swift设置启动图不现实_如何通过装饰房屋来开始在Swift中使用增强现实
swift设置启动图不现实
by Ranadhir Dey
由Ranadhir Dey
如何通过装饰房屋来开始在Swift中使用增强现实 (How to get started with augmented reality in Swift by decorating your home)
If you’ve read my previous post, you already have a beautiful AR floor in your dining room. That was the first thing we built while learning the basics of AR. And now, it’s time to decorate the room with some cool virtual furniture. At the end of this tutorial, you will have a dining room just like this:
如果您读过我以前的文章,则您的饭厅已经有一个漂亮的AR地板。 这是我们学习AR基础知识时首先构建的东西。 现在,该用一些凉爽的虚拟家具装饰房间了。 在本教程的最后,您将拥有一个饭厅,如下所示:
命名SCNNode (Naming SCNNodes)
Let’s get our hands dirty. Fire up Xcode, and open the last project where we decorated our floor. Before viewDidLoad, create a constant floorNodeName.
让我们弄脏双手。 启动Xcode,并打开最后一个装饰地板的项目 。 在viewDidLoad之前,创建一个常量floorNodeName。
let floorNodeName = "FloorNode"We are now going to set the name of the floor node to this constant so that we don’t mix up this node with other furniture nodes. Go to the createFloorNode method and name the floor node.
现在,我们将楼层节点的名称设置为此常数,以免我们将此节点与其他家具节点混淆。 转到createFloorNode方法并命名地板节点。
In line 7 we have just named the floor node — everything else remains the same.
在第7行中,我们刚刚命名了地板节点-其他所有内容都保持不变。
The plan is that, once launched, the app would recognise the floor first and then the user would see through the screen to determine where they want to place the furniture. They would tap on the location and a piece of furniture would sit just there. To achieve this, we need a correlation between the points on screen and the real-world locations. Thankfully, Apple has made this process quite simple.
计划是,一旦启动,应用程序将首先识别地板,然后用户将通过屏幕查看以确定他们要放置家具的位置。 他们将点击该位置,然后将一件家具坐在那里。 为此,我们需要在屏幕上的点与实际位置之间建立关联。 值得庆幸的是,Apple使此过程非常简单。
手势和HitTests (Gestures and HitTests)
An active AR session keeps on finding nearby objects/planes. Once a new object/plane is found, it places AR anchors on top of it. To find exactly on which anchors user has tapped, we need the help of HitTest. HitTest works like this:
活跃的AR会话不断寻找附近的物体/平面。 一旦找到新的对象/平面,它将在其顶部放置AR锚点。 为了准确找到用户点击了哪个锚,我们需要HitTest的帮助。 HitTest的工作方式如下:
- a logical ray is shot from the point of touch to the anchors on the plane从接触点到平面上的锚点发出逻辑射线
all the anchors the ray passes through are stored in an array in the format of HitTestResult.
射线穿过的所有锚点都以HitTestResult的格式存储在数组中。
Each HitTestResult contains the information of the real-world surface of an AR anchor. We will use this HitTestResult information to place our furniture.
每个HitTestResult都包含AR锚点的真实表面信息。 我们将使用此HitTestResult信息放置家具。
Let’s create a method that adds the tap gesture to our sceneView to interact with the user. We’ll call this method from viewDidLoad.
让我们创建一个将轻击手势添加到我们的sceneView以便与用户交互的方法。 我们将从viewDidLoad调用此方法。
Now define the “tapped” method to get the location of the tap and place a furniture there. For now, we print to test if the HitTest is working fine.
现在定义“轻敲”方法以获取水龙头的位置并将家具摆放在那里。 现在,我们打印以测试HitTest是否工作正常。
In the first line, we are casting tap gesture’s view to ARSCNView. As we know that the tap will come from our sceneView itself, we force-unwrap it. Then we get the location on sceneView where user has tapped. Then a HitTest is performed to get all the HitTestResults from the tapped location to the real-world anchors. “.existingPlaneUsingExtent” gives the estimated size of the detected planes. Now, we check if the user actually has tapped on a detected plane or somewhere else, and we print accordingly.
在第一行中,我们将轻击手势的视图投射到ARSCNView。 我们知道水龙头将来自我们的sceneView本身,因此我们将其强行打开。 然后,我们在SceneView上获得了用户点击的位置。 然后执行HitTest,以从点击的位置获取所有HitTestResults到现实世界的锚点。 “ .existingPlaneUsingExtent”给出检测到的平面的估计大小。 现在,我们检查用户是否确实在检测到的平面或其他位置上轻击,然后进行相应打印。
Now run the app, wait until the world origin loads and the floor is detected. Then tap on the screen to check if we are hitting the planes correctly.
现在运行该应用,等待世界原点加载并检测到地面。 然后在屏幕上点击以检查我们是否正确击中了飞机。
If you tap on the places where the tiles are located, it will print “Touched on the plane.” Touch anywhere else, and it will be “Not a plane.” If there’s no output in the console, you haven’t called the addTapGesture method from viewDidLoad (this happed to me!). Now that we have successfully detected the clicked position, it’s time to bring home some furniture.
如果您点击瓷砖所在的位置,它将打印“ Touched on the plane”。 触摸其他任何地方,它将变为“不是飞机”。 如果控制台中没有输出,则您尚未从viewDidLoad调用addTapGesture方法(这对我来说很麻烦!)。 现在我们已经成功检测到点击位置,是时候将一些家具带回家了。
将3D模型导入项目 (Importing 3D models to the project)
We need some 3D furniture models. I use turbosquid, which is a great repository of 3D models. You need to create a free account there to access their free models. I’ve downloaded a 3D table for now (in the GitHub repo — I’ll add some more furniture as well).
我们需要一些3D家具模型。 我使用了turbosquid ,它是一个很棒的3D模型库。 您需要在此处创建一个免费帐户以访问其免费模型。 我现在已经下载了一个3D 表格 (在GitHub存储库中-我还将添加更多家具)。
Apple advises you to use collada-formatted(.dae) models in SceneKit. I have used other kinds of models as well in the past, and I have faced problems in many cases. Mostly, if there is a glass, SceneKit tends to make it solid. So, let’s find 3D models with a .dae extension.
Apple建议您在SceneKit中使用collada格式的(.dae)模型。 过去我也使用过其他类型的模型,并且在许多情况下都遇到了问题。 通常,如果有玻璃,SceneKit倾向于使其坚固。 因此,让我们找到扩展名为.dae的3D模型。
Now add an asset folder under the “Home Decor” group.
现在,在“ Home Decor”组下添加一个资产文件夹。
Press next, and in the save dialog, save it as furnitures.scnassets and not xcassets.
按下一步,然后在保存对话框中将其另存为家具。 scnassets,而不是xcassets。
使用Xcode SceneKit编辑器 (Working with Xcode SceneKit Editor)
All scene files or models that will be used by SceneKit should reside in a scnassets folder. Now drag and drop the table we just downloaded to the scnassets folder and rename it as “Table”. Click on the Table.dae file (if not already opened) to open it in SceneKit Editor. On the bottom left corner there is a button (marked with a red ellipse below) to open Scene Graph View. Click on it and the editor should appear like below.
SceneKit将使用的所有场景文件或模型都应位于scnassets文件夹中。 现在,将刚才下载的表拖放到scnassets文件夹中,并将其重命名为“ Table”。 单击Table.dae文件(如果尚未打开)在SceneKit Editor中将其打开。 在左下角有一个按钮(下面带有红色椭圆标记)以打开“场景图视图”。 单击它,编辑器应如下所示。
In the Scene Graph there are 3 nodes: a Camera, a light source (Lamp) and the table (Small_table). ARKit has its default camera, so we don’t need this camera anymore. As we will be using sceneView’s default lighting, we don’t need the Lamp either. Remove both of them.
在“场景图”中,有3个节点:“相机”,“光源”(“灯”)和表(“小表”)。 ARKit具有其默认摄像头,因此我们不再需要此摄像头。 因为我们将使用SceneView的默认照明,所以我们也不需要Lamp。 删除两个。
Let’s rename “Small_table” to “Table”, same as the file name. Now the scene graph will look like this:
让我们将“ Small_table”重命名为“ Table”,与文件名相同。 现在,场景图将如下所示:
There is something called point of view (marked with a red ellipse above) in the editor which determines how the object will look from a certain point of view. By default, it’s set to Perspective, but we will be seeing the table from the front. So change the point of view to Front.
编辑器中有一个称为“视点”(上面带有红色椭圆标记)的东西,它确定从特定视点看对象的外观。 默认情况下,它设置为Perspective,但是我们将从前面看到表格。 因此,将视角更改为“正面”。
Oops — it looks like we can see only the top view. Clearly, this isn’t how we would like to see it. We want to see the table as it was shown in the perspective view. Let’s fix this.
糟糕-看来我们只能看到顶视图。 显然,这不是我们希望看到的。 我们希望看到透视表中显示的表格。 让我们解决这个问题。
Select the Table node, open the Utilities tab (right-top corner button in Xcode) and click on the node inspector(the cube icon). You should see the below window.
选择“表”节点,打开“实用程序”选项卡(Xcode中的右上角按钮),然后单击节点检查器(多维数据集图标)。 您应该看到以下窗口。
I’ve numbered the steps for your reference. To view the complete table from the front, we need to rotate the table on its X axis. If you can recollect, we did same kind of thing in the first post where we rotated the capsule on its Z axis by changing its Euler angle.
我已编号步骤供您参考。 要从正面查看完整的表格,我们需要沿X轴旋转表格。 如果可以回忆的话,我们在第一篇文章中做了同样的事情,我们通过更改胶囊的欧拉角沿其Z轴旋转胶囊。
If you see the Transforms matrix, the Euler angle for X is already specified to 90 degree radians, which is causing the table to be rotated incorrectly. Make it zero and the rotation will be fixed. But the positioning has a vector of (-0.35,0.348,0). We will make it (0,0,0) to place the table exactly where the user will tap. Now the Transform will look like this:
如果您看到“变换”矩阵,则X的欧拉角已指定为90度弧度,这将导致表格旋转不正确。 使其为零,旋转将被固定。 但是定位的向量为(-0.35,0.348,0)。 我们将使其(0,0,0)恰好将桌子放置在用户点击的位置。 现在,Transform将如下所示:
Transform matrix editing is kind of a trial and error task. You might need to go through quite a number of iterations before you reach the exact position.
变换矩阵编辑是一种反复试验的任务。 您可能需要经过很多次迭代才能到达确切位置。
Now, we change the .dae model to a SceneKit scene file (.scn) which will made it much more efficient for SceneKit to handle. Go to Editor>Convert to SceneKit scene file(.scn).
现在,我们将.dae模型更改为SceneKit场景文件(.scn),这将使SceneKit的处理效率大大提高。 转到“编辑器”>“转换为SceneKit场景文件(.scn)”。
And…we are done with the 3D object editing. Head back to the ViewController file. First, since we have removed the light source of the table, we should turn on the default lighting of the scene view in viewDidLoad.
并且…我们完成了3D对象编辑。 回到ViewController文件。 首先,由于我们已经删除了桌子的光源,因此我们应该在viewDidLoad中打开场景视图的默认照明。
sceneView.autoenablesDefaultLighting = true
sceneView.autoenablesDefaultLighting = true
定位3D对象 (Positioning 3D objects)
Then we create a method to add the table to the scene. It will accept a HitResult as a parameter and place the table based on the position of the HitResult.
然后,我们创建一种将表添加到场景的方法。 它将接受HitResult作为参数,并根据HitResult的位置放置表格。
Bear with me — this is the last method which needs some explanation!
忍受我-这是最后一个需要解释的方法!
- A constant is declared to know what furniture scene needs to be added. We will change it to a variable and declare it on top of the viewcontroller when we have more furniture.声明一个常数以知道需要添加什么家具场景。 当我们拥有更多家具时,我们将其更改为变量并在ViewController的顶部声明。
- Then we create a scene from the selected furniture file.然后,我们从选定的家具文件创建场景。
- A furniture node is created from the child node of the furniture scene’s root node with the name of the furniture. As we named the first node the same as the furniture name, it doesn’t need to traverse any further. Hence the recursive option is set to false.从家具场景的根节点的子节点创建带有家具名称的家具节点。 由于我们将第一个节点命名为与家具名称相同,因此不需要进一步遍历。 因此,递归选项设置为false。
HitResult’s worldTransform property holds the co-relation transform matrix between the real-world position and the scene anchor/node position. And the 3rd column of the transform matrix holds the position information.
HitResult的worldTransform属性保存现实位置和场景锚点/节点位置之间的互相关转换矩阵。 并且变换矩阵的第三列保存位置信息。
- Now that we have successfully extracted the world coordinate of the tapped location, our job is now just to place the furniture node on that exact same coordinate.现在我们已经成功提取了所点击位置的世界坐标,我们的工作就是将家具节点放置在该完全相同的坐标上。
- Then we add the node to the root node of the scene. And thats it!然后,将节点添加到场景的根节点。 就是这样!
Now we just need to call the method whenever the user taps on the screen. Let’s modify the tapped method to accommodate this change.
现在,我们只需要在用户点击屏幕时调用该方法。 让我们修改点按的方法以适应此更改。
Here, if we find a plane, we are just calling the method to add the furniture. As HitTest holds all the positions the ray passes through, we are considering the top most result. Let’s run the app, wait until the floor has tiles on it, and then tap on the screen to place a table. And voilà! You have a new table on your floor. Watch your step :)
在这里,如果找到飞机,我们只是在调用添加家具的方法。 由于HitTest保持了射线穿过的所有位置,因此我们正在考虑获得最高的结果。 让我们运行该应用程序,等到地板上铺有瓷砖,然后在屏幕上点击以放置桌子。 和瞧! 您的地板上有一张新桌子。 小心台阶 :)
I have downloaded some more furniture and have added it into the repo. I’ve also added pinch and rotate gestures to resize and rotate objects. The complete source code will give you an appearance like this:
我已经下载了更多家具并将其添加到存储库中。 我还添加了捏合和旋转手势以调整大小和旋转对象。 完整的源代码将为您提供如下外观:
You can download the full source code from GitHub.
您可以从GitHub下载完整的源代码。
Hope you have enjoyed reading the post as much as I did writing it :)
希望您像我写这篇文章一样喜欢阅读这篇文章:)
See you at the next post. Happy reading!!
下篇文章见。 阅读愉快!
翻译自: https://www.freecodecamp.org/news/how-to-get-started-with-augmented-reality-in-swift-by-decorating-your-home-85671482df3c/
swift设置启动图不现实
相关文章:

可用于nodejs的SuperAgent(ajax API)
简单示例: import request from superagent;//引用声明 request.post(api).withCredentials()//跨域.end((err, res) > {if (res.ok) {const json JSON.parse(res.text);} else {console.log(获取失败);}}); 1、get 方式 当使用get请求传递查询字符串的时候&…

Java第四次实验
一、实验内容: 结对编程。运行TCP代码,结对进行,一人服务器,一人客户端;利用加解密代码包,编译运行代码,一人加密,一人解密; 集成代码,密后通过TCP发送。 二、…

JS 面向对象编程之原型(prototype)
微信小程序开发交流qq群 173683895 承接微信小程序开发。扫码加微信。 function Person(first, last) {this.first first;this.last last; } Person.prototype.fullName function() {return this.first this.last; } Person.prototype.fullNameReversed function() {…
idea自动捕获_Smilefie:如何通过检测微笑来自动捕获自拍
idea自动捕获by Rishav Agarwal通过里沙夫阿加瓦尔 Smilefie:如何通过检测微笑来自动捕获自拍 (Smilefie: how you can auto-capture selfies by detecting a smile) Ten second takeaway: use Python and OpenCV to create an app that automatically captures a …

hiho 1015 KMP算法 CF 625 B. War of the Corporations
#1015 : KMP算法 时间限制:1000ms单点时限:1000ms内存限制:256MB描述 小Hi和小Ho是一对好朋友,出生在信息化社会的他们对编程产生了莫大的兴趣,他们约定好互相帮助,在编程的学习道路上一同前进。 这一天,他们遇到了一只河蟹&#…
React 组件绑定点击事件,并且传参完整Demo
微信小程序开发交流qq群 173683895 承接微信小程序开发。扫码加微信。 1.传数组下标给点击事件Demo: const A 65 // ASCII character codeclass Alphabet extends React.Component {constructor(props) {super(props);this.handleClick this.handleClick.bind…
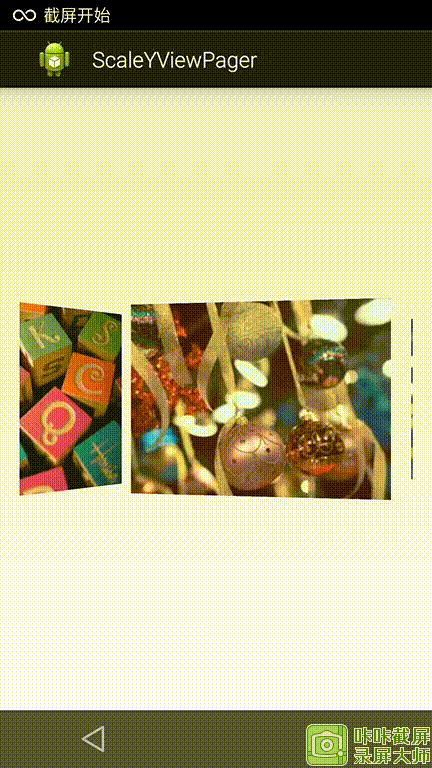
ScaleYViewPager
https://github.com/eltld/ScaleYViewPager 转载于:https://www.cnblogs.com/eustoma/p/4572925.html
node mongoose_如何使用Express,Mongoose和Socket.io在Node.js中构建实时聊天应用程序
node mongooseby Arun Mathew Kurian通过阿伦马修库里安(Arun Mathew Kurian) 如何使用Express,Mongoose和Socket.io在Node.js中构建实时聊天应用程序 (How to build a real time chat application in Node.js using Express, Mongoose and Socket.io) In this tut…
结对项目开发电梯调度 - 整体设计
一、系统介绍 1. 功能描述 本电梯系统用来控制一台运行于一个具有16层的大楼电梯,它具有上升、下降、开门、关门、载客的基本功能。 大楼的每一层都有: (1) 两个指示灯: 这两个指示灯分别用于指示当前所在的层数和电梯的当前状态ÿ…
3.分支结构与循环结构
1 程序结构 程序结构分为顺序结构、分支结构、循环结构。分支结构有:if结构,if....else结构,if...else if....else ,if...else结构,switch结构;循环结构有:while循环,do....while循环…
微信小程序 实现复制到剪贴版功能
微信小程序开发交流qq群 173683895 承接微信小程序开发。扫码加微信。 实现API: wx.setClipboardData(Object object) API说明:设置系统剪贴板的内容 属性类型默认值是否必填说明支持版本datastring 是剪贴板的内容 successfunction 否接口调用成功…
数据结构面试题编程题_您下次编程面试时应该了解的顶级数据结构
数据结构面试题编程题by Fahim ul Haq通过Fahim ul Haq Niklaus Wirth, a Swiss computer scientist, wrote a book in 1976 titled Algorithms Data Structures Programs.瑞士计算机科学家Niklaus Wirth在1976年写了一本书,名为《 算法数据结构程序》。 40 yea…

oracle使用小技巧
批量禁用触发器 SELECT ALTER TRIGGER || trigger_name || DISABLE; FROM all_triggers; 这样就生成了一个禁用语句列表,复制到sql脚本执行界面,批量执行即可,类似的,可以用all_tables来批量删除表。 转载于:https://www.cnblogs…
if for switch语句
顺序语句:一行行执行条件语句:选择分支if语句 1、 if(....)//括号内是判断条件 { //程序代码,运算等等 } 2、 if(....)//括号内是判断条件 { //程序代码,运算等等 } else//如果不满足条件则执…
Apache Unable to find the wrapper https - did you forget to enable it when you configured PHP?
微信小程序开发交流qq群 173683895 承接微信小程序开发。扫码加微信。 Apache Unable to find the wrapper "https" - did you forget to enable it when you configured PHP? 问题解决办法: 打开配置文件 php.ini , 如图: …
文件魔术数字_如何使用魔术脚手架自动创建文件并节省时间
文件魔术数字Before we begin: This article uses JavaScript / Node.js example code, but you can port these concepts to any language using the right tools.开始之前:本文使用JavaScript / Node.js示例代码,但是您可以使用正确的工具将这些概念移…

Sql Server统计报表案例
场景:查询人员指定年月工作量信息 USE [Test] GO SET ANSI_NULLS ON GO SET QUOTED_IDENTIFIER ON GO ALTER procedure [dbo].[GetWorkLoadMain] year int, month int, UserId varchar(50) as begindeclare day varchar(50)set dayCAST(year as varchar)-RIGHT((00…

运行报表时提示输入用户名和密码
在AX2012运行报表是总是提示用户输入用户名和密码: 尝试输入登陆名和密码,点击查看报表,出现如下错误: 因为AX2012的报表使用的针对AX2012客制化的SSRS,而要求输入登录名和密码是SSRS报表的数据源设置导致的。在SSRS管…
CSS 文字,边框实现从左至右颜色渐变
微信小程序开发交流qq群 173683895 承接微信小程序开发。扫码加微信。 1.文本从左至右颜色渐变 效果图: 2.边框从左至右颜色渐变 效果图: 实现代码: 1.文本从左至右颜色渐变实现代码: <!DOCTYPE html> <html>&l…
如何使用Create-React-App和自定义服务人员构建PWA
Note: This is not a primer on create-react-app or what a service worker is. This post assumes prior knowledge of both.注意:这不是create-react-app或服务工作者的入门。 这篇文章假定两者都有先验知识。 So, I recently had the opportunity to work on a…
inline-block空隙怎么解决
方法一:移除空格 元素间留白间距出现的原因就是标签段之间的空格,因此,去掉HTML中的空格,自然间距就木有了。考虑到代码可读性,显然连成一行的写法是不可取的,我们可以: <div class"spa…
php 网络请求 get请求和post请求
微信小程序开发交流qq群 173683895 承接微信小程序开发。扫码加微信。 代码记录 <?php header(content-type:application:json;charsetutf8); header(Access-Control-Allow-Origin:*); //header(Access-Control-Allow-Methods:POST); header(Access-Control-Allow-He…
docker查看现有容器_如何使用Docker将现有应用程序推送到容器中
docker查看现有容器by Daniel Newton丹尼尔牛顿 如何使用Docker将现有应用程序推送到容器中 (How to shove an existing application into containers with Docker) I have finally got round to learning how to use Docker past the level of knowing what it is and does w…
巧妙使用Firebug插件,快速监控网站打开缓慢的原因
巧妙使用Firebug插件,快速监控网站打开缓慢的原因 原文 巧妙使用Firebug插件,快速监控网站打开缓慢的原因 很多用户会问,我的网站首页才50KB,打开网页用了近60秒才打开?如何解释? 用户抱怨服务器运行缓…
第二阶段第三次站立会议
昨天做了什么:写了部分购物车的功能 今天要干什么:修改后台代码的错误 遇到的困难:没有困难转载于:https://www.cnblogs.com/jingxiaopu/p/7109774.html
微信小程序生成小程序二维码 php 直接可以用
微信小程序开发交流qq群 581478349 承接微信小程序开发。扫码加微信。 小程序需要先上线才能生成二维码 HTTP请求的效果图: 小程序展示的效果图: 小程序展示二维码源码: 请求二维码图片base64路径,点击预览图片 onLoad: func…
vue和react相同点_我在React和Vue中创建了相同的应用程序。 这是区别。
vue和react相同点by Sunil Sandhu由Sunil Sandhu 我在React和Vue中创建了相同的应用程序。 这是区别。 (I created the same app in React and Vue. Here are the differences.) Having used Vue at my current workplace, I had a fairly solid understanding of how it all …
Filter(过滤器)
一、Filter过滤器(重要) Javaweb中的过滤器可以拦截所有访问web资源的请求或响应操作。 1、Filter快速入门 1.1、步骤: 1. 创建一个类实现Filter接口 2. 重写接口中方法 doFilter方法是真正过滤的。 3. 在web.xml文件中配置 …
css3实现3D立体翻转效果
1、在IE下无法显示翻转效果,火狐和谷歌可以 1 /*样式css*/2 3 .nav-menu li {4 display: inline;5 }6 .nav-menu li a {7 color: #fff;8 display: block;9 text-decoration: none;10 overflow: visible;11 line-height: 40px;12 font-…
Ant Design 入门-参照官方文档使用组件
微信小程序开发交流qq群 173683895 承接微信小程序开发。扫码加微信。 先来一个按钮组件使用的对比,官方文档的(不能直接用)和实际能用的。 官网demo: import { Table, Divider, Tag } from antd;const columns = [{title: Name,dataIndex: name,key: name,render: text =…