gi克隆github文件_如何构建GitHub文件搜索功能的克隆
gi克隆github文件
In this article, we will build a project that mimics the lesser known but awesome file search functionality provided by GitHub.
在本文中,我们将构建一个项目,该项目模仿GitHub提供的鲜为人知但功能强大的文件搜索功能。
To see how it works, go to any GitHub repository and press the letter t which will land you in search view. Then you can simultaneously search and scroll through the list as shown in the below gif:
要查看其工作原理,请转到任何GitHub存储库,然后按字母t ,这将使您进入搜索视图。 然后,您可以同时搜索和滚动列表,如以下gif所示:
By building this app, you will learn the following:
通过构建此应用程序,您将学到以下内容:
- How to create a UI similar to a GitHub repository如何创建类似于GitHub存储库的UI
- How to work with keyboard events in React如何在React中处理键盘事件
- How to work with navigation using the arrow keys on your keyboard如何使用键盘上的箭头键进行导航
- How to highlight matching text while searching如何在搜索时突出显示匹配的文本
- How to add icons in React如何在React中添加图标
- How to render HTML content in a JSX expression如何在JSX表达式中呈现HTML内容
And much more.
以及更多。
You can see the live demo of the application here.
您可以在此处查看该应用程序的实时演示。
让我们开始吧 (Let’s get started)
Create a new project using create-react-app:
使用create-react-app创建一个新项目:
create-react-app github-file-search-reactOnce the project is created, delete all files from the src folder and create index.js, App.js and styles.scss files inside the src folder. Also create components and utils folders inside the src folder.
一旦项目被创建,从删除所有文件src文件夹并创建index.js , App.js和styles.scss内部文件src文件夹。 还要在src文件夹内创建components和utils文件夹。
Install the necessary dependencies:
安装必要的依赖项:
yarn add moment@2.27.0 node-sass@4.14.1 prop-types@15.7.2 react-icons@3.10.0Open styles.scss and add the contents from here inside it.
打开styles.scss然后从此处添加内容。
Create a new file Header.js inside the components folder with the following content:
在components文件夹内创建一个新文件Header.js ,内容如下:
import React from 'react';const Header = () => <h1 className="header">GitHub File Search</h1>;export default Header;Create a new file api.js inside the utils folder and add the content from here inside it.
在utils文件夹中创建一个新文件api.js ,然后从此处添加内容。
In this file, we have created static data to be displayed on the UI to keep the application simple and easy to understand.
在此文件中,我们创建了要在UI上显示的静态数据,以使应用程序简单易懂。
Create a new file ListItem.js inside the components folder with the following content:
在components文件夹中创建一个具有以下内容的新文件ListItem.js :
import React from 'react';
import moment from 'moment';
import { AiFillFolder, AiOutlineFile } from 'react-icons/ai';const ListItem = ({ type, name, comment, modified_time }) => {return (<React.Fragment><div className="list-item"><div className="file"><span className="file-icon">{type === 'folder' ? (<AiFillFolder color="#79b8ff" size="20" />) : (<AiOutlineFile size="18" />)}</span><span className="label">{name}</span></div><div className="comment">{comment}</div><div className="time" title={modified_time}>{moment(modified_time).fromNow()}</div></div></React.Fragment>);
};export default ListItem;
In this file, we are taking the data of each file we want to display and we're displaying the folder/file icon, the name of the file, the comment(s), and the last time the file was modified.
在此文件中,我们将获取要显示的每个文件的数据,并显示文件夹/文件图标,文件名,注释和文件的最后修改时间。
For displaying the icons, we'll use the react-icons npm library. It has a really nice website that lets you easily search and use the icons you need. Check it out here.
为了显示图标,我们将使用react-icons npm库。 它有一个非常不错的网站,可让您轻松搜索和使用所需的图标。 在这里查看 。
The icons component accepts the color and size props to customize the icon which we have used in the above code.
图标组件接受color和size道具以自定义我们在以上代码中使用的图标。
Create a new file called FilesList.js inside the components folder with the following content:
在components文件夹中创建一个名为FilesList.js的新文件,其内容如下:
import React from 'react';
import ListItem from './ListItem';const FilesList = ({ files }) => {return (<div className="list">{files.length > 0 ? (files.map((file, index) => {return <ListItem key={file.id} {...file} />;})) : (<div><h3 className="no-result">No matching files found</h3></div>)}</div>);
};export default FilesList;
In this file, we read the static data from the api.js file and then display each element of the files array by using the array map method.
在此文件中,我们从api.js文件中读取静态数据,然后使用数组映射方法显示文件数组的每个元素。
Now open the src/App.js file and add the following code inside it:
现在打开src/App.js文件,并在其中添加以下代码:
import React from 'react';
import Header from './components/Header';
import FilesList from './components/FilesList';
import files from './utils/api';export default class App extends React.Component {state = {filesList: files};render() {const { counter, filesList } = this.state;return (<div className="container"><Header /><FilesList files={filesList} /></div>);}
}
In this file, we have added a state to store the static files data which we can modify whenever we need to do so. Then we have passed it to the FilesList component to display on the UI.
在此文件中,我们添加了一个状态来存储静态文件数据,可以在需要时对其进行修改。 然后,我们将其传递给FilesList组件以在UI上显示。
Now, open the index.js file and add the following code inside it:
现在,打开index.js文件,并在其中添加以下代码:
import React from 'react';
import ReactDOM from 'react-dom';
import App from './App';
import './styles.scss';ReactDOM.render(<App />, document.getElementById('root'));
Now, start your application by running the yarn start command from the terminal or command prompt and you will see the following initial screen:
现在,通过在终端或命令提示符处运行yarn start命令来启动应用程序,您将看到以下初始屏幕:
You can find the code up to this point in this branch.
您可以在此分支中找到到目前为止的代码。
添加基本搜索功能
(Add basic search functionality
)
Now, let's add the functionality which changes the UI and allows us to search through files when we press the letter t on our keyboard.
现在,让我们添加功能,该功能可以更改UI,并允许我们在按键盘上的字母t时搜索文件。
Inside the utils folder create a new file called keyCodes.js with the following content:
在utils文件夹中,创建一个名为keyCodes.js的新文件,其内容如下:
export const ESCAPE_CODE = 27;
export const HOTKEY_CODE = 84; // key code of letter t
export const UP_ARROW_CODE = 38;
export const DOWN_ARROW_CODE = 40;
Create a new file called SearchView.js inside the components folder with the following content:
在components文件夹内创建一个名为SearchView.js的新文件,其内容如下:
import React, { useState, useEffect, useRef } from 'react';const SearchView = ({ onSearch }) => {const [input, setInput] = useState('');const inputRef = useRef();useEffect(() => {inputRef.current.focus();}, []);const onInputChange = (event) => {const input = event.target.value;setInput(input);onSearch(input);};return (<div className="search-box">My Repository <span className="slash">/</span><inputtype="text"name="input"value={input}ref={inputRef}autoComplete="off"onChange={onInputChange}/></div>);
};export default SearchView;
We are using React Hooks here for our state and lifecycle methods. If you are new to React Hooks check out this article for an introduction.
我们在这里将React Hooks用于状态和生命周期方法。 如果您不熟悉React Hooks,请查看本文的介绍。
In this file, we have first declared a state to store the user typed input. Then we added a ref using the useRef Hook so we can focus on the input field when the component is mounted.
在此文件中,我们首先声明了一个状态来存储用户键入的输入。 然后,我们使用useRef Hook添加了一个ref ,以便在安装组件时可以专注于输入字段。
const inputRef = useRef();useEffect(() => {inputRef.current.focus();
}, []);...<inputtype="text"name="input"value={input}ref={inputRef}autoComplete="off"onChange={onInputChange}/>
In this code, by passing the Empty array [] as the second argument to the useEffect hook, the code inside the useEffect hook will only be executed once when the component is mounted. This acts as the componentDidMount lifecycle method in class components.
在该代码中,通过使空数组[]作为第二个参数到useEffect钩,内部的代码useEffect钩将仅当部件被安装执行一次。 这充当类组件中的componentDidMount生命周期方法。
Then we assigned the ref to the input field as ref={inputRef}. On change of the input field inside the onInputChange handler, we are calling the onSearch method passed as a prop to the component from the App.js file.
然后,将ref分配给输入字段ref={inputRef} 。 在onInputChange处理函数中的输入字段发生更改时,我们将调用作为道具传递的onSearch方法从App.js文件传递到组件。
Now, open App.js and replace its contents with following code:
现在,打开App.js并将其内容替换为以下代码:
import React from 'react';
import Header from './components/Header';
import FilesList from './components/FilesList';
import SearchView from './components/SearchView';
import { ESCAPE_CODE, HOTKEY_CODE } from './utils/keyCodes';
import files from './utils/api';export default class App extends React.Component {state = {isSearchView: false,filesList: files};componentDidMount() {window.addEventListener('keydown', this.handleEvent);}componentWillUnmount() {window.removeEventListener('keydown', this.handleEvent);}handleEvent = (event) => {const keyCode = event.keyCode || event.which;switch (keyCode) {case HOTKEY_CODE:this.setState((prevState) => ({isSearchView: true,filesList: prevState.filesList.filter((file) => file.type === 'file')}));break;case ESCAPE_CODE:this.setState({ isSearchView: false, filesList: files });break;default:break;}};handleSearch = (searchTerm) => {let list;if (searchTerm) {list = files.filter((file) =>file.name.toLowerCase().indexOf(searchTerm.toLowerCase()) > -1 &&file.type === 'file');} else {list = files.filter((file) => file.type === 'file');}this.setState({filesList: list});};render() {const { isSearchView, filesList } = this.state;return (<div className="container"><Header />{isSearchView ? (<div className="search-view"><SearchView onSearch={this.handleSearch} /><FilesList files={filesList} isSearchView={isSearchView} /></div>) : (<FilesList files={filesList} />)}</div>);}
}
Now, restart the app by running the yarn start command again and check its functionality.
现在,通过再次运行yarn start命令重新启动应用程序并检查其功能。
As you can see, initially all folders and files are displayed. Then when we press the letter t on the keyboard, the view changes to allow us to search through the displayed files.
如您所见,最初显示所有文件夹和文件。 然后,当我们按键盘上的字母t时,视图将更改,以允许我们搜索显示的文件。
Now, let's understand the code from the App.js file.
现在,让我们了解App.js文件中的代码。
In this file, we have first declared isSearchView as a state variable. Then inside the componentDidMount and componentWillUnmount lifecycle methods we are adding and removing the keydown event handler, respectively.
在此文件中,我们首先将isSearchView声明为状态变量。 然后在componentDidMount和componentWillUnmount生命周期方法内部,我们分别添加和删除keydown事件处理程序。
Then inside the handleEvent function, we are checking which key is pressed by the user.
然后在handleEvent函数内部,我们正在检查用户按下了哪个键。
If the user presses the t key, then we set the
isSearchViewstate totrueand update thefilesListstate array to include only files and exclude the folders.如果用户按下t键,则将
isSearchView状态设置为true并更新filesList状态数组以仅包括文件而排除文件夹。If use presses the escape key then we set the
isSearchViewstate tofalseand update thefilesListstate array to include all the files and folders.如果use按下转义键,则将
isSearchView状态设置为false并更新filesList状态数组以包括所有文件和文件夹。
The reason we declare HOTKEY_CODE and ESCAPE_CODE in separate files (keyCodes.js instead of directly using the keycode like 84) is that later, if we want to change the hotkey from t to s, then we just need to change the keycode in that file. It will reflect the change in all files where it's used without needing to change it in every file.
我们在单独的文件中声明HOTKEY_CODE和ESCAPE_CODE的原因( keyCodes.js而不是像84那样直接使用键码)是因为稍后,如果我们要将热键从t更改为s ,那么我们只需要在该文件中更改键码即可。 。 它会反映使用该文件的所有文件中的更改,而无需在每个文件中都进行更改。
Now, let's understand the handleSearch function. In this function, we check if the user has entered something in the input search box and then filter out the matching file name(s) which include that search term. Then we update the state with the filtered result(s).
现在,让我们了解handleSearch函数。 在此功能中,我们检查用户是否在输入搜索框中输入了某些内容,然后过滤出包含该搜索词的匹配文件名。 然后,我们使用过滤后的结果更新状态。
Then inside the render method, based on the isSearchView value, we display either the file list view or search view to the user.
然后,在render方法中,基于isSearchView值,我们向用户显示文件列表视图或搜索视图。
You can find code up to this point in this branch.
您可以在此分支中找到到目前为止的代码。
添加功能以在文件之间导航
(Add functionality to navigate between files
)
Now, lets add the functionality to display an arrow in front of the currently selected file while navigating the list of files.
现在,让我们添加功能,在导航文件列表时在当前选定文件的前面显示箭头。
Create a new file called InfoMessage.js inside the components folder with the following content:
在components文件夹中创建一个名为InfoMessage.js的新文件,其内容如下:
import React from 'react';const InfoMessage = () => {return (<div className="info-message">You've activated the <em>file finder</em>. Start typing to filter the filelist. Use <span className="navigation">↑</span> and{' '}<span className="navigation">↓</span> to navigate,{' '}<span className="navigation">esc</span> to exit.</div>);
};export default InfoMessage;
Now, open the App.js file and import the InfoMessage component to use it:
现在,打开App.js文件并导入InfoMessage组件以使用它:
import InfoMessage from './components/InfoMessage';Add a new state variable called counter with the initial value of 0. This is to keep track of the index of the arrow.
添加一个名为counter的新状态变量,其初始值为0 。 这是为了跟踪箭头的索引。
Inside the handleEvent handler, get the filesList and counter values from state:
在handleEvent处理程序内,从状态获取filesList和counter值:
const { filesList, counter } = this.state;Add two new switch cases:
添加两个新的开关盒:
case UP_ARROW_CODE:if (counter > 0) {this.setState({ counter: counter - 1 });}break;
case DOWN_ARROW_CODE:if (counter < filesList.length - 1) {this.setState({ counter: counter + 1 });}break;
Here, we decrement the counter state value when we press the up arrow on the keyboard and increment when we press the down arrow.
在这里,当我们按下键盘上的向上箭头时,递减counter状态值,而当我们按下向下箭头时,则递增计数。
Also import the up and down array constants at the top of the file:
还要在文件顶部导入up和down数组常量:
import {ESCAPE_CODE,HOTKEY_CODE,UP_ARROW_CODE,DOWN_ARROW_CODE
} from './utils/keyCodes';
Inside the handleSearch function, reset the counter state to 0 at the end of the function so the arrow will always display for the first file from the list while filtering the files list.
在handleSearch函数内部,在函数末尾将counter状态重置为0 ,这样,在过滤文件列表时,箭头将始终显示列表中第一个文件。
this.setState({filesList: list,counter: 0
});
Change the render method to display the InfoMessage component and pass counter and isSearchView as props to the FilesList component:
更改render方法以显示InfoMessage组件,并将counter和isSearchView作为props传递给FilesList组件:
render() {const { isSearchView, counter, filesList } = this.state;return (<div className="container"><Header />{isSearchView ? (<div className="search-view"><SearchView onSearch={this.handleSearch} /><InfoMessage /><FilesListfiles={filesList}isSearchView={isSearchView}counter={counter}/></div>) : (<FilesList files={filesList} />)}</div>);
}
Now, open the FilesList.js file and accept the isSearchView and counter props and pass them to the ListItem component.
现在,打开FilesList.js文件并接受isSearchView和counter道具并将它们传递给ListItem组件。
Your FilesList.js file will look like this now:
您的FilesList.js文件现在看起来像这样:
import React from 'react';
import ListItem from './ListItem';const FilesList = ({ files, isSearchView, counter }) => {return (<div className="list">{files.length > 0 ? (files.map((file, index) => {return (<ListItemkey={file.id}{...file}index={index}isSearchView={isSearchView}counter={counter}/>);})) : (<div><h3 className="no-result">No matching files found</h3></div>)}</div>);
};export default FilesList;
Now, open ListItem.js file and replace its contents with the following content:
现在,打开ListItem.js文件,并将其内容替换为以下内容:
import React from 'react';
import moment from 'moment';
import { AiFillFolder, AiOutlineFile, AiOutlineRight } from 'react-icons/ai';const ListItem = ({index,type,name,comment,modified_time,isSearchView,counter
}) => {const isSelected = counter === index;return (<React.Fragment><div className={`list-item ${isSelected ? 'active' : ''}`}><div className="file">{isSearchView && (<spanclassName={`arrow-icon ${isSelected ? 'visible' : 'invisible'}`}><AiOutlineRight color="#0366d6" /></span>)}<span className="file-icon">{type === 'folder' ? (<AiFillFolder color="#79b8ff" size="20" />) : (<AiOutlineFile size="18" />)}</span><span className="label">{name}</span></div>{!isSearchView && (<React.Fragment><div className="comment">{comment}</div><div className="time" title={modified_time}>{moment(modified_time).fromNow()}</div></React.Fragment>)}</div></React.Fragment>);
};export default ListItem;
In this file, we first accept the isSearchView and counter prop. Then we check if the index of the currently displayed file from the list matches with the counter value.
在此文件中,我们首先接受isSearchView和counter isSearchView 。 然后,我们检查列表中当前显示文件的索引是否与counter值匹配。
Based on that, we display the arrow in front only for that file. Then when we use the down or up arrow to navigate through the list, we increment or decrement the counter value respectively in the App.js file.
基于此,我们仅在该文件的前面显示箭头。 然后,当我们使用向下或向上箭头浏览列表时,我们分别在App.js文件中增加或减少计数器值。
Based on the isSearchView value we display or hide the comment and time column in the search view on the UI.
基于isSearchView值,我们在UI的搜索视图中显示或隐藏注释和时间列。
Now, restart the app by running the yarn start command again and check its functionality:
现在,通过再次运行yarn start命令重新启动应用程序并检查其功能:
You can find the code up to this point in this branch.
您可以在此分支中找到到目前为止的代码。
添加功能以突出显示匹配的文本
(Add functionality to highlight matching text
)
Now, let's add the functionality to highlight the matching text from the filename when we filter the file.
现在,让我们添加功能,以在过滤文件时突出显示文件名中的匹配文本。
Open App.js and change the handleSearch function to the following code:
打开App.js并将handleSearch函数更改为以下代码:
handleSearch = (searchTerm) => {let list;if (searchTerm) {const pattern = new RegExp(searchTerm, 'gi');list = files.filter((file) =>file.name.toLowerCase().indexOf(searchTerm.toLowerCase()) > -1 &&file.type === 'file').map((file) => {return {...file,name: file.name.replace(pattern, (match) => {return `<mark>${match}</mark>`;})};});} else {list = files.filter((file) => file.type === 'file');}this.setState({filesList: list,counter: 0});
};
In this code, first we use the RegExp constructor to create a dynamic regular expression for global and case insensentive search:
在这段代码中,首先我们使用RegExp构造函数为全局和不区分大小写的搜索创建动态正则表达式:
const pattern = new RegExp(searchTerm, 'gi');Then we filter out the files which match that search criteria:
然后,我们筛选出符合搜索条件的文件:
files.filter((file) =>file.name.toLowerCase().indexOf(searchTerm.toLowerCase()) > -1 &&file.type === 'file'
);
Then we call the array map method on the result we got from above filter functionality.
然后,根据从上述过滤器功能获得的结果调用数组映射方法。
In the map method, we use the string replace method. The replace method accepts two parameters:
在map方法中,我们使用字符串replace方法。 replace方法接受两个参数:
- pattern to search for搜索模式
- function to execute for each matched pattern为每个匹配的模式执行的函数
We use the replace method to find all the matches for the pattern and replace it with the string <mark>${match}</mark>. Here match will contain the matched text from the file name.
我们使用replace方法查找该pattern所有匹配项,并将其替换为字符串<mark>${match}</mark> 。 这里的match将包含文件名中的匹配文本。
If you check the JSON structure from the utils/api.js file, the structure of each file looks like this:
如果您从utils/api.js文件中检查JSON结构,则每个文件的结构如下所示:
{id: 12,type: 'file',name: 'Search.js',comment: 'changes using react context',modified_time: '2020-06-30T07:55:33Z'
}
As we want to replace the text from the name field only, we spread out the file object properties and only change the name, keeping other values as they are.
因为我们只想替换名称字段中的文本,所以我们扩展了文件对象属性,仅更改名称,并保持其他值不变。
{...file,name: file.name.replace(pattern, (match) => {return `<mark>${match}</mark>`;})
}
Now, restart the app by running the yarn start command again and check its functionality.
现在,通过再次运行yarn start命令重新启动应用程序并检查其功能。
You will see that the HTML is displayed as it is on the UI when you search:
搜索时,您将看到HTML在UI上按原样显示:
This is because we are displaying the file name in the ListItem.js file in the following way:
这是因为我们通过以下方式在ListItem.js文件中显示文件名:
<span className="label">{name}</span>And to prevent Cross-site scripting (XSS) attacks, React escapes all the content displayed using the JSX Expression (which is in curly brackets).
为了防止Cross-site scripting (XSS)攻击,React会使用JSX表达式(位于大括号中)对所有显示的内容进行转义。
So if we want to actually display the correct HTML, we need to use a special prop known as dangerouslySetInnerHTML. It passes the __html name with the HTML to display as the value like this:
因此,如果我们想实际显示正确HTML,我们需要使用一种称为特殊道具dangerouslySetInnerHTML 。 它通过HTML传递__html名称,以显示为如下所示的值:
<span className="label" dangerouslySetInnerHTML={{ __html: name }}></span>Now, restart the app by running the yarn start command again and check its functionality:
现在,通过再次运行yarn start命令重新启动应用程序并检查其功能:
As you can see, the search term is correctly getting highlighted in the name of the file.
如您所见,搜索词在文件名中正确突出显示。
而已! (That's it!)
You can find the code up to this point in this branch.
您可以在此分支中找到到目前为止的代码。
Complete GitHub Source Code: here Live Demo: here
完整的GitHub源代码: 此处在线演示: 此处
Check out my other React, Node.js, and Javascript articles at Medium, dev.to and subscribe to get weekly updates directly in your inbox here.
在Medium ( dev.to)上查看我的其他React,Node.js和Javascript文章,并订阅直接在此处的收件箱中获取每周更新 。
翻译自: https://www.freecodecamp.org/news/build-a-clone-of-githubs-file-search-functionality/
gi克隆github文件
相关文章:

ipython --pandas
d定义: pandas是一个强大的Python数据分析的工具包。 pandas是基于NumPy构建的。 安装方法: pip install pandas import pandas as pd pandas的主要功能 具备对其功能的数据结构DataFrame、Series 集成时间序列功能 提供丰富的数学运算和操作 灵活处理缺失数据 Series 定义:Ser…

玩转Android之二维码生成与识别
二维码,我们也称作QRCode,QR表示quick response即快速响应,在很多App中我们都能见到二维码的身影,最常见的莫过于微信了。那么今天我们就来看看怎么样在我们自己的App中集成二维码的扫描与生成功能。OK,废话不多说&…

属性字符串(富文本)的使用
改变字符串中某些字符串字体的颜色 NSMutableAttributedString *attrStr[[NSMutableAttributedString alloc] initWithString:str]; [attrStr addAttribute:NSForegroundColorAttributeName value:kUIColorFromRGB(0xb2151c) range:[str rangeOfString:[NSString stringWith…
如何使用create-react-app在本地设置HTTPS
Running HTTPS in development is helpful when you need to consume an API that is also serving requests via HTTPS. 当您需要使用同时通过HTTPS服务请求的API时,在开发中运行HTTPS会很有帮助。 In this article, we will be setting up HTTPS in development …
Swift强制解析
IDE:Xcode Version7.3.1 Swift中"数据类型?"表示这是可选类型,即 某个常量或者变量可能是一个类型,也可能什么都没有,不确定它是否有值,也许会是nil。 比如: let num1 “123” let num2 Int(number1) pri…
rfc6455 WebSockets
https://tools.ietf.org/html/rfc6455 转载于:https://www.cnblogs.com/cheungxiongwei/p/8385719.html
2020-mb面试指南_2020年最佳代码面试准备平台
2020-mb面试指南Software developer interviews are rapidly evolving. Years ago, mastering data structures and common algorithms was enough to ace an interview and get a job. Today though, employers want candidates with real-world experience and skills. 软件开…

设计模式学习笔记(一)之工厂模式、单例模式
一、工厂模式 (1)简单工厂模式: 1 public interface IProduct { 2 3 public void saleProduct(); 4 5 } 创建一个产品接口,有一个卖产品的方法。 1 public class ProductA implements IProduct{ 2 3 public void saleProduct(){ 4 Sy…
iOS使用支付宝支付步骤
开发平台 (http://open.alipay.com/index.htm(这个里面找不到sdk) 需要进入下面的链接) 使用支付宝进行一个完整的支付功能,大致有以下步骤: 1>先与支付宝签约,获得商户ID(partner)和账号ID(…
heroku_了解如何使用Heroku部署全栈Web应用程序
herokuBuilding a full stack web app is no mean feat. Learning to deploy one to production so that you can share it with the world can add an additional layer of complexity.构建全栈式Web应用程序绝非易事。 学习将其部署到生产环境中,以便您可以与世界…
SpringMVC学习手册(三)------EL和JSTL(上)
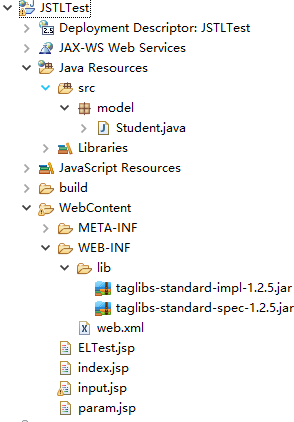
1.含义 EL: Expression Language , 表达式语言JSTL: Java Server Pages Standard Tag Library, JSP标准标签库 2.测试项目构建 2.1 复制JSTL的标准实现 复制Tomcat中webapps\examples\WEB-INF\lib下的两个jar包到新建项目目录的WEB-INF\lib下2.2 在JSP文件中使用tagli…
OpenStack Heat模板详解
Heat模板全称为heat orchestration template,简称为HOT。 1 典型Heat模板结构 heat_template_version: 2015-04-30 description:# a description of the template parameter_groups:# a declaration of input parameter groups and order parameters:# declaration …

如何从头开始构建自己的Linux Dotfiles Manager
As a new linux 🐧 user, you might realize that there are a bunch of configuration files present in your system. These special files are called "dotfiles". 作为新的Linux用户,您可能会意识到系统中存在大量配置文件。 这些特殊文件…
D3.js、HTML5、canvas 开发专题
https://www.smartdraw.com/genogram/ http://www.mamicode.com/info-detail-1163777.html D3折线图 https://www.cnblogs.com/hwaggLee/p/5073885.html js-d3画图插件 http://www.xiaomlove.com/2014/06/29/d3-js简单画图-箭头连接随机圆圈/ 连线 http://www.decemberc…
单向链表JAVA代码
//单向链表类publicclassLinkList{ //结点类 publicclassNode{ publicObject data; publicNode next; publicNode(Object obj,Node next){ this.data obj; this.next next; } } Node head; //记录…
forkjoin rxjs_如何通过吃披萨来理解RxJS运算符:zip,forkJoin和Combine
forkjoin rxjs什么是RxJS? (What is RxJS?) Reactive programming is an asynchronous programming paradigm concerned with data streams and the propagation of change - Wikipedia响应式编程是一种与数据流和变更传播有关的异步编程范式 -Wikipedia RxJS is a…
SQLserver数据库操作帮助类SqlHelper
1 SqlHelper源码 using System; using System.Data; using System.Xml; using System.Data.SqlClient; using System.Collections; namespace SQL.Access {/// <summary>/// SqlServer数据访问帮助类/// </summary>public sealed class SqlHelper{#region 私有构造…

python框架之Flask基础篇(一)
一.第一个hello world程序 # codingutf-8 from flask import Flaskapp Flask(__name__)app.route(/) def hello_world():return Hello World!if __name__ __main__:app.run(debugTrue) 1.app参数的设置: 以下几种方式全部拿debug模式举例: .方式一&…
flask部署机器学习_如何开发端到端机器学习项目并使用Flask将其部署到Heroku
flask部署机器学习Theres one question I always get asked regarding Data Science:关于数据科学,我经常被问到一个问题: What is the best way to master Data Science? What will get me hired?掌握数据科学的最佳方法是什么? 什么会雇…
UVALive2678:Subsequence
UVALive2678:Subsequence 题目大意 给定一个数组A和一个整数S。求数组A中,连续且之和不小于S的连续子序列长度最小值。 要求复杂度:Ο(n) Solution 用变量L表示所选区间最左端下标,用变量R表示所选区间最右端下标,用变量sum表示所选区间的和。…

【BZOJ-3712】Fiolki LCA + 倍增 (idea题)
3712: [PA2014]Fiolki Time Limit: 30 Sec Memory Limit: 128 MBSubmit: 303 Solved: 67[Submit][Status][Discuss]Description 化学家吉丽想要配置一种神奇的药水来拯救世界。吉丽有n种不同的液体物质,和n个药瓶(均从1到n编号)。初始时&am…
访问系统相册或调用摄像头
头文件:#import <MobileCoreServices/MobileCoreServices.h> 协议:<UINavigationControllerDelegate, UIImagePickerControllerDelegate> // 调用系统相册获取图片 - (IBAction)getImageFromAlbum:(id)sender {// 判断系统相册是否可用&…
unity镜像_通过镜像学习Unity Multiplayer Basics
unity镜像Unity is one of the most well-known and established engines for game development, and Mirror is a third-party, open source networking solution that allows you to add multiplayer to your games.Unity是最著名的游戏开发引擎之一,而Mirror是第…

java内存模型和线程安全
转载于:https://www.cnblogs.com/Michael2397/p/8397451.html
测试,发布,质量保障,用户体验
1.在实际项目中何时开始设计用户体验:用户的第一印象;从用户的角度考虑问题;软件啊服务始终要记住用户的选择;短期刺激和长期影响 2.测试经验交流:基本名词解释及分类;按测试设计的方法分类;按测…
UIImage存为本地文件与UIImage转换为NSData
UIImage *image"XXX"; //png格式 NSData *imagedataUIImagePNGRepresentation(image); //JEPG格式 //NSData *imagedataUIImageJEPGRepresentation(image); NSArray*pathsNSSearchPathForDirectoriesInDomains(NSDocumentDirectory,NSUserDomainMask,YES); NSString …
如何在JavaScript中实现链接列表
If you are learning data structures, a linked list is one data structure you should know. If you do not really understand it or how it is implemented in JavaScript, this article is here to help you. 如果您正在学习数据结构,则链表是您应该知道的一种…
SVG.path_不连续的线段
1、之前 用<path/>画的 线段等 都是连续的,想知道 是否能画 不连续的线段等 结论:可以 2、测试代码: <?xml version"1.0" encoding"UTF-8"?> <svg width"1000" height"800" viewBo…

Leetcode 之Binary Tree Postorder Traversal(44)
后序遍历,比先序和中序都要复杂。访问一个结点前,需要先判断其右孩子是否被访问过。如果是,则可以访问该结点;否则,需要先处理右子树。 vector<int> postorderTraversal(TreeNode *root){vector<int> resu…
如何创建自己的ESLint配置包
ESLint is a powerful tool that helps you enforce consistent coding conventions and ensure quality in your JavaScript codebase. ESLint是一个功能强大的工具,可帮助您实施一致的编码约定并确保JavaScript代码库的质量。 Coding conventions are sometimes …