如何使用React提前三天计划
by Mohit Jain
由Mohit Jain
如何使用React提前三天计划 (How you can plan three days ahead with React)
Today we’ll be making a ‘to-do’ website… with some different features.
今天,我们将建立一个具有一些不同功能的“待办事项”网站。
You can check the live demo of what we will be making here.
您可以在此处查看我们将进行的实时演示。
For the front end, we will be using React.js. React.js is a component based library which is used to develop interactive user interfaces (UIs).
对于前端,我们将使用React.js。 React.js是一个基于组件的库,用于开发交互式用户界面(UI)。
For the back end and storage, we will be using the browser’s local storage. This lets us save data so that next time we open our site, we can access the data we saved earlier.
对于后端和存储,我们将使用浏览器的本地存储。 这使我们可以保存数据,以便下次打开站点时可以访问之前保存的数据。
创建React应用 (Create-React-App)
Let’s begin. First, you need to setup Node (a cross-platform JavaScript run-time environment) and React.
让我们开始。 首先,您需要设置Node(跨平台JavaScript运行时环境) 和React。
You can download and install Node from the node.js website. After that, open terminal and cd to the directory where you want to save the project. Next, run these two commands:
您可以从node.js网站下载并安装Node。 之后,打开终端并cd到要保存项目的目录。 接下来,运行以下两个命令:
npm install -g create-react-appcreate-react-app next-3-days-plannernpm install is a command to install npm packages, and the -g flag helps to install the package globally in our system.
npm install是用于安装npm软件包的命令,并且-g标志有助于在我们的系统中全局安装软件包。
create-react-app will set up a new project directory. It also takes care of all the stuff needed by React like webpack, babel and JSX so that beginners don’t have to mess with setting up their initial project.
create-react-app将建立一个新的项目目录。 它还照顾了React需要的所有东西,例如webpack,babel和JSX,这样,初学者就不必为设置初始项目而烦恼。
I am naming this project next-3-day-planner but you can name it whatever you like.
我要next-3-day-planner为这个项目命名,但是您可以随便命名。
Open the project directory in your favorite code editor.
在您喜欢的代码编辑器中打开项目目录。
父组件 (The parent component)
Now let’s make our parent component. Open the App.js file and remove everything. Add this code snippet:
现在,让我们创建父组件。 打开App.js文件并删除所有内容。 添加以下代码段:
In first two line we are importing the React class, which helps us make components. We also import ReactDOM which helps render components to the DOM (document object model).
在前两行中,我们导入了React 类,可以帮助我们制作组件。 我们也导入ReactDOM 这有助于将组件呈现到DOM(文档对象模型)。
We have also imported the Header component, which will be used to display the header bar of the website.
我们还导入了Header组件,该组件将用于显示网站的标题栏。
The Textbox component will contain the input section where the user will type their ‘todo’ item.
Textbox组件将包含输入部分,用户将在其中输入“待办事项”项。
Then we import some more child components. These are DisplayToday, DisplayTomorrow, DisplayDayAfterTomorrow. These three components help us display our todo list.
然后,我们导入更多子组件。 它们是DisplayToday , DisplayTomorrow , DisplayDayAfterTomorrow. 这三个组件可帮助我们显示待办事项列表。
If you are seeing an error, don’t worry. We have not defined these components yet!
如果看到错误,请不要担心。 我们尚未定义这些组件!
Then we define our App component, which is our parent component.
然后定义我们的App组件,这是我们的父组件。
This component has a state which will be used to store data. The ‘Today’ key will be used to store the todo items list that should be completed by today. The same applies for the ‘Tomorrow’ and ‘Day_After_Tomorrow’ keys.
该组件的状态将用于存储数据。 'Today'键将用于存储待完成的待办事项列表。 'Tomorrow'和'Day_After_Tomorrow'键也是如此。
updateEntry(), deleteEntry() are two functions used to add items to the lists, and to remove an item from the lists. We will define them now.
updateEntry() , deleteEntry()是两个用于将项目添加到列表以及从列表中删除项目的函数。 我们现在将定义它们。
更新列表条目 (Updating list entries)
The updateEntry() function takes two parameters.
updateEntry() 函数有两个参数。
term is the new todo item we need to save, and day is the ‘day’ in which we want to add that todo item.
term 是我们需要保存为新的待办事项,以及day 是我们要添加待办事项的“一天”。
We have an if-else block, which checks the value of day and adds that todo item to that particular array.
我们有一个if-else块,它检查day的值并将该待办事项添加到该特定数组中。
The three dots ... before this.state.Today help us concatenate the array with new values.
三个点...前this.state.Today帮助我们连接具有新值的数组。
删除条目 (Deleting entries)
Let’s code the delete function:
让我们编写一下delete函数:
The deleteEntry() function will be triggered whenever the user clicks the ‘remove item’ button on the page
每当用户单击页面上的“删除项目”按钮时,就会触发deleteEntry()函数
The deleteEntry() function takes two parameters.
deleteEntry()函数采用两个参数。
index is the index-location of the element in the array which is to be removed. The second parameter is day, which is the day from which we want to remove the entry.
index是要删除的元素在数组中的索引位置。 第二个参数是day , 这是我们要删除条目的日期。
To implement the logic of deleting an entry from the array, we will use JavaScript’s filter() function.
为了实现从数组中删除条目的逻辑,我们将使用JavaScript的filter() 功能。
This function iterates through each element of the array and returns the element if the logic we define corresponds to true.
如果我们定义的逻辑对应于true,则此函数迭代数组的每个元素并返回该元素。
Then we update the value of state using the setState() method, which re-renders the DOM by default.
然后,我们使用setState()方法更新state的值,该方法默认情况下重新呈现DOM。
渲染功能 (Render function)
Let’s code the render function of our App component.
让我们编写App组件的render函数的代码。
Here we have mentioned all our child components (which we will be coding later…) and passed some attribute to each tag.
在这里,我们提到了所有子组件(稍后将进行编码……),并将一些属性传递给每个标签。
The Header gets an attribute nam which refers to this.state.username. This is the username we defined in the state.
Header获得引用此this.state.username的属性nam 。 这是我们在状态中定义的用户名。
Textbox gets the attribute updateEntry which refers to the this.updateEntry function we defined above.
Textbox获取属性updateEntry ,该属性引用我们上面定义的this.updateEntry函数。
Dont forget to add this one line at the end of App.js so that we can see our output in the browser screen:
不要忘记在App.js的末尾添加这一行,这样我们就可以在浏览器屏幕中看到输出:
export default App;子组件 (Child Components)
Create a new directory inside src and name it Components.
在src创建一个新目录,并将其命名为Components 。
Next, create three new files named Display.js , Header.js and Textbox.js inside the Components directory.
接下来,在Components目录中创建三个名为Display.js , Header.js和Textbox.js新文件。
标头组件 (Header Component)
Let’s start with the src/Components/Header.js file:
让我们从src/Components/Header.js文件开始:
Our header is very simple. It just displays the username we passed in as an attribute. It access that attribute using this.props.nam.
我们的标题很简单。 它只是显示我们作为属性传递的用户名。 它使用this.props.nam访问该属性。
The weird className attributes you see are nothing but HTML class attributes. className is a JSX-specific keyword for HTML classes. These classNames will help us in designing our website with the help of CSS.
您看到的奇怪的className属性不过是HTML类属性。 className是HTML类的JSX特定关键字。 这些className将在CSS的帮助下帮助我们设计网站。
文字框组件 (Textbox Component)
Now let’s code the Textbox component. This will show the form where users can select a day from the drop-down menu, and add an item to its todo list for that day, using the HTML input field.
现在,让我们对Textbox组件进行编码。 这将显示表单,用户可以在其中从下拉菜单中选择一天,并使用HTML输入字段将一项添加到该日的待办事项列表中。
Open src/Component/Textbox.js and code the following:
打开src/Component/Textbox.js并编写以下代码:
The Textbox component class has a state object. The term will be used to store the entry that user types, and the day is initialized by default to today. But, its value may change if the user selects any other day like Tomorrow or Day After Tomorrow.
Textbox组件类具有一个状态对象。 该term将用于存储用户键入的条目以及day 默认情况下初始化为今天。 但是,如果用户选择“ Tomorrow或Day After Tomorrow类的其他日期,则其值可能会更改。
The render function renders a simple form which has two fieldsets.
render函数渲染具有两个字段集的简单表单。
One has an HTML <select> tag so the user can select the day.
一个具有HTML <sele ct>标记,因此用户可以选择日期。
This select tag has a onChange event associated with it. This event will be triggered whenever a new option is selected. The handleSelect function will be called and it will update the value of day in the component’s state.
该选择标记具有关联的onChange事件。 每当选择新选项时,都会触发此事件。 将调用handleSelect函数,它将更新组件状态下的day值。
We also have another input tag where user will type their ‘todo Goal’ they want to accomplish. This also has an onChange event which will call the handleChange function. This function will update the value of term in the component’s state.
我们还有另一个输入标签,用户可以在其中输入他们想要完成的“要做的目标”。 这也有一个onChange事件,它将调用handleChange函数。 此功能将更新组件状态下的term值。
The wrapping form tag has an onSubmit event which will be triggered when the form is submitted, and it will call the handleSubmit function.
包装表单标签具有onSubmit事件,该事件将在提交表单时触发,并将调用handleSubmit函数。
The handleSubmit function calls the updateEntry function and passes the value of term and day. Now the updateEntry function will add the term and day in the parent Component’s state and it will be saved there.
handleSubmit函数调用updateEntry函数并传递term和day的值。 现在, updateEntry函数将在父组件的状态中添加term和day ,并将其保存在该位置。
The handleSubmit function also sets the value of term to blank so that the next value can be saved in it.
handleSubmit函数还将term的值设置为空白,以便可以将下一个值保存在其中。
Note: here we are talking about two states. One is the App component’s state which we will consider our main state. Its data will be saved permanently even after we close the website and server. The other state we refer to is the particular Component’s state. This is used to store data temporarily. For example, here the Textbox Component’s state is a temporary state.
注意:这里我们讨论的是两种状态。 一种是应用程序组件的state ,我们将考虑其主要状态。 即使我们关闭网站和服务器,其数据也将永久保存。 我们引用的另一个状态是特定Component的state 。 这用于临时存储数据。 例如,此处的“文本框组件” state为临时状态。
显示组件 (Display Components)
Let’s code our display components.
让我们对显示组件进行编码。
We have divided display logic in three components, which displays the todo list of Today, Tomorrow and Day_After_Tomorrow state objects.
我们将显示逻辑分为三个部分,显示了Today , Tomorrow和Day_After_Tomorrow状态对象的待办事项列表。
Open src/Components/Display.js and paste the following code:
打开src/Components/Display.js并粘贴以下代码:
The Display.js file contains three classes which have identical code.
Display.js文件包含三个具有相同代码的类。
Let’s consider class DisplayToday for an explanation:
让我们考虑class DisplayToday的解释:
Remember that in the App component class inside the render function, when we call:
请记住,在我们调用以下函数时,在render函数内部的App组件类中:
/* App.js file */<DisplayToday items={this.state.Today} deleteItem={this.deleteEntry} />…we are referring to this DisplayToday class of Display.js file.
…我们指的是Display.js文件的DisplayToday类。
We passed in two attributes. item points to the Today array defined in the state of the App.js file, and deleteItem refers to the deleteEntry function we wrote in the App.js file.
我们传入了两个属性。 item指向在App.js文件的状态中定义的Today数组,而deleteItem引用我们在App.js文件中编写的deleteEntry函数。
The DisplayToday class inside Display.js file renders the DisplayToday component and iterates through the items list we passed in the attribute.
Display.js文件中的DisplayToday类呈现DisplayToday组件,并遍历我们在属性中传递的项目列表。
This is the line which does the task of iterating through each item:
这是执行迭代每个项目的任务的行:
this.props.items.map((item, index)=> return ( /* item here */ ))Here item is each item of an array and index is the index-location of that item in the array.
这里item是数组中的每个项目,而index是该项目在数组中的索引位置。
We also have a <button> tag which has an onClick event listener linked to a local function removeThis.
我们还有一个<butt on>标记,它as an o与本地ction remo删除链接的nClick事件侦听器。
When the user clicks on the button, the onClick event is triggered and the removeThis function is called. This function receives the index value of the item in the array as a parameter and it calls the deleteEntry function, and passes the array index and array name as parameters.
当用户单击按钮时,将触发onClick事件并调用removeThis函数。 该函数接收数组中项的索引值作为参数,并调用deleteEntry函数,并将数组索引和数组名作为参数传递。
removeThis(e){ this.props.deleteEntry(e, 'Today'); }Then the deleteEntry function will remove that particular index location from the array.
然后deleteEntry函数将从数组中删除该特定索引位置。
You can go above and have a look at the deleteEntry function that we coded in the App.js file.
您可以继续看一下我们在App.js文件中编码的deleteEntry函数。
The working of the DisplayTomorrow class and DisplayDayAfterTomorrow class is the same as the DisplayToday class.
在的工作DisplayTomorrow类和DisplayDayAfterTomorrow类是一样的DisplayToday类。
So we are almost done — now let’s add some final touches.
至此,我们差不多完成了—现在让我们添加一些最后的修饰。
CSS (The CSS)
For the CSS, I decided to use a CSS framework instead of coding the entire thing.
对于CSS,我决定使用CSS框架而不是对整个代码进行编码。
After a little searching, I found Hack.css. I really liked its monospaced fonts and its classic ‘hacker’ theme.
经过一番搜索,我发现了Hack.css 。 我真的很喜欢它的等宽字体和经典的“黑客”主题。
Setting up the CSS with the project is a very easy task. Just run the following command:
在项目中设置CSS是一项非常简单的任务。 只需运行以下命令:
npm install --save hackAdd this line at the top along with other import statements in your App.js file:
在您的App.js文件中,将此行以及其他导入语句添加到顶部:
import 'hack';I you want to add some custom CSS styling, create a new file called src/style.css
我要添加一些自定义CSS样式,创建一个名为src/style.css的新文件
Write your CSS in this file and import it into App.js at the top along with other import statements.
在此文件中编写CSS,并将其与其他导入语句一起导入到顶部的App.js中。
存储 (Storage)
Let’s set up the storage.
让我们设置存储。
We will use the browser’s local storage as the main storage of our website.
我们将使用浏览器的本地存储作为我们网站的主要存储。
What we are going to do next is just magic.
接下来我们要做的只是魔术。
Integrating our website with browser storage would not be so easy without React Simple Storage.
如果没有React Simple Storage,将我们的网站与浏览器存储集成起来将不会那么容易。
Just run the following command in the terminal:
只需在终端中运行以下命令:
npm install --save react-simple-storageOpen the App.js file and at the top of file add this line:
打开App.js文件,并在文件顶部添加以下行:
import SimpleStorage from 'react-simple-storage'Now in your App Component class, scroll down to the render function and add this line after the first <div> tag:
现在在您的App Component类中,向下滚动到render函数,并在第一个<d iv>标签之后添加以下行:
<SimpleStorage parent={this} />And voilà! Now our data will be saved in the browser and it will be fetched from the browser when we reopen our website.
和瞧! 现在,我们的数据将保存在浏览器中,并在我们重新打开网站时从浏览器中获取数据。
结果! (The Result!)
To check out what we have accomplished, open your terminal and type:
要查看我们已完成的工作,请打开您的终端并输入:
npm startNow in the browser, navigate to localhost:3000.
现在,在浏览器中,导航到localhost:3000 。
I hope you enjoyed this!
希望您喜欢!
A few things as homework for you to add…
几件事作为作业供您添加...
- Code validation functions. Right now even a blank entry is also updated, but our app should throw an error that user needs to write something first.代码验证功能。 现在,即使是空白条目也会被更新,但是我们的应用程序应该抛出一个错误,用户需要先写一些东西。
- Showing date and time显示日期和时间
- Adding an option to edit the username添加选项以编辑用户名
If you get stuck anywhere, you can go to my GitHub page where you will find the complete code.
如果您遇到任何困难,都可以转到我的GitHub页面 ,在该页面中您将找到完整的代码。
If you want to use this website on daily basis to increase your productivity, you can set this page as your browser homepage (it has some more features added to it).
如果您想每天使用此网站来提高工作效率,则可以将该页面设置为浏览器主页(它添加了更多功能)。
…until next time buddy, happy coding!
…直到下一次伙伴,编码愉快!
翻译自: https://www.freecodecamp.org/news/how-you-can-plan-three-days-ahead-with-react-99ca0f8eb0f6/
相关文章:

ajax 基础
ajax基础模式 url : "Handler.ashx", -- 提交到哪个服务端 data: { "uname": s }, -- 提交的数据,以键值对的方式传字符串,只能是字符串,可以传多个。 type: "post", …

wamp配置虚拟域名
1、打开apache下httpd.conf 我的目录是在F:\wamp\bin\apache\apache2.2.22\conf\httpd.conf 2、去掉这两行前面的#注释 LoadModule rewrite_module modules/mod_rewrite.so Include conf/extra/httpd-vhosts.conf 这两个注释 3、配置httpd-vhosts.conf <VirtualHost *:80>…

VUE 事件获取当前组件的属性
微信小程序开发交流qq群 173683895 承接微信小程序开发。扫码加微信。 for循环把当前的item传递给绑定事件: <block v-for"(item, index) in data_list"><div v-on:clickchangeType(item) class"ci "><div class"cib&q…
javascript计时器_JavaScript计时器:您需要了解的一切
javascript计时器by Samer Buna通过Samer Buna JavaScript计时器:您需要了解的一切 (JavaScript Timers: Everything you need to know) A few weeks ago, I tweeted this interview question:几周前,我在推特上发布了这个面试问题: *** An…

软考总结——虚存管理
存储管理是操作系统的重要职能之中的一个,主要任务是对内存空间进行分配与回收。因为计算机内存容量有限(如今一般都是32位或64位系统),而外存储设备的容量增长速度很快,比如移动硬盘已经到了…
微信小程序与H5相互跳转和传递数据
微信小程序开发交流qq群 173683895 承接微信小程序开发。扫码加微信。 这是小程序和web-vew的H5相互传参,H5使用小程序的微信支付的代码 H5部分 <!DOCTYPE html> <html><head><meta charset"utf-8" /><!--<meta name&…

【算法】弗洛伊德(Floyd)算法
这个算法主要要弄懂三个循环的顺序关系。 弗洛伊德(Floyd)算法过程:1、用D[v][w]记录每一对顶点的最短距离。2、依次扫描每一个点,并以其为基点再遍历所有每一对顶点D[][]的值,看看是否可用过该…
二次开发photoshop_Photoshop 101:Web开发人员简介
二次开发photoshop介绍 (Introduction) Often, when working as web developer, we need to integrate templates. They can be from Photoshop or other software. In this article, we will have a look at the basics of Photoshop for web developers.通常,在作…
html 提交表单,图片和文字一起提交,图片存入服务器,图片地址和表单信息存入数据库,带后端php代码
微信小程序开发交流qq群 173683895 承接微信小程序开发。扫码加微信。 html <!DOCTYPE html> <html><head><meta name"viewport" content"widthdevice-width, initial-scale1.0, user-scalableno, minimum-scale1.0, maximum-scale1.0…
mysql-理想的索引
1.查询频繁 2.区分度高 例如:数据库表字段:sex 存储:男女,区分度就不高。 3.长度小 索引的长度直接影响索引文件的大小,影响增删改的速度,并间接影响查询速度。 4.尽可能覆盖常用字段 转载于:https://www.c…
使用java的Calendar对象获得当前日期的上几个度开始、结束时间
思路: 先获得当前季度的开始和结束日期,在当前日期的基础上往前推3个月即上个季度的开始和结束日期 /*** param flag true:开始日期;false:结束日期* return*/public static String getLastQuarterTime(boolean flag){…
快速 开发平台 架构_快速介绍清洁架构
快速 开发平台 架构by Daniel Deutsch由Daniel Deutsch 快速介绍清洁架构 (A quick introduction to clean architecture) In an open source project I started to contribute to, the concept of “clean architecture” was brought to me.在一个我开始参与的开源项目中 &a…
linux uart m200平台波特率500kbps乱码问题和输入不响应问题
[问题] linux uart m200平台波特率500kbps乱码问题 [解答] [问题] linux uart m200平台波特率500kbps输入不响应问题 [解答]转载于:https://www.cnblogs.com/harvis/p/6972196.html

VS2013中, 无法嵌入互操作类型“……”,请改用适用的接口的解决方法
使用VS2013,在引用COM组件的时候,出现了无法嵌入互操作类型“……”,请改用适用的接口的错误提示。 查阅资料,找到解决方案,记录如下: 选中项目中引入的dll,鼠标右键,选择属性&#…
JS根据两点的经纬度坐标得到驾车行驶距离
微信小程序开发交流qq群 173683895 承接微信小程序开发。扫码加微信。 html <!DOCTYPE html> <html><head><meta http-equiv"Content-Type" content"text/html; charsetutf-8"><meta name"viewport" content&quo…
three.ar.js_我们如何通过AR.js使产品吉祥物栩栩如生
three.ar.jsby Mateusz Tarnaski由Mateusz Tarnaski 我们如何通过AR.js使产品吉祥物栩栩如生 (How we brought our product mascot to life with AR.js) Short answer: using a browser-based Augmented Reality (AR) application. For the long answer, read below.简短答案&…
利用tuning-primer脚本优化MySQL数据库
脚本下载网址: http://www.day32.com/MySQL/tuning-primer.sh #!/bin/sh # vim: ts8########################################################################## ## MySQL performance tuning primer script ## Writen by: Matthew Montgomery ## Report bugs t…

自定义View步骤学习笔记
用途 : 一个View内部的子控件比较多的时候可以自定义一个View,把它内部的子控件屏蔽起来(就像苹果的导航栏上面的UIBarButton,你是通过BarButtonitem来修改显示的内容) 1.重写 initWithFrame 和 awakeFromNib(一般两个都要写),然后在写一个初始化的方法,在初始化方法中添加子控…
小程序给视频加默认图片封面,点击播放视频并停止播放上一个视频
微信小程序开发交流qq群 173683895 承接微信小程序开发。扫码加微信。 实现的功能: 微信小程序视频组件添加图片封面, 点击图片播放视频, 点击下一个视频的封面图自动停止播放当前视频并播放点击的视频。 效果GIF图: 实现代码: WXML …
一天 用户旅程_439天的旅程改变了我的生活
一天 用户旅程by Daniel Lemay丹尼尔勒梅(Daniel Lemay) 439天的旅程改变了我的生活 (The 439 day Journey that Changed my Life) It was Spring of 2017. I was beyond displeased with my current work situation. I dreaded going into work every day and being a punchi…

实现音乐播放器
音乐播放器 首先声明一下,本例是直接采用课本中范例122的方法。 效果图如下: 1、activity_main.xml布局 1 //四个按钮2 <LinearLayout3 android:layout_width"fill_parent"4 android:layout_height"wrap_content"5 …
学习ASP.NET MVC系列 - 还有比这更简炼的吗?把复杂的事情变简单了,贡献啊!...
转自学习ASP.NET MVC系列: 学习ASP.NET MVC(一)——我的第一个ASP.NET MVC应用程序 学习ASP.NET MVC(二)——我的第一个ASP.NET MVC 控制器 学习ASP.NET MVC(三)——我的第一个ASP.NET MVC 视图 学习ASP.NET MVC(四)——我的第一个ASP.NET MVC 实体对象 学习ASP.NET…
微信小程序开通腾讯云开发实践流程附详细图解
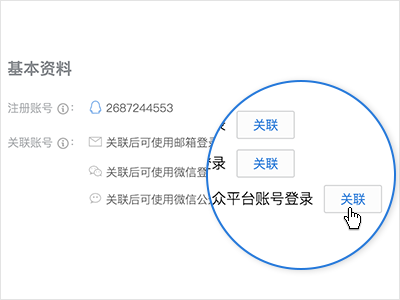
微信小程序开发交流qq群 173683895 云开发流程: 1.关联账户 关联腾讯云账号与微信公众号平台账号。前往关联账号时,请选择微信公众号。错误关联账号请在腾讯云账号中心重新绑定。 已关联账号 2.安装开发者工具 下载与安装客户端微信开发者工具并使…
github组织存储库使用_为什么我不使用您的GitHub存储库
github组织存储库使用by Sam Westreich, PhD由Sam Westreich博士 为什么我不使用您的GitHub存储库 (Why I’m not using your GitHub repository) As a bioinformatician, I reside in an interesting middle ground between developers and end users. My background trainin…
PHP导入excel到mysql数据库完整代码附效果图
微信小程序开发交流qq群 173683895 承接微信小程序开发。扫码加微信。 1.新建一个数据库 ImportXlsx 并在里面添加表名 IsXlsx. 2.下载 phpExcel 插件 点击下载 3.导入文件和xlsx 。 4.获取xlsx表的对象并存入数据库 效果图: PHP 实现 demo <?phph…
黑马程序员—易混淆的知识
------- android培训、java培训、期待与您交流! ---------- String和StringBuffer类区别1.String 是定长的例如:String s1"abc";s1"egf";StringBuffer类:是变成字符串,因为它具有(buffer)缓冲区&a…
简谈 Java 中的泛型通配符
很好的一篇文章https://zhuanlan.zhihu.com/p/26681625 转载于:https://www.cnblogs.com/hihtml5/p/6978651.html
播客#47:劳伦斯·布拉德福德
On todays episode, I interview Laurence Bradford. Shes the creator of the LearnToCodeWith.me blog and podcast, and the Newbie Coder Warehouse Facebook group.在今天的一集中,我采访了劳伦斯布拉德福德。 她是LearnToCodeWith.me博客和播客以及Newbie Cod…
如何使用 DBCC MEMORYSTATUS 命令来监视 SQL Server 2005 中的内存使用情况
https://technet.microsoft.com/en-us/solutionaccelerators/dd537566.aspx 注意:这篇文章是由无人工介入的微软自动的机器翻译软件翻译完成。微软很高兴能同时提供给您由人工翻译的和由机器翻译的文章, 以使您能使用您的语言访问所有的知识库文章。然而由机器翻译的…
{code:-1,error:`QcloudSecretId`不能为空,请确保 SDK 配置已正确初始化}解决方法
微信小程序开发交流qq群 173683895 承接微信小程序开发。扫码加微信。 微信小程序云开发登录报错:{"code":-1,"error":"QcloudSecretId不能为空,请确保 SDK 配置已正确初始化"} 遇到这个错误的原因是:腾讯不…