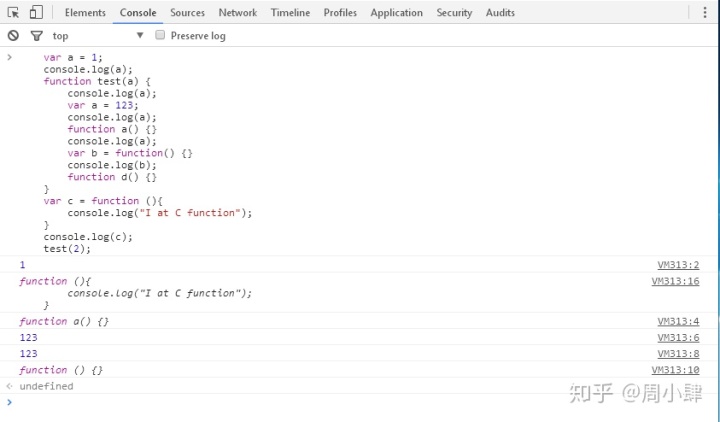
demo下载:https://github.com/chenquanjun/Quick-x-HighlightArea
2、裁剪模式
(1)创建裁剪对象
    local bgColor = ccc3(255, 0, 0) --非高亮区域颜色local bgOpacity = 0.6 --非高亮区域透明度local layerColor = CCLayerColor:create(ccc4(bgColor.r, bgColor.g, bgColor.b, bgOpacity * 255), size.width, size.height)local clipNode = CCClippingNode:create();clipNode:setInverted(true)--设定遮罩的模式true显示没有被遮起来的纹理   如果是false就显示遮罩起来的纹理  clipNode:setAlphaThreshold(0) --设定遮罩图层的透明度取值范围
    clipNode:addChild(layerColor)self:addChild(clipNode)
(2)创建用来裁剪的对象
因为这里都是使用同一张贴图,所以使用CCSpriteBatchNode统一创建
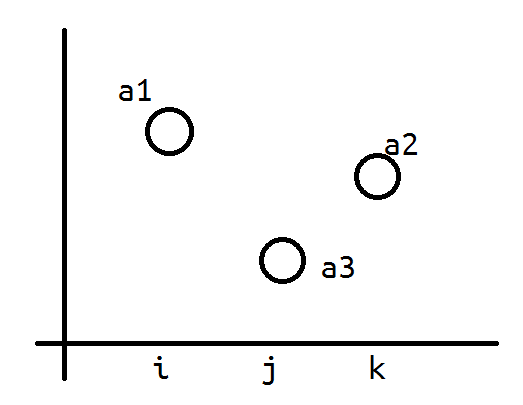
local batchNode = CCSpriteBatchNode:create("Images/circle.png")local circleSpr = CCSprite:createWithTexture(batchNode:getTexture())local circleSize = circleSpr:getContentSize()local widthPara local heightParalocal rectArray = {[1] = CCRect(100, 100, 100, 100),[2] = CCRect(200, 100, 100, 150),[3] = CCRect(450, 35, 150, 100),[4] = CCRect(300, 300, 100, 100),}for i, rect in ipairs(rectArray) dolocal circleSpr = CCSprite:createWithTexture(batchNode:getTexture())if not widthPara thenlocal circleSize = circleSpr:getContentSize()--宽度和高度参数,1.4142为根号2,矩形的外接椭圆的长轴与短轴长度widthPara = 1.4142 / circleSize.widthheightPara = 1.4142 / circleSize.heightendlocal fScaleX = widthPara * rect.size.widthlocal fScaleY = heightPara * rect.size.heightcircleSpr:setScaleX(fScaleX)circleSpr:setScaleY(fScaleY)circleSpr:setPosition(rect:getMidX(), rect:getMidY())batchNode:addChild(circleSpr)endclipNode:setStencil(batchNode) --关键代码
具体效果(裁剪模板模式 StencilMode)

教程方法一的使用的混合模式(BlendMode)

原始图片(Origin)

可以看到,裁剪模式已经出现了锯齿(后面会用另外一种方式解决这个问题)
demo下载:https://github.com/chenquanjun/Quick-x-HighlightArea