ADO.NET与ORM的比较(5):MyBatis实现CRUD
说明:这是一个系列文章,在前面的四篇当中周公分别讲述了利用ADO.NET、NHibernate、Linq to SQL及EntityFramework来实现CRUD功能(C:Create/R:Read/U:Update/D:Delete),在这里再讲述另一种框架,那就是MyBatisNet。MyBatisNet源自于iBatisNet,而iBatisNet又是受了Java平台上的iBatis的影响。
iBatis及iBatis.NET都是利用XML描述来执行存储过程或者SQL语句。与其它ORM框架相比,简单易学是iBatis及iBatis.NET的最大特点,简单易学并不意味着它们功能简单,实际上它们能提供强大的功能。不过iBatis及iBatis.NET现在已经分别更名为MyBatis和MyBatis.NET,它们原来的官方网站http://ibatis.apache.org/上已经有声明新的官方网站网址:http://www.mybatis.org(迄今为止,它们提供的手册里仍是称呼iBatis及iBatis.NET,不过这个不影响使用,在本篇中一律以MyBatisNet来称呼)。
在这里需要说明的是MyBatis并不是一个ORM框架,像NHibernate之类的ORM框架会为你生成全部的或者绝大部分的SQL语句,但是MyBatis没有提供这种功能。MyBatis利用你编写的存储过程或者SQL语句来建立对象与数据库之间的关系映射。相比较而言NHibernate自动生成SQL语句(也可以利用HQL语言),学习难度比较大,而MyBatisNet学习起来比较容易,并且因为自己编写SQL语句,所以比较适合数据量大对性能要求高的场合。MyBatis的工作原理图如下:

一、准备
要想在项目中使用MyBatisNet,就需要到它的官方网站http://www.mybatis.org下载相应的dll,根据官方网站的链接可以下载到IBatis.DataAccess.1.9.2.bin.zip和IBatis.DataMapper.1.6.2.bin.zip两个压缩文件,在这个压缩文件中包含了几乎我们需要的所有dll文件(如果使用MySQL等其它数据库,可能需要到数据库厂商网站下载相应的dll驱动),包含如下文件:
Castle.DynamicProxy.dll
IBatisNet.Common.dll
IBatisNet.Common.Logging.Log4Net.dll
IBatisNet.DataAccess.dll
IBatisNet.DataMapper.dll
log4net.dll
同时MyBatis还提供了一些辅助文件,如IBatisNet.Common.Logging.Log4Net.xml、IBatisNet.Common.xml、IBatisNet.DataAccess.xml、log4net.xml及IBatisNet.DataMapper.xml,将这些文件拷贝到VS的相应目录就可以在编写代码时获得程序的API说明,这个位置就是你的.NET Framework的安装目录,比如系统盘是C盘,这个位置就是C:\WINDOWS\Microsoft.NET\Framework\v2.0.50727\zh-CN。除此之外,还有一些xsd文件,如provider.xsd、SqlMap.xsd及SqlMapConfig.xsd,这些文件都是对应的xml文件的验证文件,利用这些文件就可以在VS中编辑这些文件时获得智能感知,从而减少出错的机会。假设你的系统是安装在C盘,如果你使用的是VS2005,那么就把这些文件拷贝到C:\Program Files\Microsoft Visual Studio 8\Xml\Schemas;如果你使用的是VS2008,那么就拷贝到C:\Program Files\Microsoft Visual Studio 9.0\Xml\Schemas;如果你使用的是VS2010,那么就拷贝到C:\Program Files\Microsoft Visual Studio 10.0\Xml\Schemas。
除了上面的准备工作之外,我们还需要几个配置文件,分别如下:
Providers.config文件
这个文件可以从下载的MyBatis压缩包中找到,它包含了常用数据库驱动程序清单,里面一个典型的节点如下:
- <provider
- name="sqlServer2005"
- enabled="true"
- description="Microsoft SQL Server, provider V2.0.0.0 in framework .NET V2.0"
- assemblyName="System.Data, Version=2.0.0.0, Culture=neutral, PublicKeyToken=b77a5c561934e089"
- connectionClass="System.Data.SqlClient.SqlConnection"
- commandClass="System.Data.SqlClient.SqlCommand"
- parameterClass="System.Data.SqlClient.SqlParameter"
- parameterDbTypeClass="System.Data.SqlDbType"
- parameterDbTypeProperty="SqlDbType"
- dataAdapterClass="System.Data.SqlClient.SqlDataAdapter"
- commandBuilderClass=" System.Data.SqlClient.SqlCommandBuilder"
- usePositionalParameters = "false"
- useParameterPrefixInSql = "true"
- useParameterPrefixInParameter = "true"
- parameterPrefix="@"
- allowMARS="true"
- />
这段XML代码想必大家也能猜得到大部分的属性的意思,在这里周公只讲两个需要注意的地方,一个是enabled属性,如果要启用某个数据库驱动就要将它的值设为true,还有一个就是parameterPrefix属性,表示参数化SQL语句中参数的前缀。
SqlMap.config文件
这是一个有关当前数据库信息及实体映射文件配置的文件。在这个文件里我们可以指定数据库连接的信息(账号、密码及主机等),还可以指定实体映射文件。
关于数据库连接的信息可以采用如下方式的配置:
首先在<properties>节点配置有关数据库连接的信息,在本实例中周公的配置如下:
- <properties>
- <property key="userid" value="sa" />
- <property key="password" value="root" />
- <property key="database" value="AspNetStudy" />
- <property key="datasource" value="netskycn\SQL2005" />
- <property key="selectKey" value="select @@IDENTITY as value" />
- <property key="directory" value="MapFiles" />
- <property key="useStatementNamespaces" value="false" />
- </properties>
上面的大部分属性的意思可以猜测得出来,唯一周公觉得需要说明的是selectKey属性,这是解决插入记录之后获取自增字段主键的值的,在不同的数据库中这个SQL语句可能会不同。
接着在<database>节点中使用这些属性,在周公的运行环境中<database>节点值如下:
- <database>
- <provider name="sqlServer2005"/>
- <!--<dataSource name="iBatisNet" connectionString="data source=netskycn\SQL2005;database=AspNetStudy;user id=sa;password=root;"/>-->
- <dataSource name="iBatisNet" connectionString="data source=${datasource};database=${database};user id=${userid};password=${password};"/>
- </database>
当然,你也可以采用那种被注释的方式,也就是直接将连接字符串写好,而不是采用未注释的方式,不过个人感觉未注释的方式稍微容易维护一些,一旦数据库连接信息发生变动,集中修改<properties>节点中的值就可以了。
最后需要解决的是实体映射文件的问题。和NHibernate一样,MyBatis也是通过XML文件来解决数据记录与实体之间的映射关系的,关于这些映射文件如何编写周公稍后再说。这里要说的是在SqlMap.config文件中可以有两种方式引入外部的文件,一种是通过资源的方式,在文件中表现为resource,如<providers resource="providers.config"/>,另外一种嵌入式资源的方式,在文件中表现为embedded,如<sqlMap embedded="MapFiles.UserInfo.xml,MyBatisNetDemo"/>,这就需要将该文件设置为嵌入式资源,如下图所示:

在本项目中有一个实体类,它就是MyBatisNetDemo程序集中的UserInfo类,它对应的XML映射文件是项目中的MapFiles文件下的UserInfo.xml。
在SqlMap.config文件中这部分的配置如下:
- <sqlMaps>
- <sqlMap embedded="MapFiles.UserInfo.xml,MyBatisNetDemo"/>
- </sqlMaps>
App.config文件
为了调试时能得到运行过程中的相关信息,需要配置Log4Net,关于Log4Net的用法周公博客上有详尽的说明,这里就不在赘述了。在本项目中App.config文件的内容如下:
- <?xml version="1.0" encoding="utf-8" ?>
- <configuration>
- <configSections>
- <sectionGroup name="iBATIS">
- <section name="logging" type="IBatisNet.Common.Logging.ConfigurationSectionHandler, IBatisNet.Common" />
- </sectionGroup>
- <section name="log4net" type="log4net.Config.Log4NetConfigurationSectionHandler, log4net" />
- </configSections>
- <iBATIS>
- <logging>
- <logFactoryAdapter type="IBatisNet.Common.Logging.Impl.Log4NetLoggerFA, IBatisNet.Common.Logging.Log4Net">
- <arg key="configType" value="inline" />
- <arg key ="showLogName" value="true" />
- <arg key ="showDataTime" value="true" />
- <arg key ="level" value="ALL" />
- <arg key ="dateTimeFormat" value="yyyy/MM/dd HH:mm:ss:SSS" />
- </logFactoryAdapter>
- </logging>
- </iBATIS>
- <!-- 下面的节点定义log4net -->
- <log4net>
- <!-- 定义输出的appenders -->
- <appender name="RollingLogFileAppender" type="log4net.Appender.RollingFileAppender">
- <param name="File" value="iBatisNet_log.txt" />
- <param name="AppendToFile" value="true" />
- <param name="MaxSizeRollBackups" value="2" />
- <param name="MaximumFileSize" value="100KB" />
- <param name="RollingStyle" value="Size" />
- <param name="StaticLogFileName" value="true" />
- <layout type="log4net.Layout.PatternLayout">
- <param name="Header" value="[Header]\r\n" />
- <param name="Footer" value="[Footer]\r\n" />
- <param name="ConversionPattern" value="%d [%t] %-5p %c [%x] - %m%n" />
- </layout>
- </appender>
- <appender name="ConsoleAppender" type="log4net.Appender.ConsoleAppender">
- <layout type="log4net.Layout.PatternLayout">
- <param name="ConversionPattern" value="%d [%t] %-5p %c [%x] <%X{auth}> - %m%n" />
- </layout>
- </appender>
- <!-- Set root logger level to ERROR and its appenders -->
- <root>
- <level value="DEBUG" />
- <appender-ref ref="RollingLogFileAppender" />
- <appender-ref ref="ConsoleAppender" />
- </root>
- <!-- Print only messages of level DEBUG or above in the packages -->
- <logger name="IBatisNet.DataMapper.Configuration.Cache.CacheModel">
- <level value="DEBUG" />
- </logger>
- <logger name="IBatisNet.DataMapper.Configuration.Statements.PreparedStatementFactory">
- <level value="DEBUG" />
- </logger>
- <logger name="IBatisNet.DataMapper.LazyLoadList">
- <level value="DEBUG" />
- </logger>
- <logger name="IBatisNet.DataAccess.DaoSession">
- <level value="DEBUG" />
- </logger>
- <logger name="IBatisNet.DataMapper.SqlMapSession">
- <level value="DEBUG" />
- </logger>
- <logger name="IBatisNet.Common.Transaction.TransactionScope">
- <level value="DEBUG" />
- </logger>
- <logger name="IBatisNet.DataAccess.Configuration.DaoProxy">
- <level value="DEBUG" />
- </logger>
- </log4net>
- </configuration>
做了上面的配置之外,还需要添加相关的dll引用,在本项目中所使用到的dll引用如下图所示:

至此,我们已经做好了所有的准备工作,可以进行下一步的编码工作了。
二、编码
编写实体类代码
在本项目中采用的数据表结构与本系列的第一篇一样(便于比较),如下:
- CREATE TABLE [dbo].[UserInfo](
- [UserID] [int] IDENTITY(1,1) NOT NULL,
- [UserName] [varchar](20) COLLATE Chinese_PRC_CI_AS NOT NULL,
- [RealName] [nvarchar](8) COLLATE Chinese_PRC_CI_AS NOT NULL,
- [Age] [tinyint] NOT NULL,
- [Sex] [bit] NOT NULL,
- [Mobile] [char](11) COLLATE Chinese_PRC_CI_AS NULL,
- [Phone] [char](11) COLLATE Chinese_PRC_CI_AS NULL,
- [Email] [varchar](50) COLLATE Chinese_PRC_CI_AS NOT NULL,
- CONSTRAINT [PK_UserInfo] PRIMARY KEY CLUSTERED
- (
- [UserID] ASC
- )WITH (IGNORE_DUP_KEY = OFF)
- )
所对应的实体类的代码如下:
- using System;
- using System.Collections.Generic;
- using System.Text;
- namespace MyBatisNetDemo
- {
- public class UserInfo
- {
- /// <summary>
- /// 用户编号
- /// </summary>
- public int UserID { get; set; }
- /// <summary>
- /// 用户名
- /// </summary>
- public string UserName { get; set; }
- /// <summary>
- /// 真实姓名
- /// </summary>
- public string RealName { get; set; }
- /// <summary>
- /// 年龄
- /// </summary>
- public byte Age { get; set; }
- /// <summary>
- /// 性别
- /// </summary>
- public bool Sex { get; set; }
- /// <summary>
- /// 电子邮件
- /// </summary>
- public string Email { get; set; }
- /// <summary>
- /// 手机号
- /// </summary>
- public string Mobile { get; set; }
- /// <summary>
- /// 电话
- /// </summary>
- public string Phone { get; set; }
- }
- }
编写映射文件
前面说到了映射文件是数据库记录与实体类之间的桥梁,它指示了数据库字段与实体类属性之间如何建立联系,并且还指示了MyBatis如何去操作数据库。在本项目中的UserInfo.xml文件内容如下:
- <?xml version="1.0" encoding="utf-8" ?>
- <sqlMap namespace="UserInfo" xmlns="http://ibatis.apache.org/mapping"
- xmlns:xsi="http://www.w3.org/2001/XMLSchema-instance" >
- <alias>
- <typeAlias alias="UserInfo" type="MyBatisNetDemo.UserInfo,MyBatisNetDemo" />
- </alias>
- <resultMaps>
- <resultMap id="SelectAllResult" class="UserInfo">
- <result property="UserID" column="UserID" dbType="int" type="int" />
- <result property="UserName" column="UserName" dbType="varchar" type="string" />
- <result property="RealName" column="RealName" dbType="varchar" type="string" />
- <result property="Sex" column="Sex" dbType="bit" type="bool" />
- <result property="Mobile" column="Mobile" dbType="varchar" type="string" />
- <result property="Phone" column="Phone" dbType="varchar" type="string" />
- <result property="Email" column="Email" dbType="varchar" type="string"/>
- </resultMap>
- </resultMaps>
- <statements>
- <select id="SelectAllUser" resultMap="SelectAllResult">
- <![CDATA[
- SELECT UserID
- ,UserName
- ,RealName
- ,Age
- ,Sex
- ,Mobile
- ,Phone
- FROM UserInfo
- ]]>
- </select>
- <select id="SelectByUserId" parameterClass="int" resultMap="SelectAllResult" extends="SelectAllUser">
- <![CDATA[
- where UserID = #value#
- ]]>
- </select>
- <select id="SelectByUserName" resultClass="UserInfo" parameterClass="string" resultMap="SelectAllResult" extends="SelectAllUser">
- <![CDATA[
- where UserName = #value#
- ]]>
- </select>
- <select id="SelectUserInfoCount" resultClass="int">
- <![CDATA[
- SELECT
- COUNT(UserID)
- FROM UserInfo
- ]]>
- </select>
- <select id="SelectMaxUserId" resultClass="int">
- <![CDATA[
- SELECT MAX(UserID)
- FROM UserInfo
- ]]>
- </select>
- <insert id="InsertUserInfo" parameterClass="UserInfo" >
- <selectKey property="UserID" type="post" resultClass="int">
- ${selectKey}
- </selectKey>
- <![CDATA[
- insert into UserInfo
- (UserName,RealName,Age,Sex,Mobile,Phone,Email)
- values
- (#UserName#,#RealName#,#Age#,#Sex#,#Mobile#,#Phone#,#Email#)
- ]]>
- </insert>
- <update id="UpdateUserInfo" parameterClass="UserInfo">
- <![CDATA[
- UPDATE UserInfo SET
- UserName=#UserName#,
- RealName =#RealName#,
- Age =#Age#,
- Sex=#Sex#,
- Mobile=#Mobile#,
- Phone=#Phone#,
- Email=#Email#
- WHERE
- UserID=#UserID#
- ]]>
- </update>
- <delete id="DeleteUserInfo" parameterClass="int">
- <![CDATA[
- delete from UserInfo
- where
- UserID = #value#
- ]]>
- </delete>
- </statements>
- </sqlMap>
为了便于维护和管理,这个文件放在了新建的MapFiles文件夹下。在本文件中出现的节点有如下:
<alias>:为了便于编码,可以给实体类是一个别名,例如<typeAlias alias="UserInfo" type="MyBatisNetDemo.UserInfo,MyBatisNetDemo" />就是说明在本文件中UserInfo是MyBatisNetDemo程序集中MyBatisNetDemo.UserInfo类的别名。
<resultMaps>:包含一个到多个<resultMap>节点,每个节点表示实体类到数据库字段的映射,比如我们需要一个完整的数据库字段到实体类的映射就可以用上面的表示方式,在某些情况下我们可能只需要数据库中的某几个字段到实体类的某几个属性的映射,那么可以再建一个<resultMap>节点表示这种映射,这些<resultMap>节点所表示的映射可以在下面的配置中用上。
<statements>:可以包含多个<select>、<insert>、<update>、<delete>节点,每个<select>、<insert>、<update>、<delete>中可以包含parameterClass及resultMap和resultClass属性,在上面的例子中可以看到这三个属性的值出现过string、int和UserInfo,这些是根据实际情况来的。这些代码本身比较容易理解,限于篇幅在这里举例解释其中的一个:
<select id="SelectByUserId" parameterClass="int" resultMap="SelectAllResult" extends="SelectAllUser">
<![CDATA[
where UserID = #value#
]]>
</select>
parameterClass="int"表示传入的参数值为int类型,resultMap="SelectAllResult" extends="SelectAllUser"表示数据库字段与实体类的映射关系如同id为SelectAllResult的<resultMap>节点所指示的那样,extends="SelectAllUser"表示它的SELECT子句前面部分和id为SelectAllUser的<select>节点一致,也就是完整的SQL语句是:
SELECT UserID
,UserName
,RealName
,Age
,Sex
,Mobile
,Phone
,Email
FROM UserInfo
where UserID = #value#
其中的#value#是占位符,将来会被传入的int类型的参数值替换。
如果传入的参数是实体类,如id为UpdateUserInfo的<update>节点所示,在SQL语句中出现了#RealName#等字符串,这些表示是UserInfo的属性。还有一点需要说明的是在<insert>节点中的${selectKey}的值在运行时将会被SqlMap.config中定义的<property key="selectKey" value="select @@IDENTITY as value" />这句所替换。
注意,有时候SQL语句中会出现“<”及“>”这样与XML文件本身相冲突的特殊字符,为了避免出现这种这种情况,我们可以将SQL语句写在“<![CDATA[”与“]]>”之间。
编写CRUD类
通过上面的工作我们配置了数据库连接并建立了数据库字段与实体类属性之间的联系,现在需要编写一个类来操作数据库,在本实例中的CRUD类的代码如下:
- using System;
- using System.Collections.Generic;
- using System.Text;
- using IBatisNet.DataMapper.Configuration;
- using IBatisNet.DataAccess;
- using IBatisNet.DataMapper;
- namespace MyBatisNetDemo
- {
- public class MyBatisNetCRUD
- {
- private static SqlMapper sqlMapper = null;
- static MyBatisNetCRUD()
- {
- DomSqlMapBuilder builder = new DomSqlMapBuilder();
- sqlMapper = builder.Configure() as SqlMapper;
- }
- /// <summary>
- /// 统计用户总数
- /// </summary>
- /// <returns></returns>
- public int Count()
- {
- int result = sqlMapper.QueryForObject<int>("SelectUserInfoCount", null);
- return result;
- }
- /// <summary>
- /// 创建用户
- /// </summary>
- /// <param name="info">用户实体</param>
- /// <returns></returns>
- public bool Create(UserInfo info)
- {
- //object o=sqlMapper.Insert("InsertUserInfo", info);
- //int id=(int)o;
- //return id>0;
- int id = (int)sqlMapper.Insert("InsertUserInfo", info);
- return id > 0;
- }
- /// <summary>
- /// 读取用户信息
- /// </summary>
- /// <param name="userId">用户编号</param>
- /// <returns></returns>
- public UserInfo Read(int userId)
- {
- UserInfo info = sqlMapper.QueryForObject<UserInfo>("SelectByUserId", userId);
- return info;
- }
- public IList<UserInfo> GetUserList()
- {
- IList<UserInfo> userList = sqlMapper.QueryForList<UserInfo>("SelectAllUser", null);
- return userList;
- }
- public IList<UserInfo> GetUserList(int index,int size)
- {
- string connectionString=sqlMapper.DataSource.ConnectionString;
- Console.WriteLine(connectionString);
- IList<UserInfo> userList = sqlMapper.QueryForList<UserInfo>("SelectAllUser", null,index,size);
- return userList;
- }
- /// <summary>
- /// 更新用户信息
- /// </summary>
- /// <param name="info">用户实体</param>
- /// <returns></returns>
- public bool Update(UserInfo info)
- {
- int result = sqlMapper.Update("UpdateUserInfo", info);
- return result > 0;
- }
- /// <summary>
- /// 删除用户
- /// </summary>
- /// <param name="userId">用户编号</param>
- /// <returns></returns>
- public bool Delete(int userId)
- {
- int result = sqlMapper.Delete("DeleteUserInfo", userId);
- return result > 0;
- }
- /// <summary>
- /// 获取用户表中编号最大的用户
- /// </summary>
- /// <returns></returns>
- public int GetMaxUserId()
- {
- int result = sqlMapper.QueryForObject<int>("SelectMaxUserId", null);
- return result;
- }
- }
- }
为了对比,在这个CRUD类中实现的功能与前几篇中实现的功能一致,在代码中我们首先要实例化SqlMapper类,获得了这个类的实例后就可以利用它来操作数据库了。在方法中第一个字符串类型的参数都是我们在UserInfo.xml中配置的那些<select>、<insert>、<update>、<delete>节点的id(这些id自然在整个项目中不能重复命名了),后面的参数是根据执行该id对应的SQL语句所需要的参数。
注意:在本项目中周公将providers.config和SqlMap.config文件设置成复制到输出目录,而将UserInfo.xml文件设置为嵌入式资源了。在实际操作中要注意这一点。整个项目的结构如下:

三、单元测试代码
为了照顾很多仍在使用NUnit作为单元测试工具的开发人员的习惯,我们的单元测试代码针对NUnit2.5.3,代码如下:
- using System;
- using System.Collections.Generic;
- using System.Linq;
- using System.Text;
- using NUnit.Framework;
- using MyBatisNetDemo;
- namespace NUnitTest
- {
- [TestFixture]
- public class MyBatisNetTest
- {
- private MyBatisNetCRUD instance = null;
- [SetUp]
- public void Initialize()
- {
- instance = new MyBatisNetCRUD();
- }
- [Test]
- public void Count()
- {
- Assert.Greater(instance.Count(), 0);
- }
- [Test]
- public void Create()
- {
- UserInfo userInfo = new MyBatisNetDemo.UserInfo { UserName = "www1", Age = 40, Email = "zhoufoxcn1@gmail.com", Mobile = "13567891234", Phone = "02786543210", RealName = "test", Sex = false };
- Assert.True(instance.Create(userInfo));
- }
- [Test]
- public void Read()
- {
- UserInfo info =instance.Read(2);
- //Assert.IsNotNull(info);
- Assert.AreEqual(info.UserID, 2);
- }
- [Test]
- public void GetUserList()
- {
- IList<UserInfo> userList = instance.GetUserList();
- Assert.Greater(userList.Count,0);
- }
- [Test]
- public void GetUserListPaging()
- {
- IList<UserInfo> userList = instance.GetUserList(10,20);
- Assert.Greater(userList.Count, 0);
- }
- [Test]
- public void Update()
- {
- UserInfo info = instance.Read(1);
- Assert.True(instance.Update(info));
- }
- [Test]
- public void Delete()
- {
- int maxUserId = instance.GetMaxUserId();
- Assert.True(instance.Delete(maxUserId));
- }
- [Test]
- public void GetMaxUserId()
- {
- int result = instance.GetMaxUserId();
- Assert.True(result > 0);
- }
- }
- }
上面的代码在NUnit2.5.3中测试通过。
四、总结
作为一种数据库与实体类的映射框架二不是一个ORM框架,和ADO.NET相比MyBatis不用太多考虑ADO.NET的细节(比如是用SqlConnection还是用OleDbConnecion,还有如何打开和关闭数据库连接等),因而比较容易跨数据库;和NHibernate这样的ORM相比它又能让我们更多地操纵如何与数据库交互,性能上更容易控制一些(前提是必须有比较精通书库的开发人员或者DBA),同时它也比NHibernate更容易学习一些。
当然MyBatis也有它的一些不足,比如在UserInfo.xml中我们要编写大量的SQL语句和添加很多<select>、<insert>、<update>、<delete>节点,当然这些不足可以通过一个自动代码生成工具来解决。
从个人选择上来说,我更愿意选择MyBatisNet,今后的项目中我可能会更多的使用MyBatisNet。另外从我一个在银行从事开发的朋友得到的反馈,他们用Java做银行项目选择的也是MyBatisNet的Java版——MyBatis,这是出于对性能的考虑。
没有最好的,只有最合适的。如何选择合适的技术,取决于我们队将要运行的环境的判断,这来自于经验分析。周公
2010-12-17
广告:本人现在正在参加“2010年度十大杰出IT博客大赛”,欢迎大家前去捧场投下您宝贵的一票!网址是:http://2010blog.51cto.com/792419,欢迎大家每天投票支持周公。
相关文章:

BZOJ1391: [Ceoi2008]order
【传送门:BZOJ1391】 简要题意: 有n个工作,m种机器,每种机器可以租或买来,给出租和买的费用,每个工作有若干个工序,每个工序需要用某种机器完成,完成工作可以获得利润 求出完成n个工…
MongoDB(3)--有关NoSQL及MongoDB的一些概念
学习任何东西在没有理解的前提下去背熟一些概念是没有用的,就像只背会了几个概念而没有理解的开发人员去面试是经不住面试官的追问的。前面的两篇对MongoDB做了简单的介绍,能够很快上手,对MongoDB有一个感性的认识。本篇大部分内容来自MongoD…
SpringBootMybatis 关于Mybatis-generator-gui的使用|数据库的编码注意点|各项复制模板...
mysql注意点: 1.有关编码 create table user( id int primary key auto_increment, name varchar(255), password varchar(255) )ENGINEInnoDB AUTO_INCREMENT11 DEFAULT CHARSETutf8; 需要加上引擎的注释和默认数据库编码 application.properties的默认写法 #数据源…
【java】兴唐第三十节课之零三知识点总结
1、服务器通过session id来辨别用户 2、绝对路径与相对路径 (1)相对路径 . :当前路径 .. :向上返回一层路径 (2)绝对路径: 查找所有的文件都是从根目录出发 目录结构如图 代码实现: <div><span><a href …
(续)我对09毕业生说两句
上次写那篇文章已经是09年2月份,转眼2年过去,一直没想好再说些什么。后来想想也不用刻意说些什么,就是闲聊一下我的一些新看法吧。 简 历这个东西很重要,从简历上可以看出很多信息来。有很多人喜欢写自己细致认真。可以从简历上看…
Python Socket请求网站获取数据
Python Socket请求网站获取数据 ---阻塞 I/O ->收快递,快递如果不到,就干不了其他的活 ---非阻塞I/0 ->收快递,不断的去问,有没有送到,有没有送到,...如果送到了就接收 ---I/O多路…
用户控件和服务器控件的数据绑定
一、绑定Repeater控件的数据源 aspx.cs文件中绑定Repeater控件的数据源在BindDataSource()中: protected override void BindDataSource(){ this.rpID.DataSource this.dataList; this.rpID.DataBind();}Repeater控件事件OnItemDataBound,表示在循环…

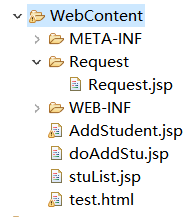
【jsp】兴唐第三十节课作业
写一个jsp调取数据库的文件显示在主页面,并实现查找、添加、删除和数据更新以及用户登录的功能 stuList.jsp <% page language"java" contentType"text/html; charsetUTF-8"pageEncoding"UTF-8"%> <% page import "…
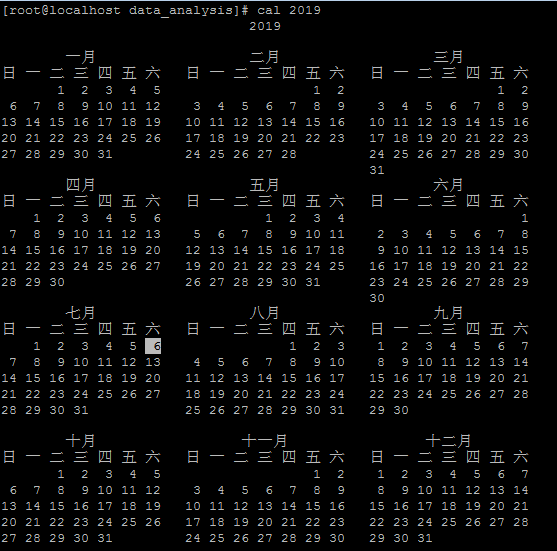
Linux命令行好玩的命令
0.cal 2019 #输出日历并显示今天是哪一天 1.命令“date”,显示系统的当前日期和时间; 2.命令“date 040100002016”,屏幕显示新修改的系统时间; #不太明白 3.转载于:https://www.cnblogs.com/Formulate0303/p/11142997.html

Solaris下访问windows共享资源
今在做实验过程中,发现上传软件太费时而且解压起来也繁琐,还要占用很大的空间,就在windows上创建了共享资源,在linux下使用mount挂载上来,直接解压在windows上面,用完了直接将解压的文件删除即可࿰…
centOS外部浏览器无法访问tomcat8000端口解决办法
防火墙开放特定端口 (iptables) 查看状态:iptables -L -n下面添加对特定端口开放的方法:使用iptables开放如下端口/sbin/iptables -I INPUT -p tcp --dport 8000 -j ACCEPT保存/etc/rc.d/init.d/iptables save重启服务service iptables resta…

Linux命令行与shell脚本编程大全:第2版
《Linux命令行与shell脚本编程大全:第2版》基本信息作者: (美)布卢姆(Blum,R.) 布雷斯纳汉(Bresnahan.C.) [作译者介绍]译者: 武海峰丛书名: 图灵程序设计丛书出版社:人民邮电出版社ISBN:9787115288899上架时间&#x…
企业云存储云办公方案
云存储、云计算最近一直被炒得很热,成为了一部分人文档中既神秘又华丽的辞藻,总之来总之去就是"云里来雾里去",其实"云技术"与历史上的"纳米技术"一词一样忽悠了很多很多的人。云存储是在云计算基础上衍生起来…
【servlete】兴唐第三十二节课知识点汇总
一、 servlet开发: 1、创建java类并继承HttpServlet 2、重写 doGet\doPost方法 3、将Servlet配置到web.xml中: <servlet> <servlet-name>自定义一个唯一的名称</servlet-name> <servlet-class>servlet全类…
悦读上品 得乎益友
悦读上品 得乎益友 ——电子工业出版社2011新年巨献不可复制的《传世经典书从》 孔子云:“取乎其上,得乎其中;取乎其中,得乎其下;取乎其下,则无所得矣。”读书求知,贵在能选择好书中的上品——经…
超详细的Java面试题总结(四 )之JavaWeb基础知识总结
系列文章请查看: 超详细的Java面试题总结(一)之Java基础知识篇 超详细的Java面试题总结(二)之Java基础知识篇 超详细的Java面试题总结(三)之Java集合篇常见问题 超详细的Java面试题总结…

HTML教程--多页面窗体
基本语法 <frameset> ... </frameset> <frame src"url"> <noframes> ... </noframes> 在 <noframes> 标记后的文字将只出现在不支持 FRAMES 的浏览器中。 <HTML><HEAD></HEAD><FRAMESET><FRAME SRC…
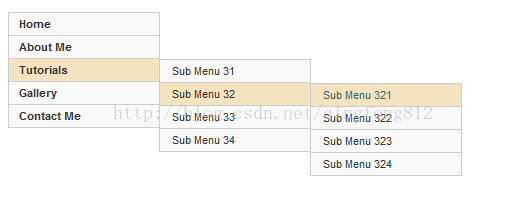
js左侧三级菜单导航代码
效果演示: 实例代码: <!DOCTYPE html PUBLIC "-//W3C//DTD XHTML 1.0 Transitional//EN" "http://www.w3.org/TR/xhtml1/DTD/xhtml1-transitional.dtd"> <html xmlns"http://www.w3.org/1999/xhtml" xml:lang&…
【jsp】页面跳转的两种方法
注:由index.jxp跳转到Failure.jsp request.getSession().setAttribute("msg", "45654"); 方法一: response.sendRedirect("Failure.jsp"); 特点: (1)不能传值 (2&…
windows远程桌面端口修改
众所周知,windows 2003远程终端服务基于默认端口3389。***者一般先扫描主机开放端口,一旦发现其开放了3389端口,就会进行下一步的***,所以我们只需要修改该务默认端口就可以避开大多数***者的耳目。 步骤: 打开“开始→…

《java第二次实验》
(一)学习总结 1.什么是构造方法?什么是构造方法的重载?下面的程序是否可以通过编译?为什么? public class Test {public static void main(String args[]) { Foo obj new Foo(); } } class Foo…

[置顶] 当我拿车钥匙的时候,刚交的女朋友跑了。。。
转载于:https://www.cnblogs.com/james1207/p/3291906.html
【jstl】jstl的基本操作
1、jstl不属于javaEE标准,所以需要额外引入jar包 2、引入后需要引入标签库 代码实现: <% taglib prefix"c" uri"http://java.sun.com/jsp/jstl/core" %> 注: (1)可以使用 alt / 的快捷…
如何修改Sql2005注册服务器名称 {转载}
1.使用select ServerName可以看到当前数据库的服务器名 2.从Sys.SysServers表中可以看到当前的所有服务器名 3.使用 sp_dropserver servername 将这个服务器名删除。 4.使用 sp_addserver new servername,LOCAL将本地服务器重新添加到服务器表中 5.查询Sys.SysServers表&#x…
据说是腾讯php程序员面试题目 蛋疼..要是提供PHP手册就HI了..
说在前面:1、以下题目,除了编程任务外其他都需要写在给你提供的草纸上。纸张是珍贵的地球资源,请节约使用。编程任务在有相应的环境时,会要求上机书写,实在没有条件,就只能写在草纸上了。&#…
C功底挑战Java菜鸟入门概念干货(一)
一、认识Java 1、Java 程序比较特殊,它必须先经过编译,然后再利用解释的方式来运行。 2、Byte-codes 最大的好处是——可越平台运行,可让“一次编写,处处运行”成为可能。 3、使用 classpath 可以指定 class 的运行路径。 二、走…

c# lock (obj) 与 lock (this) 区别
lock(obj) 锁定 obj 对象 lock(this) 锁定 当前实例对象,如果有多个类实例的话,lock锁定的只是当前类实例,对其它类实例无影响。 直接上代码。 主窗体代码如下: delegate void SetTextCallback(string text);public Form1() …
【js】四种自定义对象的常见方法
<html><head></head><body><script type "text/javascript">//方法1var stu1 new Object();stu1.stuName "小强1";stu1.stuNo "123";stu1.print function() {alert(stu1.stuName);}//stu1.print();//alert(s…
eclipse启动时报错An internal error occurred during: Initializing Java Tooling.
eclipse启动时报错An internal error o当前工作目录文件夹下的 /.metadata/.plugins/org.eclipse.core.resources/.project。就是把初始化的项目删除,然后打开eclipse以后可以重新初始化。转载于:https://www.cnblogs.com/huanlingjisi/p/8696541.html
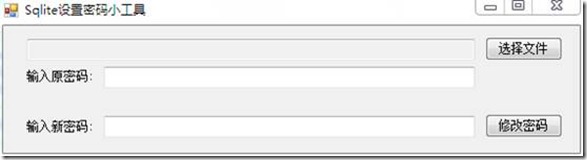
给Sqlite数据库设置密码
免费版Sqlie是不提供设置密码功能的,经过查阅资料最终找到了解决方案 方案一,从sqlite源码入手,据说sqlite源码已经提供了加密的接口,只是免费版没有实现,可以参考这位仁兄的博客以了解详情:http://www.cnb…