Windows10上使用VS2017编译MXNet源码操作步骤(C++)
MXNet是一种开源的深度学习框架,核心代码是由C++实现。MXNet官网推荐使用VS2015或VS2017编译,因为源码中使用了一些C++14的特性,VS2013是不支持的。这里通过VS2017编译,步骤如下:
1. 编译OpenCV,版本为3.4.2,可参考 https://blog.csdn.net/fengbingchun/article/details/78163217 ,注意加入opencv_contrib模块;
2. 编译OpenBLAS,版本为0.3.3,可参考: https://blog.csdn.net/fengbingchun/article/details/55509764 ;
3. 编译dmlc-core,版本为0.3:
4. 下载mshadow,注意不能是1.0或1.1版本,只能是master,因为它们的文件名不一致,里面仅有头文件;
5. 编译tvm,版本为0.4,在编译MXNet时,目前仅需要nnvm/src下的c_api, core, pass三个目录的文件参与:
6. 编译dlpack,版本为最新master,commit为bee4d1d,
7. 编译MXNet,版本为1.3.0:
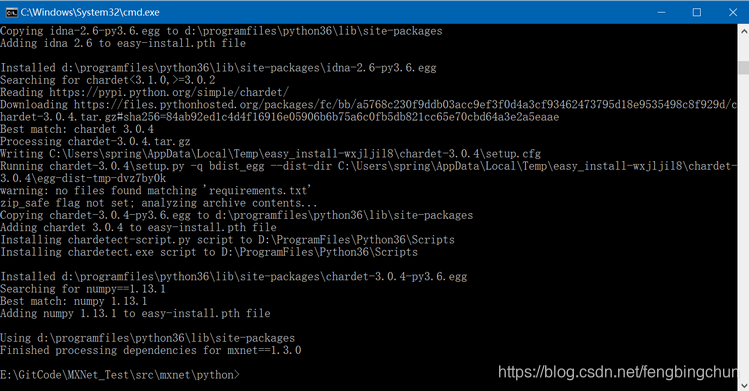
8. 使用mxnet/cpp-package/scripts/OpWrapperGenerator.py生成mxnet/cpp-package/include/mxnet-cpp目录下的op.h文件操作步骤:
(1). 将lib/rel/x64目录下的libmxnet.dll和libopenblas.dll两个动态库拷贝到mxnet/cpp-package/scripts/目录下;
(2). 在mxnet/cpp-package/scripts/目录下打开命令行提示符,执行:
python OpWrapperGenerator.py libmxnet.dll(3). 修改生成的op.h文件中的两处UpSampling函数:将参数scale,修改为int scale;将参数num_filter = 0,修改为int num_filter = 0; 注:直接通过以下命令生成op.h文件时不用作任何修改,后面查找下原因
git clone --recursive https://github.com/apache/incubator-mxnet注意:
(1). 关于MXNet中的依赖库介绍和使用可参考:https://blog.csdn.net/fengbingchun/article/details/84981969
(2). 为了正常编译整个工程,部分源码作了微小的调整;
(3). 所有项目依赖的版本如下:
1. OpenBLAS:commit: fd8d186version: 0.3.3date: 2018.08.31url: https://github.com/xianyi/OpenBLAS/releases
2. dlpack:commit: bee4d1dversion: masterdate: 2018.08.24url: https://github.com/dmlc/dlpack
3. mshadow:commit: 2e3a895version: masterdate: 2018.11.08url: https://github.com/dmlc/mshadow
4. dmlc-core:commit: 85c1180version: 0.3date: 2018.07.18url: https://github.com/dmlc/dmlc-core/releases
5. tvm:commit: 60769b7version: 0.4date: 2018.09.04url: https://github.com/dmlc/tvm/releases
6. HalideIR:commit: a08e26eversion: masterdate: 2018.11.28url: https://github.com/dmlc/HalideIR
7. mxnet:commit: b3be92fversion: 1.3.0date: 2018.09.12url: https://github.com/apache/incubator-mxnet/releases
(4). 整个项目可以从https://github.com/fengbingchun/MXNet_Test clone到E:/GitCode目录下直接编译即可。
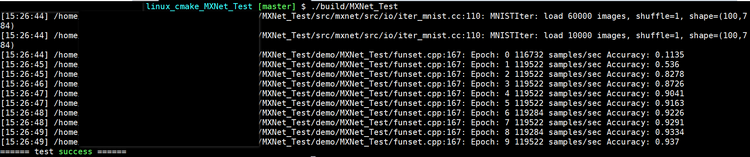
下面测试代码是用生成的MXNet.dll动态库训练MNIST:
#include "funset.hpp"
#include <chrono>
#include <string>
#include <fstream>
#include <vector>
#include "mxnet-cpp/MxNetCpp.h"namespace {bool isFileExists(const std::string &filename)
{std::ifstream fhandle(filename.c_str());return fhandle.good();
}bool check_datafiles(const std::vector<std::string> &data_files)
{for (size_t index = 0; index < data_files.size(); index++) {if (!(isFileExists(data_files[index]))) {LG << "Error: File does not exist: " << data_files[index];return false;}}return true;
}bool setDataIter(mxnet::cpp::MXDataIter *iter, std::string useType, const std::vector<std::string> &data_files, int batch_size)
{if (!check_datafiles(data_files))return false;iter->SetParam("batch_size", batch_size);iter->SetParam("shuffle", 1);iter->SetParam("flat", 1);if (useType == "Train") {iter->SetParam("image", data_files[0]);iter->SetParam("label", data_files[1]);} else if (useType == "Label") {iter->SetParam("image", data_files[2]);iter->SetParam("label", data_files[3]);}iter->CreateDataIter();return true;
}} // namespace// mnist
/* reference: https://mxnet.incubator.apache.org/tutorials/c%2B%2B/basics.htmlmxnet_source/cpp-package/example/mlp_cpu.cpp
*/
namespace {mxnet::cpp::Symbol mlp(const std::vector<int> &layers)
{auto x = mxnet::cpp::Symbol::Variable("X");auto label = mxnet::cpp::Symbol::Variable("label");std::vector<mxnet::cpp::Symbol> weights(layers.size());std::vector<mxnet::cpp::Symbol> biases(layers.size());std::vector<mxnet::cpp::Symbol> outputs(layers.size());for (size_t i = 0; i < layers.size(); ++i) {weights[i] = mxnet::cpp::Symbol::Variable("w" + std::to_string(i));biases[i] = mxnet::cpp::Symbol::Variable("b" + std::to_string(i));mxnet::cpp::Symbol fc = mxnet::cpp::FullyConnected(i == 0 ? x : outputs[i - 1], weights[i], biases[i], layers[i]);outputs[i] = i == layers.size() - 1 ? fc : mxnet::cpp::Activation(fc, mxnet::cpp::ActivationActType::kRelu);}return mxnet::cpp::SoftmaxOutput(outputs.back(), label);
}} // namespaceint test_mnist_train()
{const int image_size = 28;const std::vector<int> layers{ 128, 64, 10 };const int batch_size = 100;const int max_epoch = 20;const float learning_rate = 0.1;const float weight_decay = 1e-2;std::vector<std::string> data_files = { "E:/GitCode/MXNet_Test/data/mnist/train-images.idx3-ubyte","E:/GitCode/MXNet_Test/data/mnist/train-labels.idx1-ubyte","E:/GitCode/MXNet_Test/data/mnist/t10k-images.idx3-ubyte","E:/GitCode/MXNet_Test/data/mnist/t10k-labels.idx1-ubyte"};auto train_iter = mxnet::cpp::MXDataIter("MNISTIter");setDataIter(&train_iter, "Train", data_files, batch_size);auto val_iter = mxnet::cpp::MXDataIter("MNISTIter");setDataIter(&val_iter, "Label", data_files, batch_size);auto net = mlp(layers);mxnet::cpp::Context ctx = mxnet::cpp::Context::cpu();  // Use CPU for trainingstd::map<std::string, mxnet::cpp::NDArray> args;args["X"] = mxnet::cpp::NDArray(mxnet::cpp::Shape(batch_size, image_size*image_size), ctx);args["label"] = mxnet::cpp::NDArray(mxnet::cpp::Shape(batch_size), ctx);// Let MXNet infer shapes other parameters such as weightsnet.InferArgsMap(ctx, &args, args);// Initialize all parameters with uniform distribution U(-0.01, 0.01)auto initializer = mxnet::cpp::Uniform(0.01);for (auto& arg : args) {// arg.first is parameter name, and arg.second is the valueinitializer(arg.first, &arg.second);}// Create sgd optimizermxnet::cpp::Optimizer* opt = mxnet::cpp::OptimizerRegistry::Find("sgd");opt->SetParam("rescale_grad", 1.0 / batch_size)->SetParam("lr", learning_rate)->SetParam("wd", weight_decay);// Create executor by binding parameters to the modelauto *exec = net.SimpleBind(ctx, args);auto arg_names = net.ListArguments();// Start trainingfor (int iter = 0; iter < max_epoch; ++iter) {int samples = 0;train_iter.Reset();auto tic = std::chrono::system_clock::now();while (train_iter.Next()) {samples += batch_size;auto data_batch = train_iter.GetDataBatch();// Set data and labeldata_batch.data.CopyTo(&args["X"]);data_batch.label.CopyTo(&args["label"]);// Compute gradientsexec->Forward(true);exec->Backward();// Update parametersfor (size_t i = 0; i < arg_names.size(); ++i) {if (arg_names[i] == "X" || arg_names[i] == "label") continue;opt->Update(i, exec->arg_arrays[i], exec->grad_arrays[i]);}}auto toc = std::chrono::system_clock::now();mxnet::cpp::Accuracy acc;val_iter.Reset();while (val_iter.Next()) {auto data_batch = val_iter.GetDataBatch();data_batch.data.CopyTo(&args["X"]);data_batch.label.CopyTo(&args["label"]);// Forward pass is enough as no gradient is needed when evaluatingexec->Forward(false);acc.Update(data_batch.label, exec->outputs[0]);}float duration = std::chrono::duration_cast<std::chrono::milliseconds>(toc - tic).count() / 1000.0;LG << "Epoch: " << iter << " " << samples / duration << " samples/sec Accuracy: " << acc.Get();}std::string json_file{ "E:/GitCode/MXNet_Test/data/mnist.json" };std::string param_file{"E:/GitCode/MXNet_Test/data/mnist.params"};net.Save(json_file);mxnet::cpp::NDArray::Save(param_file, exec->arg_arrays);delete exec;MXNotifyShutdown();return 0;
}
执行结果如下:

在Windows上编译MXNet_Test工程时注意事项:
(1). clone MXNet_Test到E:/GitCode目录下;
(2). MXNet_Test使用VS2017既可在windows7 x64上编译,也可在Windows10 x64上编译;
(3). 由于每个人的机子上VS2017安装的Windows SDK版本不同,可能会导致出现"error MSB8036: 找不到 Windows SDK 版本10.0.17134.0"类似的错误,解决方法是:选中指定的项目,打开属性页,在配置属性->常规->Windows SDK版本中重新选择你已安装的Windows SDK版本即可。
GitHub: https://github.com/fengbingchun/MXNet_Test
相关文章:

StoryBoard 视图切换和传值
一 于StoryBoard相关的类、方法和属性 1 UIStoryboard // 根据StoryBoard名字获取StoryBoard (UIStoryboard *)storyboardWithName:(NSString *)name bundle:(nullable NSBundle *)storyboardBundleOrNil;// 获取指定StoryBoard的第一个视图控制器- (nullable __kindof UIViewC…

率清华团队研发“天机芯”登《Nature》封面,他说类脑计算是发展人工通用智能的基石...
整理 | AI科技大本营(ID:rgznai100)8 月,清华大学教授、类脑计算研究中心主任施路平率队研发的关于“天机芯”的论文登上《Nature》封面,这实现了中国在芯片和人工智能两大领域登上该杂志论文零的突破,引发国内外业界一…

IntelliJ IDEA 12详细开发教程(四) 搭建Android应用开发环境与Android项目创建
今天我要给大家讲的是使用Intellij Idea开发Android应用开发。自我感觉使用Idea来进行Android开发要比在Eclipse下开发简单很多。(一)打开网站:http://developer.android.com/sdk/index.html。从网站上下载SDK下载需要的Android版本ÿ…

Git环境搭建及简单的本地、远程 两库关联
这里讲下我从拿到新的Mac后怎么一步一步搭建Git环境的。 首先让我们打开终端 在终端输入 git 如果说你卡到下面的结果说明你没有安装个git,去安装。 The program git is currently not installed. You can install it by typing: sudo apt-get install git 如果你…

提高C++性能的编程技术笔记:内联+测试代码
内联类似于宏,在调用方法内部展开被调用方法,以此来代替方法的调用。一般来说表达内联意图的方式有两种:一种是在定义方法时添加内联保留字的前缀;另一种是在类的头部声明中定义方法。 虽然内联方法的调用方式和普通方法相同&…

python学习——01循环控制
系统登录:要求输入用户名,判断用户是否存在,若存在,则输入密码,密码正确后登录系统;用户不存在则重新输入用户。密码输错三次后,用户被锁定。#!/usr/bin/env python #codingutf-8 user_dic {pe…
swift 中showAlertTitle的使用
不比比 直接上代码 import UIKit class InAndOutViewController: UIViewController,UITextFieldDelegate { let API_selectExitEntryInfo : String "/app/projectAndIdCardQuery_selectBanJianInfo" //输入框 IBOutlet weak var InputTextField: UITextField! //查…

从一张风景照中就学会的SinGAN模型,究竟是什么神操作?| ICCV 2019最佳论文
作者 | 王红成,中国海洋大学-信息科学与工程学院-计算机技术-计算机视觉方向研究生,研二在读,目前专注于生成对抗网络的研究编辑 | Jane出品 | AI科技大本营(ID:rgznai100)【导读】10 月 27 日-11 月 2 日&…
Windows10上编译MXNet源码操作步骤(Python)
1. 按照https://blog.csdn.net/fengbingchun/article/details/84997490 中操作步骤首先在Windows上通过VS2017编译MXNet源代码; 2. 从 https://mxnet.incubator.apache.org/install/windows_setup.html#install-the-mxnet-package-for-python 下载mingw64_dll.zi…
LeetCode:144_Binary Tree Preorder Traversal | 二叉树的前序遍历 | Medium
题目:Binary Tree Preorder Traversal 二叉树的前序遍历,同样使用栈来解,代码如下: 1 struct TreeNode {2 int val;3 TreeNode* left;4 TreeNode* right;5 TreeNode(int x): val(x), left(NULL)…

swift (Singleton)模式
一不安全的单例实现在上一篇文章我们给出了单例的设计模式,直接给出了线程安全的实现方法。单例的实现有多种方法,如下面:?123456789101112class SwiftSingleton { class var shared: SwiftSingleton { if !Inner.instance { Inner.insta…
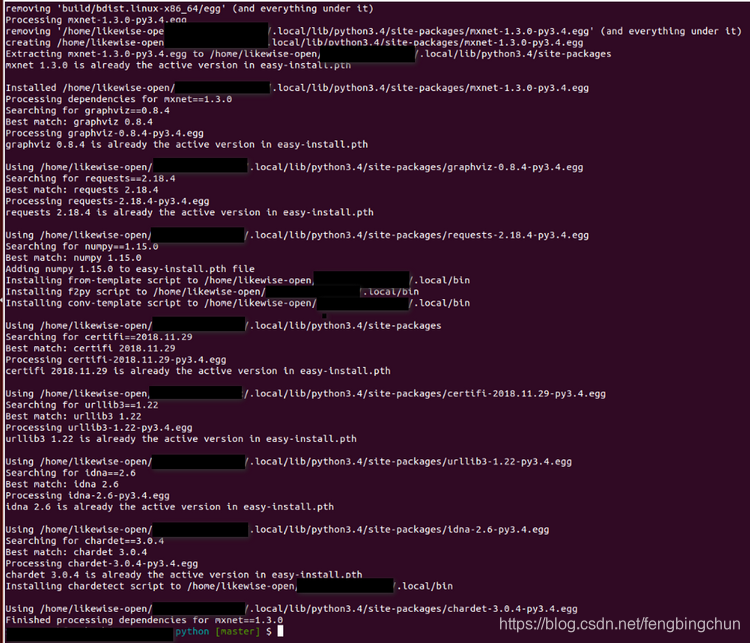
Ubuntu 14.04上使用CMake编译MXNet源码操作步骤(C++)
MXNet源码版本号为1.3.0,其它依赖库的版本号可参考:https://blog.csdn.net/fengbingchun/article/details/84997490 build.sh脚本内容为: #! /bin/bashreal_path$(realpath $0) dir_namedirname "${real_path}" echo "real_…

十年公务员转行IT,自学AI三年,他淬炼出746页机器学习入门笔记
整理 | Jane 编辑 | Just 出品 | AI科技大本营(ID:rgznai100)近期,梁劲传来该笔记重大更新的消息。《机器学习——从入门到放弃》这本笔记的更新没有停止,在基于上一版的基础上丰富了近 200 页计算机视觉领域的知识内容…

Python实现五子棋人机对战 | CSDN博文精选
作者 | 吴小鹏 来源 | 数据札记倌(ID:Data_Groom)五子棋是常见的一款小游戏,五子棋问题是人工智能中的一个经典问题。这篇文章主要介绍了Python版本五子棋的实现代码,大家可以做个参考,与我的傻儿子对弈一下。简 述虽…
HTTPS协议简介
HTTPS(HyperText Transfer Protocol Secure, 超文本传输安全协议):是一种透过计算机网络进行安全通信的传输协议。HTTPS经由HTTP进行通信,但利用SSL/TLS来加密数据包。HTTPS开发的主要目的,是提供对网站服务器的身份认证,保护交换…

闭包回调的写法
初学swift,封装了NSURLSession的get请求,在请求成功闭包回调的时候程序崩溃了 然后在图中1,2,3位置加上惊叹号“!”,再把4,5,6的惊叹号去掉就闭包回调成功了
错误 1 “System.Data.DataRow.DataRow(System.Data.DataRowBuilder)”不可访问,因为它受保护级别限制...
new DataRow 的方式: DataTable pDataTable new DataTable();DataRow pRow new DataRow(); 正确的方式: DataRow pRowpDataTable.newRow(); 转载于:https://www.cnblogs.com/wangzianan/p/4034892.html

iOS 支付 [支付宝、银联、微信]
这是开头语 前不久做了一个项目,涉及到支付宝和银联支付,支付宝和银联都是业界的老大哥,文档、SDK都是很屌,屌的找不到,屌的看不懂,屌到没朋友(吐槽而已),本文将涉及到的…
base64开源库介绍及使用
网上有一些开源的base64编解码库的实现,下面介绍几个: cppcodec是一个仅包括头文件的C11库,用于编解码RFC 4648中指定的base64, base64url, base32, base32hex等,它的License为MIT,源码在https://github.com/tplgy/cp…
情感识别难?图神经网络创新方法大幅提高性能
作者 | Kevin Shen译者 | Monanfei出品 | AI科技大本营(ID: rgznai100)【导读】最近,深度学习在自然语言处理领域(NLP)取得了很大的进步。随着诸如 Attention 和 Transformers 之类新发明的出现,BERT 和 XL…
Java的学习之路(1)
学过C语言之后,尝试接触Java. 借博文来记录自己学习的过程. Test01:利用循环,输出整数1-999之和 1 //2 //循环计算1到999的整数之和并输出3 //4 package demo;5 6 public class Main {7 8 public static void main(String[] args) {9 int su…

Swift - 使用addSubview()方法将StoryBoard中的视图加载进来
使用 Storyboard 我们可以很方便地搭建好各种复杂的页面,同时通过 segue 连接可以轻松实现页面的跳转。但除了segue,我们还可以使用纯代码的方式实现Storyboard界面的跳转。 比如:使用 presentViewController() 方法将当前页面视图切换成新视…

这项技术厉害了!让旅行者 2 号从星际空间发首批数据!
立即购票:https://dwz.cn/z1jHouwE物联网作为信息系统向物理世界的延伸,极大地拓展了人类认知和控制物理世界的能力,被称为继计算机和互联网之后的世界信息产业的第三次浪潮,正在深刻地改变着人类的生存环境和生活方式。据最新报道…
Ubuntu 14.04上使用CMake编译MXNet源码操作步骤(Python)
MXNet源码版本号为1.3.0,其它依赖库的版本号可参考:https://blog.csdn.net/fengbingchun/article/details/84997490 。 为了通过编译源码支持python接口,这里在 https://blog.csdn.net/fengbingchun/article/details/85162936 的基础上对bui…
近段时间学习html和CSS的一些细碎总结
1、边框圆角属性:border-radius,取值能够是 百分比 / 自己定义长度,不能够取负值。假设是圆,将高度和宽度设置相等,而且将border-radius设置为100% 2、IE6,IE7,IE8,opera,…

Swift:闭包
[objc] view plaincopy print?/* 闭包(Closures) * 闭包是自包含的功能代码块,可以在代码中使用或者用来作为参数传值。 * 在Swift中的闭包与C、OC中的blocks和其它编程语言(如Python)中的lambdas类似。 * 闭包…
Ubuntu下使用CMake编译OpenSSL源码操作步骤(C语言)
OpenSSL的版本为1.0.1g,在ubuntu下通过CMake仅编译c代码不包括汇编代码,脚本内容如下: build.sh内容: #! /bin/bashreal_path$(realpath $0) dir_namedirname "${real_path}" echo "real_path: ${real_path}, di…
从词袋到Transfomer,NLP十年突破史
作者 | Zelros AI译者 | 夕颜出品 | AI科技大本营(ID:rgznai100)【导读】通过 Kaggle 竞赛视角,观察 NLP 十年发展简史。根据上下文(这里指句子的最后一个词),“它”可以指“动物”或“街道”。图源 | Goog…

《千只鹤》--[日]川端康成
《千只鹤》,作者是川端康成 故事梗概: 三谷菊治的父亲是个著名的茶道师匠,他生前与一位叫栗本近子的女人有染,后来又 钟情于太田夫人,而且由于后者而疏远了前者,但前者仍出入于三谷家。在三谷先生去 世四年…