FFmpeg中一个线程获取视频流一个线程执行scale测试代码
在https://blog.csdn.net/fengbingchun/article/details/94712986 中介绍过如果usb视频流编码类型为rawvideo则无需进行解码,可直接通过av_read_frame获取视频流然后再通过sws_scale进行像素格式转换,当在高分辨率情况下,有时达不到实时显示,会有卡顿,经分析,性能瓶颈在av_read_frame和sws_scale,由于在https://blog.csdn.net/fengbingchun/article/details/94712986中将此两个函数放在一个线程中串行执行因此导致卡顿。这里将两个函数放在两个独立的线程中并行执行,一个线程负责执行av_read_frame,另一个线程负责执行sws_scale,性能得到大幅提升。
测试代码如下:
common.hpp:
#ifndef FBC_FFMPEG_TEST_COMMON_HPP_
#define FBC_FFMPEG_TEST_COMMON_HPP_#include <chrono>
#include <queue>
#include <mutex>
#include <condition_variable>class Timer {
public:static long long getNowTime() { // millisecondsauto now = std::chrono::system_clock::now();return std::chrono::duration_cast<std::chrono::milliseconds>(now.time_since_epoch()).count();}
};typedef struct Buffer {unsigned char* data;unsigned int length;
} Buffer;class BufferQueue {
public:BufferQueue() = default;~BufferQueue() {}void push(Buffer& buffer) {std::unique_lock<std::mutex> lck(mtx);queue.push(buffer);cv.notify_all();}void pop(Buffer& buffer) {std::unique_lock<std::mutex> lck(mtx);while (queue.empty()) {cv.wait(lck);}buffer = queue.front();queue.pop();}unsigned int size() {return queue.size();}private:std::queue<Buffer> queue;std::mutex mtx;std::condition_variable cv;
};class PacketScaleQueue {
public:PacketScaleQueue() = default;~PacketScaleQueue() {Buffer buffer;while (getPacketSize() > 0) {popPacket(buffer);delete[] buffer.data;}while (getScaleSize() > 0) {popScale(buffer);delete[] buffer.data;}}void init(unsigned int buffer_num = 16, unsigned int buffer_size = 1024 * 1024 * 4) {for (unsigned int i = 0; i < buffer_num; ++i) {Buffer buffer = { new unsigned char[buffer_size], buffer_num};pushPacket(buffer);}}void pushPacket(Buffer& buffer) { packet_queue.push(buffer); }void popPacket(Buffer& buffer) { packet_queue.pop(buffer); }unsigned int getPacketSize() { return packet_queue.size(); }void pushScale(Buffer& buffer) { scale_queue.push(buffer); }void popScale(Buffer& buffer) { scale_queue.pop(buffer); }unsigned int getScaleSize() { return scale_queue.size(); }private:BufferQueue packet_queue, scale_queue;
};#endif // FBC_FFMPEG_TEST_COMMON_HPP_
test_ffmpeg_decode_show.cpp:
#include "funset.hpp"
#include <stdio.h>
#include <string.h>
#include <iostream>
#include <memory>
#include <fstream>
#include <thread>
#include "common.hpp"#ifdef __cplusplus
extern "C" {
#endif#include <libavdevice/avdevice.h>
#include <libavformat/avformat.h>
#include <libavcodec/avcodec.h>
#include <libswscale/swscale.h>
#include <libavutil/mem.h>
#include <libavutil/imgutils.h>#ifdef __cplusplus
}
#endif#include <opencv2/opencv.hpp>namespace {bool packet_scale_flag = true;void get_packet(AVFormatContext* format_ctx, int video_stream_index, PacketScaleQueue& packet_scale)
{//for (int i = 0; i < 100; ++i) {while (packet_scale_flag) {AVPacket packet;//long long t1 = Timer::getNowTime();int ret = av_read_frame(format_ctx, &packet);//long long t2 = Timer::getNowTime();//fprintf(stdout, "av_read frame cost time: %lldms\n", t2 - t1);if (ret >= 0 && packet.stream_index == video_stream_index && packet.size > 0) {Buffer buffer;packet_scale.popPacket(buffer);memcpy(buffer.data, packet.data, packet.size);packet_scale.pushScale(buffer);av_packet_unref(&packet);} else {fprintf(stderr, "##### fail to av_read_frame: %d, %d\n", ret, packet.size);}}
}void get_scale(AVCodecContext* codec_ctx, PacketScaleQueue& packet_scale)
{SwsContext* sws_ctx = sws_getContext(codec_ctx->width, codec_ctx->height, codec_ctx->pix_fmt, codec_ctx->width, codec_ctx->height, AV_PIX_FMT_BGR24, 0, nullptr, nullptr, nullptr);if (!sws_ctx) {fprintf(stderr, "##### fail to sws_getContext\n");}uint8_t *bgr_data[4], *yuyv422_data[4];int bgr_linesize[4], yuyv422_linesize[4];av_image_alloc(bgr_data, bgr_linesize, codec_ctx->width, codec_ctx->height, AV_PIX_FMT_BGR24, 1);av_image_alloc(yuyv422_data, yuyv422_linesize, codec_ctx->width, codec_ctx->height, AV_PIX_FMT_YUYV422, 1);cv::Mat mat(codec_ctx->height, codec_ctx->width, CV_8UC3);const char* winname = "usb video";cv::namedWindow(winname);//for (int i = 0; i < 100; ++i) {while (packet_scale_flag) {Buffer buffer;packet_scale.popScale(buffer);const uint8_t *srcSlice[1];srcSlice[0] = buffer.data;//long long t1 = Timer::getNowTime();sws_scale(sws_ctx, srcSlice, yuyv422_linesize, 0, codec_ctx->height, bgr_data, bgr_linesize);//long long t2 = Timer::getNowTime();//fprintf(stdout, "sws_scale cost time: %lldms\n", t2 - t1);packet_scale.pushPacket(buffer);mat.data = bgr_data[0];cv::imshow(winname, mat);//cv::imwrite("xxx.jpg", mat);int key = cv::waitKey(10);if (key == 27) { packet_scale_flag = false;break;}}cv::destroyWindow(winname);sws_freeContext(sws_ctx);av_freep(&bgr_data[0]);av_freep(&yuyv422_data[0]);
}} // namespaceint test_ffmpeg_stream_show_two_thread()
{avdevice_register_all();#ifdef _MSC_VERconst char* input_format_name = "vfwcap";const char* url = "";
#elseconst char* input_format_name = "video4linux2";const char* url = "/dev/video0";
#endifAVInputFormat* input_fmt = av_find_input_format(input_format_name);AVFormatContext* format_ctx = avformat_alloc_context();int ret = avformat_open_input(&format_ctx, url, input_fmt, nullptr);if (ret != 0) {fprintf(stderr, "fail to open url: %s, return value: %d\n", url, ret);return -1;}ret = avformat_find_stream_info(format_ctx, nullptr);if (ret < 0) {fprintf(stderr, "fail to get stream information: %d\n", ret);return -1;}int video_stream_index = -1;for (unsigned int i = 0; i < format_ctx->nb_streams; ++i) {const AVStream* stream = format_ctx->streams[i];if (stream->codecpar->codec_type == AVMEDIA_TYPE_VIDEO) {video_stream_index = i;fprintf(stdout, "type of the encoded data: %d, dimensions of the video frame in pixels: width: %d, height: %d, pixel format: %d\n",stream->codecpar->codec_id, stream->codecpar->width, stream->codecpar->height, stream->codecpar->format);}}if (video_stream_index == -1) {fprintf(stderr, "no video stream\n");return -1;}AVCodecParameters* codecpar = format_ctx->streams[video_stream_index]->codecpar;const AVCodec* codec = avcodec_find_decoder(codecpar->codec_id);if (!codec) {fprintf(stderr, "fail to avcodec_find_decoder\n");return -1;}if (codecpar->codec_id != AV_CODEC_ID_RAWVIDEO) {fprintf(stderr, "this test code only support rawvideo encode: %d\n", codecpar->codec_id);return -1;}AVCodecContext* codec_ctx = avcodec_alloc_context3(codec);if (!codec_ctx) {fprintf(stderr, "fail to avcodec_alloc_context3\n");return -1;}codec_ctx->pix_fmt = AVPixelFormat(codecpar->format);codec_ctx->height = codecpar->height;codec_ctx->width = codecpar->width;codec_ctx->thread_count = 16;ret = avcodec_open2(codec_ctx, codec, nullptr);if (ret != 0) {fprintf(stderr, "fail to avcodec_open2: %d\n", ret);return -1;}PacketScaleQueue packet_scale;packet_scale.init(16, 1024*1024*4);std::thread thread_packet(get_packet, format_ctx, video_stream_index, std::ref(packet_scale));std::thread thread_scale(get_scale, codec_ctx, std::ref(packet_scale));thread_packet.join();thread_scale.join();avformat_close_input(&format_ctx);fprintf(stdout, "test finish\n");return 0;
}
执行结果如下:
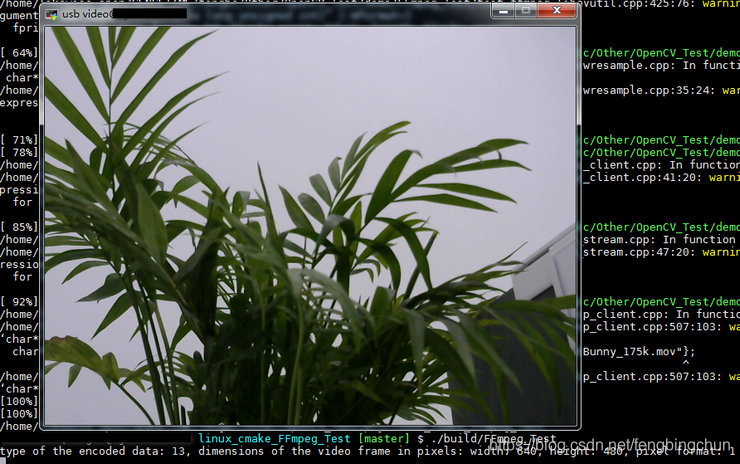
GitHub:https://github.com/fengbingchun/OpenCV_Test
相关文章:

医疗影像处理:去除医疗影像中背景的影响2D/3D【numpy-code】| CSDN博文精选
BDTC大会官网:https://t.csdnimg.cn/q4TY作者 | chestnut--来源 | CSDN博客在医疗影像中特别是CT影像,包含大量的背景,在进行器官分割时,首先去除背景对分割的效果有很好的提升。本博客使用Python处理医疗影像并去除背景的影像。使…

iOS APP提交上架最新流程
iOS APP提交上架最新流程 反复提交的过程中对上架流程熟悉了好多,写篇帖子送给同为菜鸟的你,如果里面有很菜的东西,大牛请自动忽略,毕竟这也是还为菜鸟的我的备忘录呢! 首先得描述一下各个证书的定位,作…

Spring mvc Data Redis—Pub/Sub(附Web项目源码)
一、发布和订阅机制 当一个客户端通过 PUBLISH 命令向订阅者发送信息的时候,我们称这个客户端为发布者(publisher)。 而当一个客户端使用 SUBSCRIBE 或者 PSUBSCRIBE 命令接收信息的时候,我们称这个客户端为订阅者(subscriber)。 为了解耦发布者(publish…

iOS分析崩溃日志
前言 iOS分析定位崩溃问题有很多种方式,但是发布到AppStore的应用如果崩溃了,我们该怎么办呢?通常我们都会在系统中接入统计系统,在系统崩溃的时候记录下崩溃日志,下次启动时将日志发送到服务端,比较好的第…

海思3559A上编译FFmpeg源码操作步骤
1. 从https://github.com/FFmpeg/FFmpeg/releases 下载你需要的版本; 2. 因为ffmpeg编译选项较多,为了更方便的了解有哪些选项,可将编译选项写入到一个文本文件configure_help.txt中,执行: ./configure --help > …
不到顶会现场也能听论文讲解?这个视频集合网站值得收藏
BDTC大会官网:https://t.csdnimg.cn/q4TY作者 | 刘畅出品 | AI科技大本营(ID:rgznai1000)最近跟身边的硕士生、博士生聊天,发现有一个共同话题,大家都想要知道哪款产品能防止掉头发?养发育发已经成了茶余饭…

通过cat /proc/cpuinfo看处理器特点
2019独角兽企业重金招聘Python工程师标准>>> 在我的服务器上执行cat /proc/cpuinfo得到如下信息(摘录最后一项,从0-23共24项): processor: 23:超线程技术的虚拟逻辑核第24个 vendor_id: GenuineIntel&#…

2016cocoapods安装流程及使用
一:参考安装流程:http://blog.csdn.NET/showhilllee/article/details/38398119/。 二:我的安装步骤。 1:安装cocoapods需要ruby,先查看ruby环境是不是最新版本。如果不是最新版本,需要先升级到最新版本。在终端输入以下…
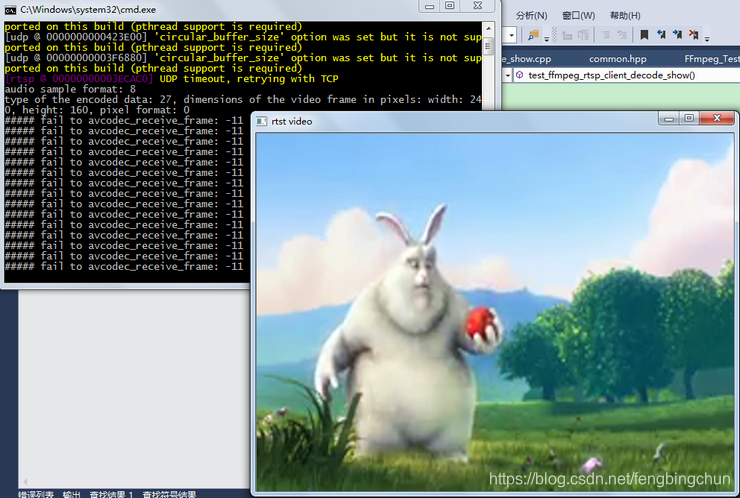
FFmpeg中拉取rtsp视频流并缩放显示测试代码
之前在https://blog.csdn.net/fengbingchun/article/details/92198857中给出过仅拉取rtsp视频流的测试代码,这里在此代码的基础上进行扩充,包括设置使用多线程进行解码,使用sws_scale函数进行图像格式转换和缩放,并通过OpenCV进行…

全面分析阿里数据中台,小白也能看懂 | CSDN原力计划
扫码参与CSDN“原力计划”作者 | yuanziok来源 | CSDN原力计划获奖作品数据中台被誉为大数据的下一站,由阿里兴起,核心思想是数据共享,2015年阿里提出“大中台,小前台”的策略。2018 年因为“腾讯数据中台论”,中台再度…
【Stage3D学习笔记续】山寨Starling(八):核心优化(批处理)的实现
批处理是使GPU进行高效绘制的一种技术手段,也是整个渲染流程中最核心的技术,到目前为止我们并没有使用到这种技术手段,下面我们看看我们现在的渲染机制。 先想一想我们最开始是怎么向GPU绘制一幅图像的,可以回头查看Stage3D学习笔…
MBProgressHUD 使用详解
MBProgressHUD是一个显示HUD窗口的第三方类库,用于在执行一些后台任务时,在程序中显示一个表示进度的loading视图和两个可选的文本提示的HUD窗口。我想最多是应用在加载网络数据的时候。其实苹果官方自己有一个带有此功能的类UIProgressHUD,只…
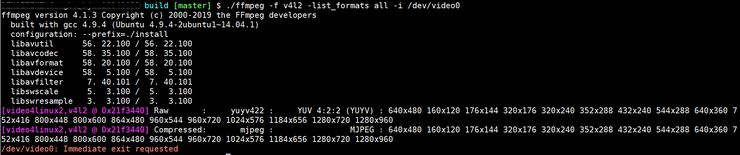
V4L2获取usb视频流测试代码
Video4Linux2(Video for Linux Two, 简称V4L2)是Linux中关于视频设备的驱动框架,为上层访问底层的视频设备提供统一接口。V4L2主要支持三类设备:视频输入输出设备、VBI设备和Radio设备,分别会在/dev目录下产生videoX、vbiX和radioX设备节点&a…

深度学习渐趋冷静,为何图形计算却逆势反涨?
不知不觉,2019 年的进度条已经快撑不住了 ▓▓▓▓▓▓▓▓▓▓▓▓▓░░ 88%。就像这个进度条一样,人工智能的发展也绝不是一蹴而就的事,而是一步一个脚印逐渐发展,最后达成某个目标。近年来,深度学习领域的技术发展…
数字图像处理课设
2019独角兽企业重金招聘Python工程师标准>>> 对于整个窗体的设计,菜单组件(MenuStrip)和工具条(ToolStrip)来添加相应的功能事件当然还有右击鼠标就能弹出相应的属性框,也是使用了叫contextMenuStrip的组件…
Swift3.0带来的变化汇总
var string "Hello-Swift" //获取某个下标后一个下标对应的字符 char"e" //swift2.2 //var char string[startIndex.successor()] //swift3.0 var char string[string.index(after: startIndex)] //获取某个下标前一个下标对应的字符 char2 "t&qu…
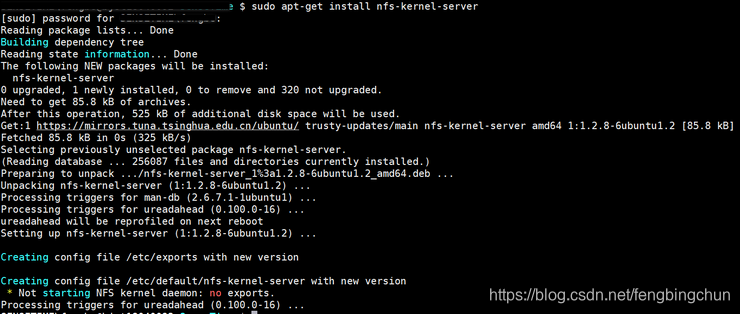
通过配置NFS使Ubuntu和海思3559A板子共享目录
之前在Ubuntu和海思3559A板子之间来回拷贝文件都是用的scp命令,不是很方便,这里通过配置NFS来实现它们之间共享目录,操作步骤如下: 1. 在Ubuntu上安装NFS,执行以下命令,执行结果如下: sudo ap…
22w+的人选择了这款蓝牙耳机
01现在有两个电子产品,应该是你们现在必有的,手机和电脑。但还有一样不可缺少的电子产品,那就是耳机。不管喜不喜欢带,反正你手里肯定有一个,应该没人不认可我说的这个话吧。反正我去哪都会带着耳机,听不听…
自定义数字格式字符串输出示例
自定义数字格式字符串输出示例 MSDN 下表阐释了通过给特定数据类型和值应用某些自定义数字格式字符串来创建的输出。输出是通过使用 ToString 方法和美国英语 (en-US) 区域性生成的。 “格式字符串”列指示格式字符串,“数据类型”列指示所用的数据类型,…
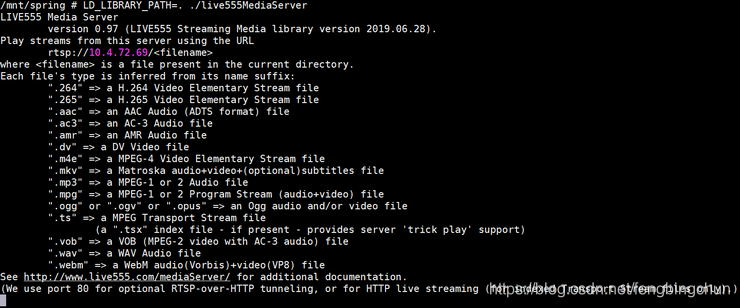
海思3559A上编译LIVE555源码操作步骤
1. 从http://www.live555.com/liveMedia/public/ 下载live.2019.06.28.tar.gz,并解压缩; 2. 生成静态库,拷贝一份config.armlinux,取名为config.hi3559a,修改后的内容如下: CROSS_COMPILE? /opt/hisi-linux/x86-ar…
基于海康机器视觉算法平台的对位贴合项目个人理解 | CSDN原力计划
扫码参与CSDN“原力计划”作者 | 果汁分你一半哈哈来源 | CSDN原力计划获奖作品都说“纸上得来终觉浅,绝知此事要躬行”,可惜咱没这条件呀,没项目咱也不能干坐着呀,那咱发挥主观能动性,咱不是学机械的么,还…
解决Swift中present(uiImagePickerController,animated: true,completion: nil)闪退的问题
swift中开发选择图片上传,会使用到Tap Gesture Recognizer控件,对应 UITapGestureRecognizer API,以下是代码示例(取自IOS developer library): IBAction func selectImageFromPhotoLibrary(_ sender: UIT…
测试发现equals和hashCode与书上描述的不一样
2019独角兽企业重金招聘Python工程师标准>>> 如果两个对象根据equals()方法比较是相等的,那么调用这两个对象中任意一个对象的hashCode方法都必须产生同样的整数结果。但是现实情况,两者产生的hashCode值却不相等求解? 转载于:htt…
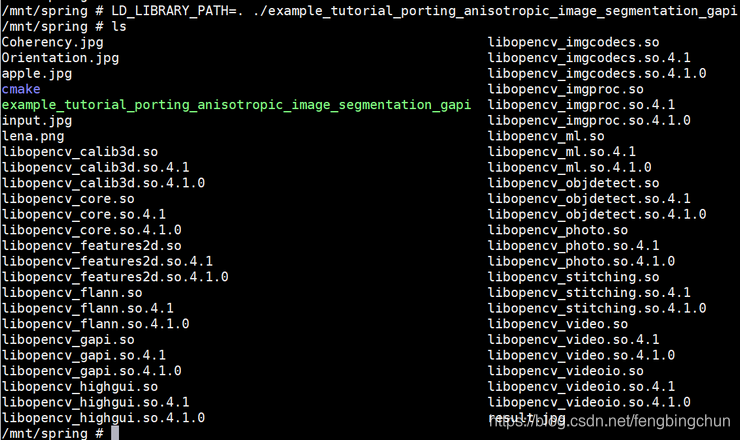
海思3559A上编译OpenCV4.1.0源码操作步骤
1. 从https://github.com/opencv/opencv/releases 下载opencv源码opencv-4.1.0.zip并解压缩; 2. 修改最顶层的CMakeLists.txt,在第658行加入一条语句如下,fix error: pngstruct.h:30:18: fatal error: zlib.h: No such file or directory #i…

如何从零开始设计与开发一款通用模型预测调度系统 | 干货分享
机器学习模型从训练导出到生成环境部署,这个过程中涉及大量工作,会面临着各种问题与挑战,比如不断丰富的业务场景,系统需要负载种类繁多的神经网络,预测任务不均匀等,然而企业拥有的计算资源(如…
闲来无事,总结 Xcode常用快捷键
IOS模拟器home键:Command Shift H 构建应用程序:Command + B 运行app:Command + R 清理工程:Command + Shift + K 打开Xcode首选项:Command + ÿ…

openNebulafrontEnd ComputeNode 配置记录
openNebulafrontEnd ComputeNode 配置记录 1,OpenNebula nfs(file system shared) for image datastore; openNebula computeNode挂载,如果frontend与compute在同一台服务器则不用做NFS shared; 3,make raw image 4,配置过程中配置服务器网桥报错 报错信息 bringing up interfa…

武汉大学提出ARGAN:注意力循环生成对抗模型用于检测、去除图像阴影 | ICCV 2019...
作者 | 王红成出品|AI科技大本营(ID:rgznai100)【导读】如何去除一张图像中的阴影部分?在ICCV 2019会上,武汉大学的一篇论文针对这一问题提出了一种用于阴影检测和去除的注意循环生成对抗网络——ARGAN。论…
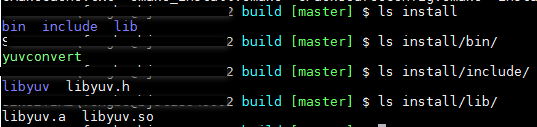
海思3559A上编译libyuv源码操作步骤
1. 下载libyuv源代码,执行: git clone https://chromium.googlesource.com/libyuv/libyuv 2. 通过CMakeLists.txt编译生成库,build.sh脚本内容如下: cmake \-DCMAKE_BUILD_TYPERELEASE \-DCMAKE_C_COMPILER/opt/hisi-linux/x86…
Cocoapods的安装以及使用(2)
Cocoapods 在网上看博客,看了好多次,都没有学会cocoapods,今天上午浪费了一上午的时间,终于算是学会了。其实也是很简单的。 iOS 新版 CocoaPods 安装流程 1.换掉现有Ruby默认源(由于好多人都没有翻墙,所…