golang 命令行_如何使用Golang编写快速有趣的命令行应用程序
golang 命令行
by Peter Benjamin
彼得·本杰明(Peter Benjamin)
如何使用Golang编写快速有趣的命令行应用程序 (How to write fast, fun command-line applications with Golang)
A while back, I wrote an article about “Writing Command-Line Applications in NodeJS”.
不久前,我写了一篇有关“ 在NodeJS中编写命令行应用程序 ”的文章。
I love JavaScript, Node.JS, npm, and the whole ecosystem. To me, nothing feels more natural than writing modern JavaScript applications with ES6 or TypeScript.
我喜欢JavaScript,Node.JS,npm和整个生态系统。 对我来说,没有什么比使用ES6或TypeScript编写现代JavaScript应用程序更自然的了。
But, lately, I’ve needed to leverage multi-processor (parallel) concurrency. Due to NodeJS’s single-threaded event loop, NodeJS is concurrent, but not parallel. NodeJS does not support parallel concurrency “out of the box”.
但是,最近,我需要利用多处理器(并行)并发。 由于NodeJS的单线程事件循环,NodeJS是并发的,但不是并行的。 NodeJS不支持“开箱即用”的并行并发。
为什么去? (Why Go?)
The Go language (often referred to as “Golang”), will utilize all cores of a machine by default. Go also brings the following benefits:
Go语言(通常称为“ Golang”)在默认情况下将利用计算机的所有内核。 Go还带来以下好处:
- Type safety (e.g. you cannot pass a string to a function that’s expecting a number — the compiler will complain)类型安全性(例如,您不能将字符串传递给需要数字的函数,编译器会抱怨)
- Easy refactoring (e.g. changing a function or variable name will propagate that change throughout the project)易于重构(例如,更改函数或变量名称将在整个项目中传播该更改)
- Speed and performance out-of-the-box开箱即用的速度和性能
- Procedural programming paradigm is certainly much easier to reason about过程编程范例当然更容易推理
- Easy deployments (just deploy the single binary file and done!)易于部署(只需部署单个二进制文件并完成!)
- Standard style (Go is opinionated about formatting and comes with tooling to automate this)标准样式(Go对格式存有疑虑,并附带可自动执行格式化的工具)
- … and many more!… 还有很多!
Note: It’s important for new developers not to be intimidated by new concepts. Embrace that uncomfortable feeling you get when you face a new challenge. It means you’re learning, growing, and improving. A key trait of successful developers is persistence.
注意:新开发者不要被新概念吓倒,这一点很重要。 面对新挑战时,您会感到不舒服。 这意味着您正在学习,成长和进步。 成功的开发人员的一个关键特征是坚持不懈 。
Here’s what you’ll learn by following along with this article:
以下是与本文一起学习的内容:
- Namespaces命名空间
- Imports进口货
- Variables变数
- Structs结构
- Functions功能
- References and Pointers参考和指针
If conditions
如果条件
For loops
对于循环
入门 (Getting Started)
In order to avoid bloating this article by having to support different commands for 3 different platforms, I will assume that you’re following along on Cloud9. Cloud9 is an online IDE (integrated development environment) — basically, it’s awesome sauce!
为了避免因必须为3个不同的平台支持不同的命令而使本文肿,我假设您正在Cloud9上关注 。 Cloud9是一个在线IDE(集成开发环境)-基本上,这太棒了!
安装 (Install)
Go already comes pre-installed on Cloud9’s blank Ubuntu workspaces. So, you can skip this step.
Go已经预先安装在Cloud9的空白U Buntu工作区中。 因此,您可以跳过此步骤。
If you want to follow along on your local computer, you can download and install Go.
如果要在本地计算机上继续学习,可以下载并安装Go 。
建立 (Setup)
Go requires you to setup your environment in a particular way.
Go要求您以特定方式设置环境。
You must have a home for all your Go projects. Go calls this home a workspace. The workspace must contain 3 directories: bin (for binaries), pkg, and src (for source code):
您必须拥有所有Go项目的家。 Go将此家称为工作区 。 工作空间必须包含3个目录: bin (对于二进制文件), pkg和src (对于源代码):
$ pwd
/home/ubuntu/workspace$ mkdir {bin,src,pkg}
Go assumes that each project lives in its own repository, so we need to further organize our src directory into:
Go假定每个项目都位于其自己的存储库中,因此我们需要将src目录进一步组织为:
$ mkdir -p src/github.com/<your_github_username>/<project_name>Note: If you’re a gitlab or a bitbucket user, simply change github.com with the appropriate name (e.g gitlab.com or bitbucket.org respectively).
注意:如果您是gitlab或bitbucket用户,只需使用适当的名称更改github.com (例如分别为gitlab.com或bitbucket.org )。
There is a reason for this directory structure. Go doesn’t have a centralized code repository, like NPM, or RubyGems. Go can fetch source code from online VCS (version control systems) directly and, when it does, it will download the source code in the correct path. For example, the following command:
此目录结构是有原因的。 Go没有像NPM或RubyGems这样的集中式代码存储库。 Go可以直接从在线VCS(版本控制系统)中获取源代码,并且当这样做时,它将以正确的路径下载源代码。 例如,以下命令:
$ go get golang.org/x/tools/cmd/goimportswill tell Go to contact golang.org, then download the source under:
会告诉Go联系golang.org,然后在以下位置下载源代码:
<your_go_workspace>/src/golang.org/x/tools/cmd/goimportsWhich, in return, enables Go to find third-party packages and libraries when you import them into your project.
作为回报,当您将它们导入到项目中时,Go可以使Go查找第三方软件包和库。
Lastly, we need to setup our GOPATH environment variable. In Cloud9 Ubuntu, just add the following at the end of .bashrc:
最后,我们需要设置我们的GOPATH环境变量。 在Cloud9 Ubuntu中,只需在.bashrc的末尾添加以下内容:
# in ~/.bashrc
...
export GOPATH="/home/ubuntu/workspace"
export PATH="$PATH:$GOPATH/bin"
Then, save the file and run the following command in the terminal:
然后,保存文件并在终端中运行以下命令:
source ~/.bashrc- To verify that Go is working on Cloud9 and that our GOPATH is set up correctly:要验证Go在Cloud9上正常工作,并且我们的GOPATH设置正确,请执行以下操作:
$ go version
go version go1.6 linux/amd64$ go get golang.org/x/tools/cmd/goimports
$ goimports --help
usage: goimports [flags] [path ...]
...
For more information on Golang setup, visit the official “Getting Started” doc.
有关Golang设置的更多信息,请访问官方的“入门”文档 。
我们走吧! (Let’s Go!)
Our Goal: to build a minimal CLI app to query GitHub users.
我们的目标:构建一个最小的CLI应用程序以查询GitHub 用户 。
Let’s create a repo for this project on Github.com. Call it gitgo. Then clone it:
让我们在Github.com上为此项目创建一个仓库。 称之为gitgo 。 然后克隆它:
$ cd $GOPATH/src/github.com/<your_github_username>
$ git clone git@github.com:<your_github_username>/gitgo.git
Go入门 (A Go primer)
Let’s create our first file, call it main.go, and write the following code (don’t worry, we’ll cover each line):
让我们创建第一个文件,将其命名为main.go ,然后编写以下代码(不用担心,我们将覆盖每一行):
package mainimport "fmt"func main() {fmt.Println("Hello, World")
}
分解…… (Breaking it down…)
package main- This is a namespace declaration. Namespaces are just a way for us to group logic and functionality. You’ll see how namespaces will help us a little bit later.这是一个名称空间声明。 命名空间只是我们对逻辑和功能进行分组的一种方式。 稍后,您将看到名称空间将如何帮助我们。
The word main is a keyword. It tells the GO compiler that our code is intended to run as an application not as a library. The difference is that applications are used directly by our users, whereas libraries can only be imported and used by other pieces of code.
单词main是一个关键字。 它告诉GO编译器我们的代码旨在作为应用程序而非库运行 。 区别在于应用程序直接由我们的用户使用,而库只能由其他代码段导入和使用。
Import “fmt”Import statement. This imports the “fmt” (short for “format”) package from the standard library.
导入声明。 这将从标准库中导入“ fmt ”(“ format”的缩写)包。
func main()func is the keyword to define or declare a function in GO.
func是在GO中定义或声明函数的关键字。
The word main is a special keyword in GO. It tells the GO compiler that our application starts here!
“ main ”一词是GO中的特殊关键字。 它告诉GO编译器我们的应用程序从这里开始!
fmt.Println(“Hello, World”)This is pretty self-explanatory. We’re using the Println function from the fmt package we imported earlier to… well… print line.
这是不言自明的。 我们正在使用之前导入到……好……打印行的fmt包中的Println函数。
Notice that the first letter of function Println is upper-case. This is GO’s way of exporting variables, functions, and other stuff. If the first letter of your function or variable is upper-case, it means you’re making it accessible to external packages or namespaces.
请注意,函数Println的首字母是大写。 这是GO导出变量,函数和其他内容的方式。 如果函数或变量的首字母是大写字母,则意味着您可以通过外部包或名称空间访问它。
让我们运行它! (Let’s Run It!)
$ go run main.go
Hello, World
Awesome! You’ve written your first GO application.What just happened? Well, GO compiled AND executed the application in memory! Pretty fast, huh?
太棒了! 您已经编写了第一个GO应用程序。发生了什么? 好吧,GO编译并在内存中执行了应用程序! 相当快吧?
让我们建造它! (Let’s Build It!)
$ go build     # generates executable binary in your local directory
$ ./gitgo
Hello, World
Sweet! You’ve just built your first GO application. You can send just thatone file to your friends and family and they can run it and get the same results. Of course, if they’re running Windows, this application will not work, because we built it for Linux/Unix. So, let’s build it for Windows:
甜! 您刚刚构建了第一个GO应用程序。 您可以仅将一个文件发送给您的朋友和家人,他们可以运行该文件并获得相同的结果 。 当然,如果他们正在运行Windows,则此应用程序将无法运行,因为我们是针对Linux / Unix构建的。 因此,让我们为Windows构建它:
$ GOOS=windows go build -o forecaster.exe main.goThere you go! Now, you’ve created an application for Windows. Pretty neat, huh?
你去! 现在,您已经为Windows创建了一个应用程序。 很整洁吧?
In fact, you can cross-compile that application to a wide range of platforms (e.g. Windows, Linux, OS X) and architectures (e.g. i386, amd64). You can see the full list here: https://golang.org/doc/install/source#environment
实际上,您可以将该应用程序交叉编译到各种平台(例如Windows,Linux,OS X)和体系结构(例如i386,amd64)。 您可以在此处查看完整列表: https : //golang.org/doc/install/source#environment
让我们安装吧! (Let’s Install It!)
If you want your application to be accessible from anywhere on your system:
如果您希望可以从系统上的任何位置访问应用程序:
$ go installThat’s it. Now, you can call your application from anywhere:
而已。 现在,您可以从任何地方调用您的应用程序:
$ gitgo
Hello, World
At this point, it would be a good idea to check your work into GitHub:
此时,将您的工作签入GitHub是一个好主意:
$ git add .
$ git commit -am "Add main.go"
$ git push
Awesome! But so far, our application doesn’t do anything really. This exercise was just meant to get our feet wet and give us an idea of what it’s like to code in Go.
太棒了! 但是到目前为止,我们的应用程序并没有真正做任何事情。 这项练习的目的只是弄湿我们,让我们对使用Go进行编码的感觉有所了解。
现在,让我们深入了解我们的CLI应用程序! (Now, let’s dive into our CLI app!)
We envision the interaction with our app to look something like
我们设想与应用程序的交互看起来像
$ gitgo -u pmbenjamin
# or...
$ gitgo --user pmbenjamin,defunkt
Now that we have a direction, let’s start creating those flags.
现在我们有了一个方向,让我们开始创建这些标志。
We could use the flag standard library in Go, but, with trial-and-error and a little bit of Googling, you will discover that the standard flag library does not support the long-flag syntax (via double-dash). It only supports single dashes.
我们可以在Go中使用标记标准库,但是经过反复试验和一点点的Google搜索,您会发现标准标记库不支持长标记语法(通过双破折号)。 它仅支持单破折号。
Luckily, someone already solved this with a GO library. Let’s download it:
幸运的是,已经有人使用GO库解决了这个问题。 让我们下载它:
$ go get github.com/ogier/pflagNow, let’s import it in our project:
现在,让我们将其导入我们的项目中:
import ("github.com/ogier/pflag"
)
In GO, the last element of the import statement is the namespace we use to access library’s functions:
在GO中,import语句的最后一个元素是我们用来访问库函数的名称空间:
func main() {pflag.SomeFunction()
}
If we prefer to use a different name, we can alias our package names at import:
如果我们希望使用其他名称,则可以在导入时为包名称加上别名:
import (flag "github.com/ogier/pflag"
)
This will allow us to do:
这将使我们能够:
func main(){flag.SomeFunction()
}
Which is what you see in the official examples.
您可以在官方示例中看到这一点。
Let’s create the variables that will hold the data from the user input:
让我们创建将保存来自用户输入的数据的变量:
import (...)import (
...
)// flags
var (user  string
)func main() {
...
}
A couple of things to point out here:
这里有两点要指出:
We’ve declared our variables outside of
func main(). This allows us to reference these variables in other functions besidefunc main(). This might feel weird to you, because you don’t want to pollute the global namespace. But, trust me, this is perfectly OK in Go. We’re scoped just to the current namespace.我们已经在
func main()之外声明了变量。 这使我们可以在func main()之外的其他函数中引用这些变量。 您可能觉得这很奇怪,因为您不想污染全局名称空间。 但是,请相信我,这在Go中完全可以。 我们仅适用于当前名称空间。Go is a statically-typed language, which means that you have to specify the type of data that will be stored in each variable (hence the
stringkeywords)Go是一种静态类型的语言,这意味着您必须指定将存储在每个变量中的数据类型(因此使用
string关键字)
Now that you’ve declared your variables, let’s declare your flags and bind/map each flag to the appropriate variable:
现在,您已经声明了变量,让我们声明您的标志并将每个标志绑定/映射到适当的变量:
import (...
)// flags
var (...
)func main() {flag.Parse()
}func init() {flag.StringVarP(&user, "user", "u", "", "Search Users")
}
分解…… (Breaking it down…)
func init()init is a special function in GO. GO executes applications in the following order:
init是GO中的特殊功能。 GO按以下顺序执行应用程序:
1. Imports statements
1.进口声明
2. Package-level variables/constants declarations
2.包级变量/常量声明
3. init() function
3. init()函数
4. main() function (if the project is to be treated as an app)
4. main()函数(如果将项目视为应用程序)
- All we are trying to do is initialize the flags once我们要做的就是将标志初始化一次
flag.StringVarP(&user, "user", "u", "", "Search Users")From the flag package/library, we are using the StringVarP() function.
从标志包/库中,我们正在使用StringVarP()函数。
StringVarP()does 3 things:StringVarP()做三件事:1. it tells GO that we will be evaluating expecting a
1.它告诉GO我们将评估期望
String,
字符串 ,
2. it tells GO that we want to bind a
2.它告诉GO我们要绑定一个
Variable to this flag, and
瓦尔 iable到这个标志,并
3. it tells GO that we want to have a
3.它告诉GO我们想要一个
Posix-compliant flag (e.g. double-dash and single-dash flag)
P兼容OSIX标志(例如双破折号和单破折号标记)
StringVarP()takes 5 arguments in this order:StringVarP()以此顺序接受5个参数:1. the variable we want to bind this flag to,
1.我们要将此标志绑定到的变量,
2. the double-dash flag,
2.双破折号
3. the single-dash flag,
3.单破折号标志,
4. the default value to use if flag is not explicitly called,
4.如果未显式调用标志,则使用默认值,
5. and the description of this flag
5.和该标志的描述
&usermeans that we are passing a reference (a.k.a. memory address) of the user variable. OK, before you start freaking out about references and memory addresses, let’s just break this concept down further…&user表示我们正在传递用户变量的引用(即内存地址)。 好吧,在开始迷恋引用和内存地址之前,让我们进一步分解一下这个概念……- In many languages, like JavaScript and Ruby, when you define a function that takes an argument then call the function and pass it an argument, you’re essentially creating a new copy of the variable that you’re passing in as an argument. But, there are times when you don’t want to pass a copy of data. Sometimes, you need to operate on the original data.在许多语言中,例如JavaScript和Ruby,当您定义一个接受参数的函数,然后调用该函数并将其传递给参数时,实际上就是在创建要作为参数传递的变量的新副本。 但是,有时您不想传递数据副本。 有时,您需要对原始数据进行操作。
Hence, if you pass the data by value, you’re essentially creating another copy of the data and passing that copy around, whereas if you pass the variable by reference (aka by its memory address), then you’re passing the original data.
因此,如果您通过value传递数据,则实际上是在创建数据的另一个副本并传递该副本,而如果您通过引用传递变量 (又称其内存地址),则您要传递原始数据。
- In GO, you can get the memory address of almost anything by pre-pending the ampersand (&) symbol.在GO中,可以通过在前面加上与号(&)符号来获取几乎所有内容的内存地址。
flag.Parse()- Parse the flags.解析标志。
让我们测试一下我们的工作… (Let’s test our work…)
$ go run main.go # nothing happens
$ go run main.go --help
Usage of /tmp/go-build375844749/command-line-arguments/_obj/exe/main:-u, --user stringSearch Users
exit status 2
Great. It seems to be working.
大。 它似乎正在工作。
Notice the weird /tmp/go-build… path? That’s where our application was compiled and executed dynamically by Go. Let’s build it and test it:
注意到奇怪的/ tmp / go-build…路径了吗? 那是我们的应用程序由Go动态编译和执行的地方。 让我们对其进行构建并对其进行测试:
$ go install -v
$ gitgo --help
Usage of gitgo:-u, --user stringSearch Users
Pro-Tip: When building or compiling binaries, always prefer go install over go build. go install will cache non-main packages into $GOPATH/pkg , thus resulting in faster build times than go build.
Pro-Tip:构建或编译二进制文件时,始终喜欢go install不是go build 。 go install将非主要软件包缓存到$GOPATH/pkg ,因此生成时间比go build快。
核心逻辑 (Core Logic)
Now that we’ve initialized our flags, let’s start implementing some core functionality:
现在我们已经初始化了标志,让我们开始实现一些核心功能:
func main() {// parse flagsflag.Parse()// if user does not supply flags, print usage// we can clean this up later by putting this into its own functionif flag.NFlag() == 0 {fmt.Printf("Usage: %s [options]\n", os.Args[0])fmt.Println("Options:")flag.PrintDefaults()os.Exit(1)}users = strings.Split(user, ",")fmt.Printf("Searching user(s): %s\n", users)}Note that there are no parentheses around if conditionals in Go.
请注意, 如果 Go中有条件,则没有括号。
让我们测试一下我们的工作… (Let’s test our work…)
$ go install
# github.com/pmbenjamin/gitgo
./main.go:15: undefined: fmt in fmt.Printf
./main.go:15: undefined: os in os.Args
./main.go:16: undefined: fmt in fmt.Println
./main.go:18: undefined: os in os.Exit
./main.go:21: undefined: fmt in fmt.Printf
./main.go:24: undefined: fmt in fmt.Printf
I intentionally wanted to show you the experience of the Go compiler when it complains that you did something wrong. It’s important that we’re able to understand these error messages to fix our code.
我有意向您展示Go编译器的经验,当它抱怨您做错了什么时。 重要的是我们能够理解这些错误消息以修复我们的代码。
So, the compiler is complaining that we’re using the Println function from the fmt package, but that package is undefined. Same with Exit from os package.
因此,编译器抱怨我们正在使用Println fmt包中的函数,但该包未定义。 与Exit相同 从操作系统包。
Turns out, we just forgot to import some packages! In a normal IDE (e.g. Atom, VS-Code, vim, emacs …etc), there are plugins that you can install in your editor that will dynamically and automatically import any missing packages! So, you don’t have to import them manually. How awesome is that?
原来,我们只是忘了导入一些软件包! 在普通的IDE中(例如Atom,VS-Code,vim,emacs等),您可以在编辑器中安装一些插件,这些插件可以动态地自动导入所有丢失的软件包! 因此,您不必手动导入它们。 那有多棒?
For now, let’s add the correct import statements ourselves. Remember the goimports tool we installed earlier?
现在,让我们自己添加正确的import语句。 还记得我们之前安装的goimports工具吗?
$ goimports -w main.go # write import stmts back in main.go!And re-build and re-test app:
并重新构建和重新测试应用程序:
$ go install$ gitgo
Usage: gitgo [options]
Options:-u, --user stringSearch Users$ gitgo -u pmbenjamin
Searching user(s): [pmbenjamin]
Yes! It works!
是! 有用!
What if the user wants to query multiple users?
如果用户要查询多个用户怎么办?
$ gitgo -u pmbenjamin,defunkt
Searching user(s): [pmbenjamin defunkt]
That seems to work too!
这似乎也可以!
Now, let’s start getting actual data. It’s always good practice to encapsulate different functionalities into separate functions to keep our code base clean and modular. You can put that function in main.go or in another file. I prefer a separate file, because it will make it our application modular, re-usable, and easily testable.
现在,让我们开始获取实际数据。 将不同的功能封装到单独的功能中始终是一个好习惯,以保持我们的代码库干净和模块化。 您可以将该函数放在main.go或另一个文件中。 我更喜欢一个单独的文件,因为它将使我们的应用程序模块化,可重复使用且易于测试。
For the sake of time, here is the code along with comments to explain.
为了节省时间,下面是代码和注释进行说明。
https://gist.github.com/petermbenjamin/8aeece9305bb44282799384365ab3a3c#file-user-go
https://gist.github.com/petermbenjamin/8aeece9305bb44282799384365ab3a3c#file-user-go
要点是这样的: (The gist is this:)
In
user.go, we send an HTTP GET request with the username在
user.go,我们发送带有用户名的HTTP GET请求Then, we read the response body and store the data in
resp.然后,我们读取响应主体并将数据存储在
resp。It’s best practice to close the response body with
deferstatement to clean up after our function has failed or completed.最佳做法是在函数失败或完成后,使用
defer语句关闭响应主体以进行清理。Then, we parse the JSON data with
json.Unmarshalfunction, store the parsed user data inuservariable, and return it.然后,我们使用
json.Unmarshal函数解析JSON数据,将解析后的用户数据存储在user变量中,然后将其返回。In
main.go, we loop over theusersarray, executegetUser()for each user, and output the data we want.在
main.go,我们遍历users数组,为每个用户执行getUser(),然后输出所需的数据。
未来增强 (Future Enhancements)
This project was just a quick introductory guide for beginners. I know this project can be written a bit more efficiently.
该项目只是针对初学者的快速入门指南。 我知道这个项目可以写得更有效率。
In my next article, I plan on diving into new concepts, like concurrency (GoRoutines), channels, testing, vendoring, and writing Go Libraries (instead of applications).
在下一篇文章中,我计划深入研究新概念,例如并发(GoRoutines),渠道,测试,供应和编写Go库(而不是应用程序)。
In the meantime, the full project code can be found here.
同时,可以在此处找到完整的项目代码。
Feel free to contribute by opening GitHub issues or submitting PRs.
欢迎打开GitHub问题或提交PR进行贡献。
翻译自: https://www.freecodecamp.org/news/writing-command-line-applications-in-go-2bc8c0ace79d/
golang 命令行
相关文章:

【Pyhon 3】: 170104:优品课堂: GUI -tkinter
from tkinter import * root Tk() root.title("BMS 图书管理系统") lbl Label(root, text书名:)#(1) lbl.pack() #(2) lbl.place(45.50) #(3) web 早期布局,, 常见。 lbl.grid(row0, column0) # web 早期布局,, 常见…
swift Sequence 和 SubSequence
1 序列 Sequence 序列协议是集合类型结构中的基础。 一个序列是代表有一系列具有相同类型的值,并且对这些值进行迭代。 协议中主要有两个参数,一个是元素Element,一个就是迭代器Iterator /// A type representing the sequences elements.…
PDF数据提取------1.介绍
1.关于PDF文件 PDF(Portable Document Format的简称,意为“便携式文件格式”)是由Adobe Systems在1993年用于文件交换所发展出的文件格式。它的优点在于跨平台、能保留文件原有格式(Layout)、开放标准,能自…
javascript_治愈JavaScript疲劳的研究计划
javascriptby Sacha Greif由Sacha Greif 治愈JavaScript疲劳的研究计划 (A Study Plan To Cure JavaScript Fatigue) Like everybody else, I recently came across Jose Aguinaga’s post “How it feels to learn JavaScript in 2016”.像其他所有人一样,我最近遇…
SQL Server中SELECT会真的阻塞SELECT吗?
在SQL Server中,我们知道一个SELECT语句执行过程中只会申请一些意向共享锁(IS) 与共享锁(S), 例如我使用SQL Profile跟踪会话86执行SELECT * FROM dbo.TEST WHERE OBJECT_ID 1 这个查询语句,其申请、释放的锁资源的过程如下所示: 而且从最常见…
appium IOS真机测试
看了 http://blog.csdn.net/today520/article/details/36378805 的文章,终于在真机上面测试成功。 由于没有开发者账号,不能发布应用到机器上面。所以就用了网易新闻的客户端来测试 没有开发者账号,貌似不能真正的开始测试。只能启动一下客户…
siwft 写时复制 Copy-On-Write
写时复制 Copy-On-Write 1 定义 在siwft 标准库中,Array,Dictionary,Set这样的集合类型是通过写时复制来实现的。 import Foundationvar a1 [1,2,3]; var a2 a1;// 将a1 复制给 a2,地址打印结果是相同的// 0x1--0x2--0x3 pri…
超越技术分析_超越技术面试
超越技术分析by Jaime J. Rios由Jaime J. Rios 超越技术面试 (Transcending the Technical Interview) “Wow. What a chastening and shameful experience that was.”“哇。 那真是一种令人st目结舌的经历。” This was my immediate mental reaction after I completed my…
轻松获取LAMP,LNMP环境编译参数配置
轻松获取LAMP,LNMP环境编译参数配置 作者:Mr.Xiong /分类:系统管理 字号:L M S大家是否遇到过去了新公司,公司内的LAMP,LNMP等所有的环境都是配置好的(已经在提供服务了),公司又没有留下部署文档…
java内存分配--引用
栈内存 对象地址 堆内存 存放属性 public class TestDemo{ public static void main(String args[]){ Person perA new Person(); //出现new百分之百就是要申请堆内存 perA.name"王强"; //perA 地址存放在栈内存中,同一块内存只能存…
iOS NSObject对象内存大小
NSObject内存大小 类的本质是结构体 无须赘述 struct NSObject { Class isa; };一个类对象的实例大小是8个字节 之所以打印出的16个字节,是因为一个NSObject 最小开辟16个字节 NSObject *obj [[NSObject alloc]init];// class_getInstanceSize 这是runtime 获…
客户端渲染 服务端渲染_这就是赢得客户端渲染的原因
客户端渲染 服务端渲染A decade ago, nearly everyone was rendering their web applications on the server using technologies like ASP.NET, Ruby on Rails, Java, and PHP.十年前,几乎每个人都使用ASP.NET,Ruby on Rails,Java和PHP等技术…
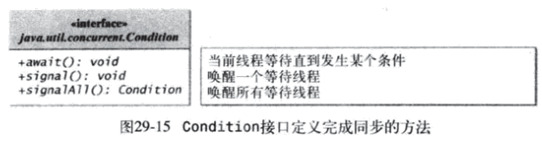
java多线程三之线程协作与通信实例
多线程的难点主要就是多线程通信协作这一块了,前面笔记二中提到了常见的同步方法,这里主要是进行实例学习了,今天总结了一下3个实例: 1、银行存款与提款多线程实现,使用Lock锁和条件Condition。 附加 :…
Java8中Lambda表达式的10个例子
Java8中Lambda表达式的10个例子 例1 用Lambda表达式实现Runnable接口 Java代码 //Before Java 8: new Thread(new Runnable() { Override public void run() { System.out.println("Before Java8, too much code for too little to do"); } }).start(); …
OC的对象的分类
OC的对象分类 一 oc的对象分类主要分为3种 1 instance 对象: 实例对象就是通过alloc 出来的对象,一个类每一次的alloc都会产生一个新的实例对象 StudentA *a [[StudentA alloc]init];StudentA *b [[StudentA alloc]init];// 打印结果如下 地址是明显…
如何在国内上medium_在Medium上写作的风格指南
如何在国内上mediumAfter spending more than 1,000 hours writing and editing stories for our Medium publication, I’ve decided to create this living style guide for contributors. Feel free to use it for your publication as well.在花了1000多个小时为我们的《中…
C# webform上传图片并生成缩略图
其实里面写的很乱,包括修改文件名什么的都没有仔细去写,主要是想记录下缩略图生成的几种方式 ,大家明白就好! 1 void UpImgs()2 {3 if (FileUpload1.HasFile)4 {5 string fileContentType FileUpload1.Pos…
ios中的自动释放池
自动释放池中是否有虑重功能 1 autoreleasepool { 2 UIView *view [UIView alloc] init] autorelease]; 3 [view autorelease]; 4 } 这样写在自动释放池的队列中是两个对象还是一个对象,就是说把view加到自动释放池的队列时,队列本身是…
arch linux安装_如何从头开始安装Arch Linux
arch linux安装by Andrea Giammarchi由Andrea Giammarchi In this article, youll learn how to install Arch Linux from scratch… and in about 5 minutes. So lets get to it.在本文中,您将学习如何从头开始安装Arch Linux,大约需要5分钟。 因此&am…
CoreCRM 开发实录 —— Profile
再简单的功能,也需要一坨代码的支持。Profile 的编辑功能主要就是修改个人的信息。比如用户名、头像、性别、电话……虽然只是一个编辑界面,但添加下来,涉及了6个文件的修改和7个新创建的文件。各种生成的和手写的代码,共有934行之…
iOS KVO 的实现原理
KVO 的实现原理 一 原理 1.KVO是基于runtime机制实现的 2.当某个类的属性对象第一次被观察时,系统就会在运行期动态地创建该类的一个派生类,在这个派生类中重写基类中任何被观察属性的setter 方法。派生类在被重写的setter方法内实现真正的通知机制 …
利用UltimateAndroid框架进行快速开发
UltimateAndroid是一套集成了许多现有优秀的Android开源类库并将之组合成一个整体的Android快速开发框架。框架目前主要包含的功能有View Injection,ORM,异步网络请求和图片加载,自动化脚本测试,磁盘LRU等功能.同时提供了类似于TripleDes、Webview快速设置、Md5处理…
溢出内容菜单_停止过度使用溢出菜单
溢出内容菜单by Daniel Burka丹尼尔伯卡(Daniel Burka) 停止过度使用溢出菜单 (Stop the overuse of overflow menus) You know those obscure menu buttons on apps and websites that reveal even more menu options? They usually have an ellipsis “…” or an arrow ▼…

KVC 和 KVO
KVC 键值编码 全称是Key-value coding,翻译成键值编码。它提供了一种使用字符串而不是访问器方法去访问一个对象实例变量的机制。 1.通过key(成员变量的名称)设置value(成员变量的值) - (void)setValue:(…
datasnap的客户端回传机制
最近,学习XE6下的DataSnap回叫技术编译代码,体会如下:第一篇 服务器与客户端回叫 从Delphi2010开始,DataSnap支持回叫(Call Back)机制。这样,在调用耗时较长的方法时,通过回叫机制…
Block 底层1
Block 本质来讲是OC 对象,其内部有一个isa指针。 1 Block 的声明 一言以蔽之: returnType ( ^blockName)(parameterTypes) ^returnType (parameters) {}; returnType 返回的类型 可以为Void,为Void的时候可以省略^blockName …
从零学web前端_从零到前端英雄(第2部分)
从零学web前端This article is part two of the “From Zero to Front-end Hero” series. In part one, you learned how to create layouts with HTML and CSS as well as some best practices. In part two, we will focus on learning JavaScript as a standalone language…
jdk8飞行记录器配置
jdk8提供了jmc工具,应该比visualvm厉害吧 下面贴一份tomcat的配置,自己留个备份,把下面的内容粘贴到tomcat setenv.sh就可以了 nowdaydate %Y%m%d_%H%M%S test -d ../gclogs || mkdir ../gclogsif [ -r "$CATALINA_BASE/bin/setenv_custom.sh" ]; then. "$CATAL…
petaPar培训文档
自己写的实验室程序文档,方便后来者。 转载于:https://www.cnblogs.com/daijkstra/p/3972167.html
Block 底层值__Block修饰符
__Block 修饰符 Block 想要改变外部的变量,必须要用__Block 来修饰自动变量。 根据内存地址可以看出来,__block 所修饰的变量,将外部的变量在栈中的内存地址放到了堆中。 // auto 自动变量的内存分配在栈区域 stack__block int meters 100…