Nginx是一个轻量级的,高性能的Web服务器以及反向代理和邮箱(IMAP/POP3)代理服务器。它运行在UNIX,GNU/Linux,BSD各种版本,Mac OS X,Solaris和Windows。根据调查统计,6%的网站使用Nginx Web服务器。Nginx是少数能处理C10K问题的服务器之一。跟传统的服务器不同,Nginx不依赖线程来处理请求。相反,它使用了更多的可扩展的事件驱动(异步)架构。Nginx为一些高流量的网站提供动力,比如WordPress,人人网,腾讯,网易等。这篇文章主要是介绍如何提高运行在Linux或UNIX系统的Nginx Web服务器的安全性。
默认配置文件和Nginx端口
/usr/local/nginx/conf/ – Nginx配置文件目录,/usr/local/nginx/conf/nginx.conf是主配置文件
/usr/local/nginx/html/ – 默认网站文件位置
/usr/local/nginx/logs/ – 默认日志文件位置
Nginx HTTP默认端口 : TCP 80
Nginx HTTPS默认端口: TCP 443
你可以使用以下命令来测试Nginx配置文件准确性。
/usr/local/nginx/sbin/nginx -t
将会输出。
the configuration file /usr/local/nginx/conf/nginx.conf syntax is ok
configuration file /usr/local/nginx/conf/nginx.conf test is successful
执行以下命令来重新加载配置文件。
/usr/local/nginx/sbin/nginx -s reload
执行以下命令来停止服务器。
/usr/local/nginx/sbin/nginx -s stop
一、配置SELinux
安全增强型Linux(SELinux)的是一个Linux内核的功能,它提供支持访问控制的安全政策保护机制。它可以大部分的攻击。下面我们来看如何启动基于CentOS/RHEL系统的SELinux。
安装SELinux
rpm -qa | grep selinux
libselinux-1.23.10-2
selinux-policy-targeted-1.23.16-6
如果没有返回任何结果,代表没有安装 SELinux,如果返回了类似上面的结果,则说明系统安装了 SELinux。
布什值锁定
运行命令getsebool -a来锁定系统。
getsebool -a | less
getsebool -a | grep off
getsebool -a | grep o
二、通过分区挂载允许最少特权
服务器上的网页/html/php文件单独分区。例如,新建一个分区/dev/sda5(第一逻辑分区),并且挂载在/nginx。确保/nginx是以noexec, nodev and nosetuid的权限挂载。以下是我的/etc/fstab的挂载/nginx的信息:
LABEL=/nginx /nginx ext3 defaults,nosuid,noexec,nodev 1 2
注意:你需要使用fdisk和mkfs.ext3命令创建一个新分区。
三、配置/etc/sysctl.conf强化Linux安全
你可以通过编辑/etc/sysctl.conf来控制和配置Linux内核、网络设置。
# Avoid a smurf attack
net.ipv4.icmp_echo_ignore_broadcasts = 1
# Turn on protection for bad icmp error messages
net.ipv4.icmp_ignore_bogus_error_responses = 1
# Turn on syncookies for SYN flood attack protection
net.ipv4.tcp_syncookies = 1
# Turn on and log spoofed, source routed, and redirect packets
net.ipv4.conf.all.log_martians = 1
net.ipv4.conf.default.log_martians = 1
# No source routed packets here
net.ipv4.conf.all.accept_source_route = 0
net.ipv4.conf.default.accept_source_route = 0
# Turn on reverse path filtering
net.ipv4.conf.all.rp_filter = 1
net.ipv4.conf.default.rp_filter = 1
# Make sure no one can alter the routing tables
net.ipv4.conf.all.accept_redirects = 0
net.ipv4.conf.default.accept_redirects = 0
net.ipv4.conf.all.secure_redirects = 0
net.ipv4.conf.default.secure_redirects = 0
# Don't act as a router
net.ipv4.ip_forward = 0
net.ipv4.conf.all.send_redirects = 0
net.ipv4.conf.default.send_redirects = 0
# Turn on execshild
kernel.exec-shield = 1
kernel.randomize_va_space = 1
# Tuen IPv6
net.ipv6.conf.default.router_solicitations = 0
net.ipv6.conf.default.accept_ra_rtr_pref = 0
net.ipv6.conf.default.accept_ra_pinfo = 0
net.ipv6.conf.default.accept_ra_defrtr = 0
net.ipv6.conf.default.autoconf = 0
net.ipv6.conf.default.dad_transmits = 0
net.ipv6.conf.default.max_addresses = 1
# Optimization for port usefor LBs
# Increase system file descriptor limit
fs.file-max = 65535
# Allow for more PIDs (to reduce rollover problems); may break some programs 32768
kernel.pid_max = 65536
# Increase system IP port limits
net.ipv4.ip_local_port_range = 2000 65000
# Increase TCP max buffer size setable using setsockopt()
net.ipv4.tcp_rmem = 4096 87380 8388608
net.ipv4.tcp_wmem = 4096 87380 8388608
# Increase Linux auto tuning TCP buffer limits
# min, default, and max number of bytes to use
# set max to at least 4MB, or higher if you use very high BDP paths
# Tcp Windows etc
net.core.rmem_max = 8388608
net.core.wmem_max = 8388608
net.core.netdev_max_backlog = 5000
net.ipv4.tcp_window_scaling = 1
四、删除所有不需要的Nginx模块
你需要直接通过编译Nginx源代码使模块数量最少化。通过限制只允许web服务器访问模块把风险降到最低。你可以只配置安装nginx你所需要的模块。例如,禁用SSL和autoindex模块你可以执行以下命令:
./configure --without-http_autoindex_module --without-http_ssi_module
make
make install
通过以下命令来查看当编译nginx服务器时哪个模块能开户或关闭:
./configure --help | less
禁用你用不到的nginx模块。
(可选项)更改nginx版本名称。
编辑文件/http/ngx_http_header_filter_module.c:
vi +48 src/http/ngx_http_header_filter_module.c
找到行:
static char ngx_http_server_string[] = "Server: nginx" CRLF;
static char ngx_http_server_full_string[] = "Server: " NGINX_VER CRLF;
按照以下行修改:
static char ngx_http_server_string[] = "Server: Ninja Web Server" CRLF;
static char ngx_http_server_full_string[] = "Server: Ninja Web Server" CRLF;
保存并关闭文件。现在你可以编辑服务器了。增加以下代码到nginx.conf文件来关闭nginx版本号的显示。
server_tokens off
五、使用mod_security(只适合后端Apache服务器)
mod_security为Apache提供一个应用程序级的防火墙。为后端Apache Web服务器安装mod_security,这会阻止很多注入式攻击。
六、安装SELinux策略以强化Nginx Web服务器
默认的SELinux不会保护Nginx Web服务器,但是你可以安装和编译保护软件。
1、安装编译SELinux所需环境支持
yum -y install selinux-policy-targeted selinux-policy-devel
2、下载SELinux策略以强化Nginx Web服务器。
cd /opt
wget 'http://downloads.sourceforge.net/project/selinuxnginx/se-ngix_1_0_10.tar.gz?use_mirror=nchc'
3、解压文件
tar -zxvf se-ngix_1_0_10.tar.gz
4、编译文件
cd se-ngix_1_0_10/nginx
make
将会输出如下:
Compiling targeted nginx module
/usr/bin/checkmodule: loading policy configuration from tmp/nginx.tmp
/usr/bin/checkmodule: policy configuration loaded
/usr/bin/checkmodule: writing binary representation (version 6) to tmp/nginx.mod
Creating targeted nginx.pp policy package
rm tmp/nginx.mod.fc tmp/nginx.mod
5、安装生成的nginx.pp SELinux模块:
/usr/sbin/semodule -i nginx.pp
七、基于Iptables防火墙的限制
下面的防火墙脚本阻止任何除了允许:
来自HTTP(TCP端口80)的请求
来自ICMP ping的请求
ntp(端口123)的请求输出
smtp(TCP端口25)的请求输出
#!/bin/bash
IPT="/sbin/iptables"
#### IPS ######
# Get server public ip
SERVER_IP=$(ifconfig eth0 | grep 'inet addr:' | awk -F'inet addr:' '{ print $2}' | awk '{ print $1}')
LB1_IP="204.54.1.1"
LB2_IP="204.54.1.2"
# Do some smart logic so that we can use damm script on LB2 too
OTHER_LB=""
SERVER_IP=""
[[ "$SERVER_IP" == "$LB1_IP" ]] && OTHER_LB="$LB2_IP" || OTHER_LB="$LB1_IP"
[[ "$OTHER_LB" == "$LB2_IP" ]] && OPP_LB="$LB1_IP" || OPP_LB="$LB2_IP"
### IPs ###
PUB_SSH_ONLY="122.xx.yy.zz/29"
#### FILES #####
BLOCKED_IP_TDB=/root/.fw/blocked.ip.txt
SPOOFIP="127.0.0.0/8 192.168.0.0/16 172.16.0.0/12 10.0.0.0/8 169.254.0.0/16 0.0.0.0/8 240.0.0.0/4 255.255.255.255/32 168.254.0.0/16 224.0.0.0/4 240.0.0.0/5 248.0.0.0/5 192.0.2.0/24"
BADIPS=$( [[ -f ${BLOCKED_IP_TDB} ]] && egrep -v "^#|^$" ${BLOCKED_IP_TDB})
### Interfaces ###
PUB_IF="eth0" # public interface
LO_IF="lo" # loopback
VPN_IF="eth1" # vpn / private net
### start firewall ###
echo "Setting LB1 $(hostname) Firewall..."
# DROP and close everything
$IPT -P INPUT DROP
$IPT -P OUTPUT DROP
$IPT -P FORWARD DROP
# Unlimited lo access
$IPT -A INPUT -i ${LO_IF} -j ACCEPT
$IPT -A OUTPUT -o ${LO_IF} -j ACCEPT
# Unlimited vpn / pnet access
$IPT -A INPUT -i ${VPN_IF} -j ACCEPT
$IPT -A OUTPUT -o ${VPN_IF} -j ACCEPT
# Drop sync
$IPT -A INPUT -i ${PUB_IF} -p tcp ! --syn -m state --state NEW -j DROP
# Drop Fragments
$IPT -A INPUT -i ${PUB_IF} -f -j DROP
$IPT -A INPUT -i ${PUB_IF} -p tcp --tcp-flags ALL FIN,URG,PSH -j DROP
$IPT -A INPUT -i ${PUB_IF} -p tcp --tcp-flags ALL ALL -j DROP
# Drop NULL packets
$IPT -A INPUT -i ${PUB_IF} -p tcp --tcp-flags ALL NONE -m limit --limit 5/m --limit-burst 7 -j LOG --log-prefix " NULL Packets "
$IPT -A INPUT -i ${PUB_IF} -p tcp --tcp-flags ALL NONE -j DROP
$IPT -A INPUT -i ${PUB_IF} -p tcp --tcp-flags SYN,RST SYN,RST -j DROP
# Drop XMAS
$IPT -A INPUT -i ${PUB_IF} -p tcp --tcp-flags SYN,FIN SYN,FIN -m limit --limit 5/m --limit-burst 7 -j LOG --log-prefix " XMAS Packets "
$IPT -A INPUT -i ${PUB_IF} -p tcp --tcp-flags SYN,FIN SYN,FIN -j DROP
# Drop FIN packet scans
$IPT -A INPUT -i ${PUB_IF} -p tcp --tcp-flags FIN,ACK FIN -m limit --limit 5/m --limit-burst 7 -j LOG --log-prefix " Fin Packets Scan "
$IPT -A INPUT -i ${PUB_IF} -p tcp --tcp-flags FIN,ACK FIN -j DROP
$IPT -A INPUT -i ${PUB_IF} -p tcp --tcp-flags ALL SYN,RST,ACK,FIN,URG -j DROP
# Log and get rid of broadcast / multicast and invalid
$IPT -A INPUT -i ${PUB_IF} -m pkttype --pkt-type broadcast -j LOG --log-prefix " Broadcast "
$IPT -A INPUT -i ${PUB_IF} -m pkttype --pkt-type broadcast -j DROP
$IPT -A INPUT -i ${PUB_IF} -m pkttype --pkt-type multicast -j LOG --log-prefix " Multicast "
$IPT -A INPUT -i ${PUB_IF} -m pkttype --pkt-type multicast -j DROP
$IPT -A INPUT -i ${PUB_IF} -m state --state INVALID -j LOG --log-prefix " Invalid "
$IPT -A INPUT -i ${PUB_IF} -m state --state INVALID -j DROP
# Log and block spoofed ips
$IPT -N spooflist
for ipblock in $SPOOFIP
do
$IPT -A spooflist -i ${PUB_IF} -s $ipblock -j LOG --log-prefix " SPOOF List Block "
$IPT -A spooflist -i ${PUB_IF} -s $ipblock -j DROP
done
$IPT -I INPUT -j spooflist
$IPT -I OUTPUT -j spooflist
$IPT -I FORWARD -j spooflist
# Allow ssh only from selected public ips
for ip in ${PUB_SSH_ONLY}
do
$IPT -A INPUT -i ${PUB_IF} -s ${ip} -p tcp -d ${SERVER_IP} --destination-port 22 -j ACCEPT
$IPT -A OUTPUT -o ${PUB_IF} -d ${ip} -p tcp -s ${SERVER_IP} --sport 22 -j ACCEPT
done
# allow incoming ICMP ping pong stuff
$IPT -A INPUT -i ${PUB_IF} -p icmp --icmp-type 8 -s 0/0 -m state --state NEW,ESTABLISHED,RELATED -m limit --limit 30/sec -j ACCEPT
$IPT -A OUTPUT -o ${PUB_IF} -p icmp --icmp-type 0 -d 0/0 -m state --state ESTABLISHED,RELATED -j ACCEPT
# allow incoming HTTP port 80
$IPT -A INPUT -i ${PUB_IF} -p tcp -s 0/0 --sport 1024:65535 --dport 80 -m state --state NEW,ESTABLISHED -j ACCEPT
$IPT -A OUTPUT -o ${PUB_IF} -p tcp --sport 80 -d 0/0 --dport 1024:65535 -m state --state ESTABLISHED -j ACCEPT
# allow outgoing ntp
$IPT -A OUTPUT -o ${PUB_IF} -p udp --dport 123 -m state --state NEW,ESTABLISHED -j ACCEPT
$IPT -A INPUT -i ${PUB_IF} -p udp --sport 123 -m state --state ESTABLISHED -j ACCEPT
# allow outgoing smtp
$IPT -A OUTPUT -o ${PUB_IF} -p tcp --dport 25 -m state --state NEW,ESTABLISHED -j ACCEPT
$IPT -A INPUT -i ${PUB_IF} -p tcp --sport 25 -m state --state ESTABLISHED -j ACCEPT
### add your other rules here ####
#######################
# drop and log everything else
$IPT -A INPUT -m limit --limit 5/m --limit-burst 7 -j LOG --log-prefix " DEFAULT DROP "
$IPT -A INPUT -j DROP
exit 0
八、控制缓冲区溢出攻击
编辑nginx.conf,为所有客户端设置缓冲区的大小限制。
vi /usr/local/nginx/conf/nginx.conf
编辑和设置所有客户端缓冲区的大小限制如下:
## Start: Size Limits & Buffer Overflows ##
client_body_buffer_size 1K;
client_header_buffer_size 1k;
client_max_body_size 1k;
large_client_header_buffers 2 1k;
## END: Size Limits & Buffer Overflows ##
解释:
1、client_body_buffer_size 1k-(默认8k或16k)这个指令可以指定连接请求实体的缓冲区大小。如果连接请求超过缓存区指定的值,那么这些请求实体的整体或部分将尝试写入一个临时文件。
2、client_header_buffer_size 1k-指令指定客户端请求头部的缓冲区大小。绝大多数情况下一个请求头不会大于1k,不过如果有来自于wap客户端的较大的cookie它可能会大于1k,Nginx将分配给它一个更大的缓冲区,这个值可以在large_client_header_buffers里面设置。
3、client_max_body_size 1k-指令指定允许客户端连接的最大请求实体大小,它出现在请求头部的Content-Length字段。
如果请求大于指定的值,客户端将收到一个”Request Entity Too Large” (413)错误。记住,浏览器并不知道怎样显示这个错误。
4、large_client_header_buffers-指定客户端一些比较大的请求头使用的缓冲区数量和大小。请求字段不能大于一个缓冲区大小,如果客户端发送一个比较大的头,nginx将返回”Request URI too large” (414)
同样,请求的头部最长字段不能大于一个缓冲区,否则服务器将返回”Bad request” (400)。缓冲区只在需求时分开。默认一个缓冲区大小为操作系统中分页文件大小,通常是4k或8k,如果一个连接请求最终将状态转换为keep-alive,它所占用的缓冲区将被释放。
你还需要控制超时来提高服务器性能并与客户端断开连接。按照如下编辑:
## Start: Timeouts ##
client_body_timeout 10;
client_header_timeout 10;
keepalive_timeout 5 5;
send_timeout 10;
## End: Timeouts ##
1、client_body_timeout 10;-指令指定读取请求实体的超时时间。这里的超时是指一个请求实体没有进入读取步骤,如果连接超过这个时间而客户端没有任何响应,Nginx将返回一个”Request time out” (408)错误。
2、client_header_timeout 10;-指令指定读取客户端请求头标题的超时时间。这里的超时是指一个请求头没有进入读取步骤,如果连接超过这个时间而客户端没有任何响应,Nginx将返回一个”Request time out” (408)错误。
3、keepalive_timeout 5 5; – 参数的第一个值指定了客户端与服务器长连接的超时时间,超过这个时间,服务器将关闭连接。参数的第二个值(可选)指定了应答头中Keep-Alive: timeout=time的time值,这个值可以使一些浏览器知道什么时候关闭连接,以便服务器不用重复关闭,如果不指定这个参数,nginx不会在应答头中发送Keep-Alive信息。(但这并不是指怎样将一个连接“Keep-Alive”)参数的这两个值可以不相同。
4、send_timeout 10; 指令指定了发送给客户端应答后的超时时间,Timeout是指没有进入完整established状态,只完成了两次握手,如果超过这个时间客户端没有任何响应,nginx将关闭连接。
九、控制并发连接
你可以使用NginxHttpLimitZone模块来限制指定的会话或者一个IP地址的特殊情况下的并发连接。编辑nginx.conf:
### Directive describes the zone, in which the session states are stored i.e. store in slimits. ###
### 1m can handle 32000 sessions with 32 bytes/session, set to 5m x 32000 session ###
limit_zone slimits $binary_remote_addr 5m;
### Control maximum number of simultaneous connections for one session i.e. ###
### restricts the amount of connections from a single ip address ###
limit_conn slimits 5;
上面表示限制每个远程IP地址的客户端同时打开连接不能超过5个。
十、只允许我们的域名的访问
如果机器人只是随机扫描服务器的所有域名,那拒绝这个请求。你必须允许配置的虚拟域或反向代理请求。你不必使用IP地址来拒绝。
## Only requests to our Host are allowed i.e. nixcraft.in, images.nixcraft.in and www.nixcraft.in
if ($host !~ ^(nixcraft.in|www.nixcraft.in|images.nixcraft.in)$ ) {
return 444;
}
##
十一、限制可用的请求方法
GET和POST是互联网上最常用的方法。 Web服务器的方法被定义在RFC 2616。如果Web服务器不要求启用所有可用的方法,它们应该被禁用。下面的指令将过滤只允许GET,HEAD和POST方法:
## Only allow these request methods ##
if ($request_method !~ ^(GET|HEAD|POST)$ ) {
return 444;
}
## Do not accept DELETE, SEARCH and other methods ##
更多关于HTTP方法的介绍
GET方法是用来请求,如文件http://www.centos.bz/index.php。
HEAD方法是一样的,除非该服务器的GET请求无法返回消息体。
POST方法可能涉及到很多东西,如储存或更新数据,或订购产品,或通过提交表单发送电子邮件。这通常是使用服务器端处理,如PHP,Perl和Python等脚本。如果你要上传的文件和在服务器处理数据,你必须使用这个方法。
十二、如何拒绝一些User-Agents?
你可以很容易地阻止User-Agents,如扫描器,机器人以及滥用你服务器的垃圾邮件发送者。
## Block download agents ##
if ($http_user_agent ~* LWP::Simple|BBBike|wget) {
return 403;
}
##
阻止Soso和有道的机器人:
## Block some robots ##
if ($http_user_agent ~* Sosospider|YodaoBot) {
return 403;
}
十三、如何防止图片盗链
图片或HTML盗链的意思是有人直接用你网站的图片地址来显示在他的网站上。最终的结果,你需要支付额外的宽带费用。这通常是在论坛和博客。我强烈建议您封锁,并阻止盗链行为。
# Stop deep linking or hot linking
location /images/ {
valid_referers none blocked www.example.com example.com;
if ($invalid_referer) {
return 403;
}
}
例如:重定向并显示指定图片
valid_referers blocked www.example.com example.com;
if ($invalid_referer) {
rewrite ^/images/uploads.*\.(gif|jpg|jpeg|png)$ http://www.examples.com/banned.jpg last
}
十四、目录限制
你可以对指定的目录设置访问权限。所有的网站目录应该一一的配置,只允许必须的目录访问权限。
通过IP地址限制访问
你可以通过IP地址来限制访问目录/admin/:
location /docs/ {
## block one workstation
deny 192.168.1.1;
## allow anyone in 192.168.1.0/24
allow 192.168.1.0/24;
## drop rest of the world
deny all;
}
通过密码保护目录
首先创建密码文件并增加“user”用户:
mkdir /usr/local/nginx/conf/.htpasswd/
htpasswd -c /usr/local/nginx/conf/.htpasswd/passwd user
编辑nginx.conf,加入需要保护的目录:
### Password Protect /personal-images/ and /delta/ directories ###
location ~ /(personal-images/.*|delta/.*) {
auth_basic "Restricted";
auth_basic_user_file /usr/local/nginx/conf/.htpasswd/passwd;
}
一旦密码文件已经生成,你也可以用以下的命令来增加允许访问的用户:
htpasswd -s /usr/local/nginx/conf/.htpasswd/passwd userName
十五、Nginx SSL配置
HTTP是一个纯文本协议,它是开放的被动监测。你应该使用SSL来加密你的用户内容。
创建SSL证书
执行以下命令:
cd /usr/local/nginx/conf
openssl genrsa -des3 -out server.key 1024
openssl req -new -key server.key -out server.csr
cp server.key server.key.org
openssl rsa -in server.key.org -out server.key
openssl x509 -req -days 365 -in server.csr -signkey server.key -out server.crt
编辑nginx.conf并按如下来更新:
server {
server_name example.com;
listen 443;
ssl on;
ssl_certificate /usr/local/nginx/conf/server.crt;
ssl_certificate_key /usr/local/nginx/conf/server.key;
access_log /usr/local/nginx/logs/ssl.access.log;
error_log /usr/local/nginx/logs/ssl.error.log;
}
重启nginx:
/usr/local/nginx/sbin/nginx -s reload
十六、Nginx与PHP安全建议
PHP是流行的服务器端脚本语言之一。如下编辑/etc/php.ini文件:
# Disallow dangerous functions
disable_functions = phpinfo, system, mail, exec
## Try to limit resources ##
# Maximum execution time of each script, in seconds
max_execution_time = 30
# Maximum amount of time each script may spend parsing request data
max_input_time = 60
# Maximum amount of memory a script may consume (8MB)
memory_limit = 8M
# Maximum size of POST data that PHP will accept.
post_max_size = 8M
# Whether to allow HTTP file uploads.
file_uploads = Off
# Maximum allowed size for uploaded files.
upload_max_filesize = 2M
# Do not expose PHP error messages to external users
display_errors = Off
# Turn on safe mode
safe_mode = On
# Only allow access to executables in isolated directory
safe_mode_exec_dir = php-required-executables-path
# Limit external access to PHP environment
safe_mode_allowed_env_vars = PHP_
# Restrict PHP information leakage
expose_php = Off
# Log all errors
log_errors = On
# Do not register globals for input data
register_globals = Off
# Minimize allowable PHP post size
post_max_size = 1K
# Ensure PHP redirects appropriately
cgi.force_redirect = 0
# Disallow uploading unless necessary
file_uploads = Off
# Enable SQL safe mode
sql.safe_mode = On
# Avoid Opening remote files
allow_url_fopen = Off
十七、如果可能让Nginx运行在一个chroot监狱
把nginx放在一个chroot监狱以减小潜在的非法进入其它目录。你可以使用传统的与nginx一起安装的chroot。如果可能,那使用FreeBSD jails,Xen,OpenVZ虚拟化的容器概念。
十八、在防火墙级限制每个IP的连接数
网络服务器必须监视连接和每秒连接限制。PF和Iptales都能够在进入你的nginx服务器之前阻止最终用户的访问。
Linux Iptables:限制每次Nginx连接数
下面的例子会阻止来自一个IP的60秒钟内超过15个连接端口80的连接数。
/sbin/iptables -A INPUT -p tcp --dport 80 -i eth0 -m state --state NEW -m recent --set
/sbin/iptables -A INPUT -p tcp --dport 80 -i eth0 -m state --state NEW -m recent --update --seconds 60 --hitcount 15 -j DROP
service iptables save
请根据你的具体情况来设置限制的连接数。
十九:配置操作系统保护Web服务器
像以上介绍的启动SELinux.正确设置/nginx文档根目录的权限。Nginx以用户nginx运行。但是根目录(/nginx或者/usr/local/nginx/html)不应该设置属于用户nginx或对用户nginx可写。找出错误权限的文件可以使用如下命令:
find /nginx -user nginx
find /usr/local/nginx/html -user nginx
确保你更所有权为root或其它用户,一个典型的权限设置 /usr/local/nginx/html/
ls -l /usr/local/nginx/html/
示例输出:
-rw-r--r-- 1 root root 925 Jan 3 00:50 error4xx.html
-rw-r--r-- 1 root root 52 Jan 3 10:00 error5xx.html
-rw-r--r-- 1 root root 134 Jan 3 00:52 index.html
你必须删除由vi或其它文本编辑器创建的备份文件:
find /nginx -name '.?*' -not -name .ht* -or -name '*~' -or -name '*.bak*' -or -name '*.old*'
find /usr/local/nginx/html/ -name '.?*' -not -name .ht* -or -name '*~' -or -name '*.bak*' -or -name '*.old*'
通过find命令的-delete选项来删除这些文件。
二十、限制Nginx连接传出
黑客会使用工具如wget下载你服务器本地的文件。使用Iptables从nginx用户来阻止传出连接。ipt_owner模块试图匹配本地产生的数据包的创建者。下面的例子中只允许user用户在外面使用80连接。
/sbin/iptables -A OUTPUT -o eth0 -m owner --uid-owner vivek -p tcp --dport 80 -m state --state NEW,ESTABLISHED -j ACCEPT
通过以上的配置,你的nginx服务器已经非常安全了并可以发布网页。可是,你还应该根据你网站程序查找更多的安全设置资料。例如,wordpress或者第三方程序
20步打造最安全的Nginx Web服务器
相关文章:

C#创建和调用DLL
一、写在前面 C# 语言是一种简单但功能强大的编程语言,用于编写企业应用程序。 C# 语言从C和 C语言演化而来,在语句、表达式和运算符方面使用了许多 C 功能。 C# 语言在类型安全性、版本转换、事件和垃圾回收等方面进行了相当大的改进和创新。 C# 语言提…

死磕算法!35 篇算法设计实例+6 本必读书打包送你
算法为什么难学?算法在程序中扮演着非常重要的角色,有人将数据结构比喻为程序的骨架,将算法比喻为程序的灵魂,这一点也不为过,正是因为这一点,很多朋友都立志要学好算法,但是我常常看到各种抱怨…
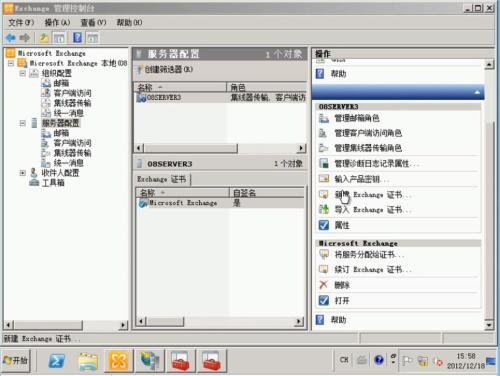
EXCHANGE证书
证书: CA(证书颁发机构)和证书有什么区别? CA:是服务器中的一个服务,主要是用来为计算机(用户)来颁发证书,安装CA的服务器称为证书服务器, 证书:从…
C#2.0模拟List和内置算法
C#中的范型对于很多从C转过来的程序员来说,可以说是一个天大的喜讯。hehe,至少笔者对于这个新特性是充满了敬仰之情。 在C#2.0中,匿名方法、IEnumerable接口和匿名方法的合作,使很多的编程任务变得非常的简单,而且写出…

横扫六大权威榜单后,达摩院开源深度语言模型体系 AliceMind
整理 | AI 科技大本营(ID:rgznai100)自然语言处理(NLP)被誉为 AI 皇冠上的明珠,传统 NLP 模型制作复杂,耗时耗力,且用途单一,难以复用。预训练语言模型是 NLP 领域的研究热点之一&am…

WP8:Unity3D之间的值传递
原地址:http://www.cnblogs.com/zhxilin/p/3799210.html 在前面的讨论中,我们介绍了如何在Unity3D for WP8中使用高于.Net 3.5的第三方库,传送门:http://www.cnblogs.com/zhxilin/p/3311240.html 在Unity3D和WP8的交互当中,如果要…

未来的程序员面临着怎样的职业变化
作为程序员,我们总是身处于如万花筒般变化无常的技术世界里。我们可能也是那群能够最早感知到科技变化所带来巨大影响的人。然而,面对这一波又一波向我们袭来的技术变革,我们是否也能从中窥见一丝规律,从而使自己更好地应对未来呢…
C#中使用Win32和其他库
C# 用户经常提出两个问题:“我为什么要另外编写代码来使用内置于 Windows 中的功能?在框架中为什么没有相应的内容可以为我完成这一任务?”当框架小组构建他们的 .NET 部分时,他们评估了为使 .NET 程序员可以使用 Win32 而需要完成…

神经网络的学习方式网络传播和图卷积,两者到底什么关系?
作者 | Remy Lau本文转载自CSDN博主「deephub」你可能听说过图卷积,因为它在当时是一个非常热门的话题。虽然不太为人所知,但网络传播是计算生物学中用于网络学习的主要方法。在这篇文章中,我们将深入研究网络传播背后的理论和直觉࿰…
string与数值之间的转换
9.50 编写程序处理一个vector<string>,其元素都表示整数型。计算vector中所有元素之和。修改程序,使之计算表示浮点值的string之和。 程序如下: #include<string> #include<vector> #include<iostream> using namespace std;int…
一个完整的大作业
1.选一个自己感兴趣的主题。网址为http://news.gzcc.cn/html/xiaoyuanxinwen/ 2.网络上爬取相关的数据 import requests import re from bs4 import BeautifulSoup urlhttp://news.gzcc.cn/html/xiaoyuanxinwen/ resrequests.get(url) res.encodingutf-8 soupBeautifulSoup(res…
剖析C#的多态
一、什么是多态 面向对象程序设计中的另外一个重要概念是多态性。在运行时,可以通过指向基类的指针,来调用实现派生类中的方法。可以把一组对象放到一个数组中,然后调用它们的方法,在这种场合下,多态性作用就体现出来了…

OSPF单区域配置
OSPF单区域配置 实验名称:OSPF单区域配置 实验拓扑: 实验配置步骤: 交换部分: Switch1 Enable Vlan database Vlan 10 name magi Exit 将vlan10加入到端口f0/2 Conf t Int fa0/2 Switchport mode access Switchport access vlan …

一文搞定7大流行后端框架:Spring、Netty、MyBatis、Hibernate、Dubbo...
框架(Framework)是整个或部分系统的可重用设计,表现为一组抽象构件及构件实例间交互的方法;另一种定义认为,框架是可被应用开发者定制的应用骨架。前者是从应用方面而后者是从目的方面给出的定义。 可以说,…
全“芯”关注用户需求 AMD“超轻薄笔记本”杀出重围
现在10.6寸跟11.6寸的笔记本已经占据整个笔记本市场的15%左右,跟过去只有几个点相比,已经有很大的提升了,几乎是百分之百的提升,超轻薄笔记本是大势所趋。这种趋势也带动了两大芯片巨头英特尔和AMD的角逐,英特尔为新一…

“去了太空就别回来了!”贝索斯还没“上天”,就遭美国 5 万多人请愿:不准重返地球...
整理 | 郑丽媛出品 | CSDN(ID:CSDNnews)美国富翁们有钱了都干什么?比尔盖茨买跑车、甲骨文老板拉里埃里森买游艇,还有呢?那必然是亚马逊创始人杰夫贝索斯和特斯拉 CEO 埃隆马斯克都很热爱的“上太空”&…
C语言中的字符串处理
•字符串字面量(字符串常量,在C标准中称为,字符串字面量) 如何存储字符串字面量 从本质上而言,C语言把字符串字面量作为字符数组来处理。当C语言编译器在程序中遇到长度为n的字符串字面量时,它会为字符串字面量分配长度为n1的…

php 派生类 数据库连接 单例模式 xhprof实测 高效连接
2019独角兽企业重金招聘Python工程师标准>>> 、 <?php //要解决的问题 在一个方法中多次调用类 //多次调用父类相同的类 class Pdoo {public function __construct(){}//这是个数据库的类function select($name) {echo "正宗" . $name;} } class Con…
安装MariaDB
结果我还是成功安装了MariaDB,其实大部分时候系统的操作不会有什么问题的,只是有时候会遇到一些问题较折腾。 最简单的指南:https://www.linode.com/docs/databases/mariadb/how-to-install-mariadb-on-centos-7 根据stackoverflow网友的说法…

CentOS5.6下安装Oracle10G软件 【保留报错经验】
CentOS5.6下安装Oracle10G ******************************************************************************** *目标:在Centos系统下,安装Oracle10g软件 *步骤: * 1、安装包 * 2、域名解析设置及网络配置 *…

人大团队研究:面向文本生成,预训练模型进展梳理
作者 | 刘媛媛来源 | 数据实战派文本生成是 NLP 中最重要且颇具挑战性的任务之一。近年来,预训练语言模型 (Pretrained Language Models ,下文简称 “PLM”) 的范式,极大地推动了该领域的发展。例如,我们曾介绍过 AI 在古诗生成上…
用C#编写获取远程IP,MAC的方法
如果要想获得远程的地址,需要用sendarp这个函数来实现。具体的代码如下: [DllImport("Iphlpapi.dll")] private static unsafe extern int SendARP(Int32 dest,Int32 host,ref IntPtr mac,ref IntPtr length); [DllImport("Ws2_32.dll…

纯JS导出excel(支持中文)
JsonExportExcel 简介 github EXAMPLE 使用方法 1.引入js (dist目录下JsonExportExcel.min.js) <script src"https://cuikangjie.github.io/JsonExportExcel/dist/JsonExportExcel.min.js"></script>npm install -save js-export-excelconst ExportJson…
C#如何取硬件标志
using System; using System.Runtime.InteropServices; using System.Management; namespace Hardware { /// <summary> /// Hardware_Mac 的摘要说明。 /// </summary> public class HardwareInfo { //取机器名 public string GetHostName() { retur…
Java发送邮件工具类(可发送匿名邮件)
为什么80%的码农都做不了架构师?>>> 为了不想到处去下载jar包,我使用maven为我管理,在开始编码这些东西之前,我们先在pom.xml文件中<dependencies>标签内加入以下内容: <!-- Following jars are …

华为、百度、小米踏上造车新征程,软件如何吞噬汽车?
【编者按】在全行业线上化的今天,新一轮的技术变革从根本上动摇了传统汽车行业的百年游戏规则,并出现了以特斯拉、蔚来、小鹏等为代表的造车新势力,和以英伟达、百度、华为等为代表的技术赋能者。传统汽车企业如何应对才能拿到行业变革的门票…
js同时打开两个连接
js同时打开两个、多个连接 <html xmlns"http://www.w3.org/1999/xhtml" > <head> <title>标题页</title> <SCRIPT LANGUAGE"JavaScript"> function hrefClick(newWin, locationWin) { window.open(newWin); //打开…
C#下用P2P技术实现点对点聊天
.NET将关于多线程的功能定义在System.Threading名字空间中。因此,要使用多线程,必须先声明引用此名字空间(using System.Threading;)。 即使你没有编写多线程应用程序的经验,也可能听说过“启动线程”“杀死线程”这些…
Java全能手册火了!Redis/Nginx/Dubbo/Spring全家桶/啥都有
前言本文是为了帮大家快速回顾了Java中知识点,这套面试手册涵盖了诸多Java技术栈的面试题和答案,相信可以帮助大家在最短的时间内用作面试复习,能达到事半功倍效果。本来想将文件上传到github上,但由于文件太大有的都无法显示所以…
关于小数的精确运算
package test;import java.math.BigDecimal;public class Test { public static void main(String[] args) { //double 只适合做科学运算,如果要进行精确运算,是不能用double来做的 double a 0.1; double b 0.006; Sys…