saltstack实现haproxy+keepalived负载均衡+高可用(二)
一键部署haproxy+keepalived实现负载均衡+高可用
实验环境:
!!!! 特别注意: www.westos.org为test1的minion名字
test1: 172.25.1.11 nginx master minion
test2: 172.25.1.12 httpd minion
test3: 172.25.1.13 haproxy minion
这里要下载高可用软件的test4需要配置高可用yum源
[root@test4 ~]# cd /etc/yum.repos.d/
[root@test4 yum.repos.d]# vim rhel-source.repo[rhel-source]
name=Red Hat Enterprise Linux $releasever - $basearch - Source
baseurl=http://172.25.1.250/rhel6.5
enabled=1
gpgcheck=0
gpgkey=file:///etc/pki/rpm-gpg/RPM-GPG-KEY-redhat-release[salt]
name=saltstack
baseurl=file:///rhel6
enabled=1
gpgcheck=0
gpgkey=file:///etc/pki/rpm-gpg/RPM-GPG-KEY-redhat-release[LoadBalancer]
name=LoadBalancer
baseurl=http://172.25.1.250/rhel6.5/LoadBalancer
gpgcheck=0
[HighAvailability]
name=HighAvailability
baseurl=http://172.25.1.250/rhel6.5/HighAvailability
gpgcheck=0
[ResilientStorage]
name=ResilientStorage
baseurl=http://172.25.1.250/rhel6.5/ResilientStorage
gpgcheck=0
[ScalableFileSystem]
name=ScalableFileSystem
baseurl=http://172.25.1.250/rhel6.5/ScalableFileSystem
gpgcheck=0
注意:实验前需要进行解析,上一篇文章已经解释,这里不再赘述
共开三台虚拟机test1、test2、test3,在test1上配置好salt-msater服务,test1、test2和test3安装并配置好salt-minion服务,具体可参照上篇文章。
1、配置master端
[root@test1 ~]# yum install -y salt-master //安装master
[root@test1 ~]# vim /etc/salt/master

[root@test1 ~]# /etc/init.d/salt-master start
2、配置minion端
[root@test1 ~]# yum install -y salt-minion
配置yun源
[root@test1 ~]# scp /etc/yum.repos.d/rhel-source.repo root@test2:/etc/yum.repos.d/ //将yum源配置文件发送给test2和test3
[root@test1 ~]# scp /etc/yum.repos.d/rhel-source.repo root@test3:/etc/yum.repos.d/
[root@test1 ~]# scp /rhel6/ root@test2:/
[root@test1 ~]# scp /rhel6/ root@test3:/
[root@test3 ~]# yum repolist //可以看出有29个saltstack安装包,此时yum源搭建成功

接下来test1、test2和test3步骤完全相同
[root@test3 ~]# yum install -y salt-minion
[root@test3 ~]# cd /etc/salt/
[root@test3 salt]# ls
[root@test3 salt]# vim minion
[root@test3 salt]# /etc/init.d/salt-minion start


3、交换密钥对
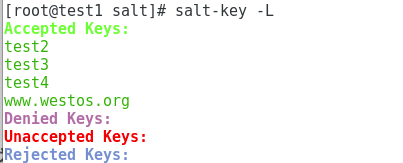
[root@test1 ~]# salt-key -L
Accepted Keys:
Denied Keys:
Unaccepted Keys:
www.westos.org
test2
test3
Rejected Keys:
[root@test1 ~]# salt-key -A
The following keys are going to be accepted:
Unaccepted Keys:
www.westos.org
test2
test3
Proceed? [n/Y] y
Key for minion test4 accepted.
温馨提示:
有个命令大家需要掌握:
salt-key -D //删除所有连接master的minion主机
salt-key -d 主机名 //删除连接master的该minion主机
到此三台主机的salt-minion就搭建完毕了
4、开始搭建nginx:
[root@test1 ~]# mkdir /srv/salt
[root@test1 ~]# cd /srv/salt/
[root@test1 salt]# mkdir nginx
[root@test1 salt]# cd nginx/
[root@test1 nginx]# mkdir files
[root@test1 nginx]# cd files/
[root@test1 files]# cp /root/nginx-1.14.0.tar.gz . //注意:这里需要用到nginx源码包,请提前将其下载下来并放到/root下以便拷贝
[root@test1 files]# cd ..
[root@test1 nginx]# vim install.sls
[root@test1 nginx]# cat install.sls
nginx-install:
pkg.installed:
- pkgs:
- pcre-devel
- openssl-devel
- gcc
file.managed:
- name: /mnt/nginx-1.14.0.tar.gz
- source: salt://nginx/files/nginx-1.14.0.tar.gz
[root@test1 nginx]# salt www.westos.org1 state.sls nginx.install 安装依赖性成功并把包导入了test2的/mnt下
在test2查看/mnt下已经有了tar包,代表:
[root@test2 salt]# cd /mnt/
[root@test2 mnt]# ls
nginx-1.14.0.tar.gz
在test2搭建环境确保命令可以执行写入脚本:
[root@test2 nginx-1.14.0]# sed -i.bak 's/#define NGINX_VER "nginx\/" NGINX_VERSION/#define NGINX_VER "nginx"/g' src/core/nginx.h //去版本号
[root@test2 nginx-1.14.0]# vim src/core/nginx.h 已经去掉版本号确保安全
[root@test2 nginx-1.14.0]# sed -i.bak 's/CFLAGS="$CFLAGS -g"/#CFLAGS="$CFLAGS -g"/g' auto/cc/gcc
[root@test2 nginx-1.14.0]# vim auto/cc/gcc //查看是否加上注释号
[root@test1 files]# vim nginx //写个nginx启动脚本
#!/bin/sh
# nginx Startup script for nginx
# chkconfig: - 85 15
# processname: nginx
# config: /usr/local/nginx/conf/nginx/nginx.conf
# pidfile: /usr/local/nginx/logs/nginx.pid
# description: nginx is an HTTP and reverse proxy server
### BEGIN INIT INFO
# Provides: nginx
# Required-Start: $local_fs $remote_fs $network
# Required-Stop: $local_fs $remote_fs $network
# Default-Start: 2 3 4 5
# Default-Stop: 0 1 6
# Short-Description: start and stop nginx
### END INIT INFO# Source function library.
. /etc/rc.d/init.d/functionsif [ -L $0 ]; then
initscript=`/bin/readlink -f $0`
else
initscript=$0
fi#sysconfig=`/bin/basename $initscript`
#if [ -f /etc/sysconfig/$sysconfig ]; then
# . /etc/sysconfig/$sysconfig
#finginx=${NGINX-/usr/local/nginx/sbin/nginx}
prog=`/bin/basename $nginx`
conffile=${CONFFILE-/usr/local/nginx/conf/nginx.conf}
lockfile=${LOCKFILE-/var/lock/subsys/nginx}
pidfile=${PIDFILE-/usr/local/nginx/logs/nginx.pid}
SLEEPMSEC=${SLEEPMSEC-200000}
UPGRADEWAITLOOPS=${UPGRADEWAITLOOPS-5}
RETVAL=0start() {
echo -n $"Starting $prog: "daemon --pidfile=${pidfile} ${nginx} -c ${conffile}
RETVAL=$?
echo
[ $RETVAL = 0 ] && touch ${lockfile}
return $RETVAL
}stop() {
echo -n $"Stopping $prog: "
killproc -p ${pidfile} ${prog}
RETVAL=$?
echo
[ $RETVAL = 0 ] && rm -f ${lockfile} ${pidfile}
}reload() {
echo -n $"Reloading $prog: "
killproc -p ${pidfile} ${prog} -HUP
RETVAL=$?
echo
}upgrade() {
oldbinpidfile=${pidfile}.oldbinconfigtest -q || return
echo -n $"Starting new master $prog: "
killproc -p ${pidfile} ${prog} -USR2
echofor i in `/usr/bin/seq $UPGRADEWAITLOOPS`; do
/bin/usleep $SLEEPMSEC
if [ -f ${oldbinpidfile} -a -f ${pidfile} ]; then
echo -n $"Graceful shutdown of old $prog: "
killproc -p ${oldbinpidfile} ${prog} -QUIT
RETVAL=$?
echo
return
fi
doneecho $"Upgrade failed!"
RETVAL=1
}configtest() {
if [ "$#" -ne 0 ] ; then
case "$1" in
-q)
FLAG=$1
;;
*)
;;
esac
shift
fi
${nginx} -t -c ${conffile} $FLAG
RETVAL=$?
return $RETVAL
}rh_status() {
status -p ${pidfile} ${nginx}
}# See how we were called.
case "$1" in
start)
rh_status >/dev/null 2>&1 && exit 0
start
;;
stop)
stop
;;
status)
rh_status
RETVAL=$?
;;
restart)
configtest -q || exit $RETVAL
stop
start
;;
upgrade)
rh_status >/dev/null 2>&1 || exit 0
upgrade
;;
condrestart|try-restart)
if rh_status >/dev/null 2>&1; then
stop
start
fi
;;
force-reload|reload)
reload
;;
configtest)
configtest
;;
*)
echo $"Usage: $prog {start|stop|restart|condrestart|try-restart|force-reload|upgrade|reload|status|help|configtest}"
RETVAL=2
esacexit $RETVAL
[root@test1 files]# ls
![]()

[root@test1 files]# cd /srv/salt
[root@test1 salt]# mkdir pkgs/
[root@test1 salt]# cd pkgs/
[root@test1 pkgs]# vim make.sls
make-gcc:
pkg.installed:
- pkgs:
- pcre-devel
- openssl-devel
- gcc

[root@test1 pkgs]# cd ..
[root@test1 salt]# mkdir users/
[root@test1 salt]# cd users/
[root@test1 users]# vim nginx.sls
nginx-group:
group.present:
- name: nginx
- gid: 800
nginx-user:
user.present:
- name: nginx
- uid: 800
- gid: 800
- shell: /sbin/nologin
- createhome: False
- home: /usr/local/nginx

[root@test1 nginx]# vim install.sls
[root@test1 nginx]# cat install.sls
include:
- pkgs.make //导入make包nginx-install:
file.managed:
- name: /mnt/nginx-1.14.0.tar.gz
- source: salt://nginx/files/nginx-1.14.0.tar.gz
cmd.run:
- name: cd /mnt && tar zxf nginx-1.14.0.tar.gz && cd nginx-1.14.0 && sed -i.bak 's/#define NGINX_VER "nginx\/" NGINX_VERSION/#define NGINX_VER "nginx"/g' src/core/nginx.h && sed -i.bak 's/CFLAGS="$CFLAGS -g"/#CFLAGS="$CFLAGS -g"/g' auto/cc/gcc && ./configure --prefix=/usr/local/nginx --with-http_ssl_module --with-http_stub_status_module --with-threads --with-file-aio &> /dev/null && make &> /dev/null && make install &> /dev/null
- creates: /usr/local/nginx

[root@test1 nginx]# vim service.sls
[root@test1 nginx]# cat service.sls
include:
- users.nginx //需要创建用户,这里是导入创建用户的包
- nginx.install/usr/local/nginx/conf/nginx.conf:
file.managed:
- source: salt://nginx/files/nginx.confnginx-service:
file.managed:
- name: /etc/init.d/nginx
- source: salt://nginx/files/nginx
- mode: 755
service.running:
- name: nginx
- reload: True
- watch:
- file: /usr/local/nginx/conf/nginx.conf

到此nginx部署完毕,推送试一下:
[root@test1 files]# salt www.westos.org state.sls nginx.service //测试成功
5、搭建apache:
[root@test1 salt]# pwd
/srv/salt
[root@test1 salt]# mkdir apache
[root@test1 salt]# cd apache/
[root@test1 apache]# vim web.sls //目的是得到httpd的配置文件
apache-install:
pkg.installed:
- pkgs:
- httpd
- php
[root@test1 apache]# salt test2 state.sls apache.web //master将服务推过去到test2
[root@test2 ~]# scp /etc/httpd/conf/httpd.conf root@test1:/srv/salt/apache/files
[root@test1 apache]# mv web.sls install.sls
[root@test1 apache]# vim install.sls
[root@test1 apache]# cat install.sls
apache-install:
pkg.installed:
- pkgs:
- httpd
- php
file.managed:
- name: /var/www/html/index.html
- source: salt://apache/files/index.html
- mode: 644
- user: root
- group: root

[root@test1 apache]# vim service.sls
[root@test1 apache]# cat service.sls
include:
- apache.install
apache-service:
file.managed:
- name: /etc/httpd/conf/httpd.conf
- source: salt://apache/files/httpd.conf
service.running:
- name: httpd
- enable: True
- reload: True
- watch:
- file: apache-service

 [root@test1 apache]# ls
files install.sls service.sls
[root@test1 apache]# cd files/
[root@test1 files]# ls
httpd.conf
[root@test1 files]# vim index.html

apache搭建完毕
[root@test1 files]# salt test2 state.sls apache.service //推送成功
马上要搭建haproxy服务了,提前添加test3为minion
服务下载及配置方法同上面的minion主机,这里不再赘述
[root@test1 salt]# salt-key -A
[root@test1 salt]# salt-key -L
6、haproxy实现负载均衡,web服务器为www.westos.org和test2
[root@test1 salt]# pwd
/srv/salt
apache nginx pkgs users
[root@test1 salt]# mkdir haproxy
[root@test1 salt]# cd haproxy/
[root@test1 haproxy]# mkdir files
[root@test1 haproxy]# vim haproxy.install
haproxy-install:
pkg.installed:
- pkgs:
- haproxy
[root@test1 haproxy]# salt test3 state.sls haproxy.install //test3下载haproxy服务得到haproxy.cfg配置文件
[root@test3 examples]# scp haproxy.init content-sw-sample.cfg root@test1:srv/salt/haproxy/files //test3将启动脚本和配置文件远程发送给test1
[root@test1 haproxy]# cd files/
[root@test1 files]# ls //可以看到配置文件已经传送过来了
content-sw-sample.cfg haproxy.init
[root@test1 files]# mv content-sw-sample.cfg haproxy.cfg
[root@test1 files]# vim haproxy.cfg //修改haproxy的配置文件,实现高可用
# This is a sample configuration. It illustrates how to separate static objects
# traffic from dynamic traffic, and how to dynamically regulate the server load.
# It listens on 192.168.1.10:80, and directs all requests for Host 'img' or
# URIs starting with /img or /css to a dedicated group of servers. URIs
# starting with /admin/stats deliver the stats page.global
maxconn 10000stats socket /var/run/haproxy.stat mode 600 level admin
log 127.0.0.1 local0
uid 188
gid 188
chroot /var/empty
daemon# The public 'www' address in the DMZ
frontend public
bind *:8080
mode http
log global
option httplog
option dontlognull
monitor-uri /monitoruri
maxconn 8000
timeout client 30s
stats uri /admin/stats
# use_backend static if { hdr_beg(host) -i img }
# use_backend static if { path_beg /img /css }
default_backend static# The static backend backend for 'Host: img', /img and /css.
backend static
mode http
balance roundrobin
option prefer-last-server
retries 2
option redispatch
timeout connect 5s
timeout server 5s
server statsrv1 172.25.1.11:80 check inter 1000
server statsrv2 172.25.1.12:80 check inter 1000
[root@test1 files]# cat haproxy.init //查看haproxy的启动脚本
#!/bin/sh
#
# chkconfig: - 85 15
# description: HA-Proxy is a TCP/HTTP reverse proxy which is particularly suited \
# for high availability environments.
# processname: haproxy
# config: /etc/haproxy/haproxy.cfg
# pidfile: /var/run/haproxy.pid# Script Author: Simon Matter <simon.matter@invoca.ch>
# Version: 2004060600# Source function library.
if [ -f /etc/init.d/functions ]; then
. /etc/init.d/functions
elif [ -f /etc/rc.d/init.d/functions ] ; then
. /etc/rc.d/init.d/functions
else
exit 0
fi# Source networking configuration.
. /etc/sysconfig/network# Check that networking is up.
[ ${NETWORKING} = "no" ] && exit 0# This is our service name
BASENAME=`basename $0`
if [ -L $0 ]; then
BASENAME=`find $0 -name $BASENAME -printf %l`
BASENAME=`basename $BASENAME`
fiBIN=/usr/sbin/$BASENAME
CFG=/etc/$BASENAME/$BASENAME.cfg
[ -f $CFG ] || exit 1PIDFILE=/var/run/$BASENAME.pid
LOCKFILE=/var/lock/subsys/$BASENAMERETVAL=0
start() {
quiet_check
if [ $? -ne 0 ]; then
echo "Errors found in configuration file, check it with '$BASENAME check'."
return 1
fiecho -n "Starting $BASENAME: "
daemon $BIN -D -f $CFG -p $PIDFILE
RETVAL=$?
echo
[ $RETVAL -eq 0 ] && touch $LOCKFILE
return $RETVAL
}stop() {
echo -n "Shutting down $BASENAME: "
killproc $BASENAME -USR1
RETVAL=$?
echo
[ $RETVAL -eq 0 ] && rm -f $LOCKFILE
[ $RETVAL -eq 0 ] && rm -f $PIDFILE
return $RETVAL
}restart() {
quiet_check
if [ $? -ne 0 ]; then
echo "Errors found in configuration file, check it with '$BASENAME check'."
return 1
fi
stop
start
}reload() {
if ! [ -s $PIDFILE ]; then
return 0
fiquiet_check
if [ $? -ne 0 ]; then
echo "Errors found in configuration file, check it with '$BASENAME check'."
return 1
fi
$BIN -D -f $CFG -p $PIDFILE -sf $(cat $PIDFILE)
}check() {
$BIN -c -q -V -f $CFG
}quiet_check() {
$BIN -c -q -f $CFG
}rhstatus() {
status $BASENAME
}condrestart() {
[ -e $LOCKFILE ] && restart || :
}# See how we were called.
case "$1" in
start)
start
;;
stop)
stop
;;
restart)
restart
;;
reload)
reload
;;
condrestart)
condrestart
;;
status)
rhstatus
;;
check)
check
;;
*)
echo $"Usage: $BASENAME {start|stop|restart|reload|condrestart|status|check}"
exit 1
esac
exit $?
[root@test1 files]# cd ..
[root@test1 haproxy]# vim install.sls
include:
- pkgs.make
haproxy-install:
file.managed:
- name: /mnt/haproxy-1.6.13.tar.gz
- source: salt://haproxy/files/haproxy-1.6.13.tar.gz
cmd.run:
- name: cd /mnt && tar zxf haproxy-1.6.13.tar.gz && cd haproxy-1.6.13 && make TARGET=linux2628 USE_PCRE=1 USE_OPENSSL=1 USE_ZLIB=1 PREFIX=/usr/local/haproxy &> /dev/null && make TARGET=linux2628 USE_PCRE=1 USE_OPENSSL=1 USE_ZLIB=1 PREFIX=/usr/local/haproxy install && cd .. && rm -rf haproxy-1.6.13.tar.gz
- creates: /usr/local/haproxy
/etc/haproxy:
file.directory:
- mode: 755
/usr/sbin/haproxy:
file.symlink:
- target: /usr/local/haproxy/sbin/haproxy

[root@test1 haproxy]# salt test3 state.sls haproxy.install
//将已经配置好高可用的haproxy配置文件推送给test3,若成功了则继续写service文件
[root@test1 haproxy]# cd ../users
[root@test1 users]# vim haproxy.sls
haproxy-group:
group.present:
- name: haproxy
- gid: 188
haproxy-user:
user.present:
- name: haproxy
- uid: 188
- gid: 188
- shell: /sbin/nologin
- home: /usr/local/haproxy
- createhome: False


[root@test1 users]# cd ../haproxy/
[root@test1 haproxy]# vim service.sls
include:
- haproxy.install
- users.haproxy
/etc/haproxy/haproxy.cfg:
file.managed:
- source: salt://haproxy/files/haproxy.cfg
haproxy-service:
file.managed:
- name: /etc/init.d/haproxy
- source: salt://haproxy/files/haproxy.init
- mode: 755
service.running:
- name: haproxy
- reload: True
- watch:
- file: /etc/haproxy/haproxy.cfg


[root@test1 haproxy]# cd ..
[root@test1 salt]# vim top.sls //写一个文件,实现一步到位
base:
'www.westos.org':
- nginx.service
'test2':
- apache.service
'test3':
- haproxy.service
[root@test1 salt]# salt '*' state.highstate //一步进行所有服务的推送
在test1、test2、test3上查看是否实现了负载均衡
在网页进行测试,发现网页是以两个页面在交替运行
到此:haproxy的负载均衡就实现啦。
7、搭建keepalived服务
实验环境:
| salt服务 | 主机(minion名称) | 主机IP | 服务1 | 服务2 |
|---|---|---|---|---|
| master | test1(www.westos.org) | 172.25.1.11 | nginx | |
| minion | test2 (test2) | 172.25.1.12 | httpd | |
| minion | test3 (test3) | 172.25.1.13 | haproxy keepalived(master) | |
| minion | test4 (test4) | 172.25.1.14 | haproxy keepalived(backup) | |
注意:这里的test3和test4需要下载haproxy高可用软件,所以需要配置高可用yum源,具体看文章开头的yum源配置文件
也可以直接拷贝test1的yum源配置文件
[root@test1 ~]# scp /etc/yum.repos.d/rhel-source.repo root@test1:/etc/yum.repos.d/
首先,添加主机test4:
[root@test4 ~]# yum install -y salt-minion
[root@test4 ~]# vim /etc/salt/minion

[root@test4 ~]# /etc/init.d/salt-minion start
[root@test1 ~]# salt-key -A
[root@test1 ~]# salt-key -L

[root@test1 salt]# ls
apache haproxy nginx pkgs top.sls users
[root@test1 salt]# cd pkgs/ //在这个目录下存放的是源码编译时用到的安装包,避免多次写这些安装包
[root@test1 pkgs]# ls
make.sls
[root@test1 pkgs]# cat make.sls
make-gcc:
pkg.installed:
- pkgs:
- pcre-devel
- openssl-devel
- gcc
[root@test1 pkgs]# cd ..
[root@test1 salt]# ls
apache haproxy nginx pkgs top.sls users
[root@test1 salt]# mkdir keepalived //创建keepalived的目录
[root@test1 salt]# cd keepalived/
[root@test1 keepalived]# mkdir files //用来存放源码编译所需的压缩包 ,配置文件
[root@test1 files]# cd
[root@test1 ~]# ls //注意:这里的源码包是提前下载到/root下的
keepalived-2.0.6.tar.gz
[root@test1 ~]# mv keepalived-2.0.6.tar.gz /srv/salt/keepalived/files/ //将其移动到file目录下
[root@test1 ~]# cd -
/srv/salt/keepalived/files
[root@test1 files]# ls
keepalived-2.0.6.tar.gz
[root@test1 files]# cd ..
[root@test1 keepalived]# vim install.sls //编写keepalived的源码编译文件
include:
- pkgs.makekeepalived-install:
file.managed:
- name: /mnt/keepalived-2.0.6.tar.gz
- source: salt://keepalived/files/keepalived-2.0.6.tar.gz
cmd.run:
- name: cd /mnt && tar zxf keepalived-2.0.6.tar.gz && cd keepalived-2.0.6 && ./configure --prefix=/usr/local/keepalived --with-init=SYSV &> /dev/null && make &> /dev/null && make install &> /dev/null
- creates: /usr/local/keepalived

[root@test1 keepalived]# salt test4 state.sls keepalived.install //一键将服务推送到test4上
在test4上查看服务
[root@test4 ~]# cd /mnt/
[root@test4 mnt]# ls

到我们该拷贝配置文件的时候了,由于keepalived服务有两个配置文件,所以我们应该传给test1两个配置文件,分别是keeplived和keepalived.conf
[root@test4 mnt]# cd /usr/local/keepalived/etc/rc.d/init.d
[root@test4 init.d]# ls
keepalived
[root@test4 init.d]# scp keepalived root@test1:/srv/salt/keepalived/files/
[root@test4 init.d]# cd /usr/local/keepalived/etc/keepalived
[root@test4 keepalived]# ls
keepalived.conf samples
[root@test4 keepalived]# scp keepalived.conf root@test1:/srv/salt/keepalived/files/
[root@test1 keepalived]# cd files/ //返回test1的files目录查看配置文件已经拷贝过来
[root@test1 files]# ls
keepalived keepalived-2.0.6.tar.gz keepalived.conf
[root@test1 files]# cd ..
[root@test1 keepalived]# vim install.sls
include:
- pkgs.makekeepalived-install:
file.managed:
- name: /mnt/keepalived-2.0.6.tar.gz
- source: salt://keepalived/files/keepalived-2.0.6.tar.gz
cmd.run:
- name: cd /mnt && tar zxf keepalived-2.0.6.tar.gz && cd keepalived-2.0.6 && ./configure --prefix=/usr/local/keepalived --with-init=SYSV &> /dev/null && make &> /dev/null && make install &> /dev/null
- creates: /usr/local/keepalived/etc/keepalived:
file.directory:
- mode: 755/etc/sysconfig/keepalived:
file.symlink:
- target: /usr/local/keepalived/etc/sysconfig/keepalived/sbin/keepalived:
file.symlink:
- target: /usr/local/keepalived/sbin/keepalived


此时keepalived服务配置完成
新的问题出现是,由于test1和test4都需要安装keepalived服务,且test1作master;test4作backup
这里有部分需要改为变量,如所以我们需要引入模块,叫pillar模块和jinja模块。
上面完成了keepalived的install配置,接下来完成service.sls配置
[root@test1 salt]# cd /srv/salt/keepalived/files/
[root@test1 files]# vim keepalived.conf //结合Jinja,将keepalived的配置文件中的state和priority的参数设置成变量
! Configuration File for keepalived
global_defs {
notification_email {
root@localhost
}
notification_email_from keepalived.localhost
smtp_server 127.0.0.1
smtp_connect_timeout 30
router_id LVS_DEVEL
vrrp_skip_check_adv_addr
vrrp_strict
vrrp_garp_interval 0
vrrp_gna_interval 0
}vrrp_instance VI_1 {
state {{ STATE }}
interface eth0
virtual_router_id 21
priority {{ PRIORITY }}
advert_int 1
authentication {
auth_type PASS
auth_pass 1111
}
virtual_ipaddress {
172.25.1.100/24 //虚拟ip为172.25.1.100/24
}
}

[root@test1 files]# cd ..
[root@test1 keepalived]# vim service.sls
include:
- keepalived.install/etc/keepalived/keepalived.conf:
file.managed:
- source: salt://keepalived/files/keepalived.conf
- template: jinja //Jinja的使用:在state文件中使用"- template: jinja"声明
- context:
STATE: {{ pillar['state'] }} //两个变量给予赋值,和上面不同的是这里的值采用了Pillar方式
PRIORITY: {{ pillar['priority'] }}kp-service:
file.managed:
- name: /etc/init.d/keepalived
- source: salt://keepalived/files/keepalived
- mode: 755
service.running:
- name: keepalived
- reload: True
- watch:
- file: /etc/keepalived/keepalived.conf
在master端打开pillar服务,若已经打开
[root@test1 keepalived]# vim /etc/salt/master

[root@test1 keepalived]# /etc/init.d/salt-master restart
[root@test1 keepalived]# cd /srv/pillar/
[root@test1 pillar]# mkdir keepalived/
[root@test1 pillar]# cd keepalived/
[root@test1 keepalived]# vim install.sls
{% if grains['fqdn'] == 'test3' %}
state: MASTER
priority: 100
{% elif grains['fqdn'] == 'test4' %}
state: BACKUP
priority: 50
{% endif %}
[root@test1 keepalived]# cd ..
[root@test1 web]# cd ..
[root@test1 pillar]# vim top.sls
base:
'*':
- keepalived.install
[root@test1 pillar]# cd ../salt/
test1和test2可以使用grains或者pillar模块,这里用grains模块
[root@test1 salt]# vim /etc/salt/minion
[root@test1 salt]# /etc/init.d/salt-minion restart
[root@test2 ~]# vim /etc/salt/minion
[root@test2 salt]# /etc/init.d/salt-minion restart


[root@test1 salt]# vim top.sls
base:
'test3':
- haproxy.service
- keepalived.service
'test4':
- haproxy.service
- keepalived.service
'roles:apache':
- match: grain //要匹配的主机需要打开grains模块- apache.service
'roles:nginx':
- match: grain
- nginx.service
8、一步高级推,实现最终目的
[root@test1 salt]# salt '*' state.highstate
9、查看服务是否已经开启:
test1:


test2:

test3:

test4:

此时即可实现haproxy+keepalived负载均衡+高可用
10、进行测试:
首先在test1端写一个测试的web页面
[root@test1 apache]# cd /usr/local/nginx/html/
[root@test1 html]# vim index.html

由于test2端在一键推送的时候已经将web测试的index.html推送过来了,所以可以直接进行测试
为了确保,我们不妨查看一下:
[root@test2 html]# pwd
/var/www/html
[root@test2 html]# ls
index.html
[root@test2 html]# cat index.html
<h1>westos</h1>
测试一:测试负载均衡:
在物理机上进行curl测试,可以看到实现了负载均衡

测试二:测试高可用性:
我们可以看test3和test4的ip(keepalived):


可以看出test3上有虚拟ip,这是因为test3的keepalived服务是master,test4的keepalived服务是backup
若此时我们将test3的keepalived服务宕掉,会发现什么呢:
[root@test3 haproxy]# /etc/init.d/keepalived stop


此时test4会将虚拟ip承接过去。而服务没有受到影响。
若将test3和test4的服务都宕掉,此时服务不可用:
[root@test4 salt]# /etc/init.d/keepalived stop

测试结束,还原服务,将test3和test4的keepalived服务重启。
测试三:测试haproxy对后端的检查:
在访问都正常的情况下,将test2的apache服务宕掉
[root@test2 html]# /etc/init.d/httpd stop
此时进行访问:

发现只能访问到test1主机,并没有发生报错现象,这说明haproxy对后端是有进行检查的。并没有继续进行负载均衡。保证了客户的正常访问。
到此,实验结束。
补充一点知识!!!!!!!!!
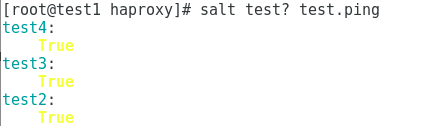
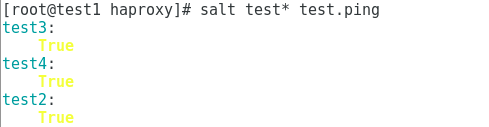
下列三条命令均可用于查看有几个minion监听
[root@test1 haproxy]# salt test? test.ping //查看有test?在监听
[root@test1 haproxy]# salt test* test.ping //查看有test?在监听
[root@test1 haproxy]# salt '*' test.ping //查看所有的监听主机


相关文章:

iOS开发技巧(系列十八:扩展UIColor,支持十六进制颜色设置)
新建一个Category,命名为UIColorHex,表示UIColor支持十六进制Hex颜色设置。 UIColorHex.h文件, #import <UIKit/UIKit.h> #define RGBA_COLOR(R, G, B, A) [UIColor colorWithRed:((R) / 255.0f) green:((G) / 255.0f) blue:((B) / 255…

iOS顶部菜单栏
封装的一个顶部菜单栏,使用懒加载(选择后加载当前页及前后各一页),自适应标题长度。 下载: Github:https://github.com/dolacmeng/JXChannelSegment 用法: //init Segment segment [[JXSegme…
Mac环境下svn的使用
CHENYILONG BlogMac环境下svn的使用 Mac环境下svn的使用 在Windows环境中,我们一般使用TortoiseSVN来搭建svn环境。在Mac环境下,由于Mac自带了svn的服务器端和客户端功能,所以我们可以在不装任何第三方软件的前提下使用svn功能,不…

zabbix简介及基本安装(一)
zabbix简单介绍: 官网:可以进官网查看一下:https://www.zabbix.com/cn/ //英语能力有限的读者可以将由上角的语言调成汉语方便查看 功能:网络监控、服务器监控、云监控、服务监控等。 介绍:zabbix([…
顺序表应用6:有序顺序表查询
顺序表应用6:有序顺序表查询 Time Limit: 7MS Memory Limit: 700KBSubmit StatisticProblem Description 顺序表内按照由小到大的次序存放着n个互不相同的整数(1<n<20000),任意输入一个整数,判断该整数在顺序表中是否存在。…
LA 5717枚举+最小生成树回路性质
1 /*LA 57172 《训练指南》P3433 最小生成树的回路性质4 在生成的最小生成树上,新增一条边e(u,v)5 若原图上u到v的路径的最大边大于e,则删除此边,加上e,否则不变。6 7 若原图上u到v的路径的最大边的产生:BFS/DFS都可 &…
【Runtime】动态添加方法demo
今天写一个小demo来演示下runtime的消息转发和动态添加方法。 一般项目中都会有保存当前登录用户资料的需求,我们可以直接将登录成功后的用户信息分别保存到NSUserDefaults中: [def setObject:"JackXu" forKey:"UserName"];[def set…

Zabbix之主机的添加与删除(二)
接着上一篇内容继续讲: 环境等都是建立在上一篇内容的基础上的,见https://blog.csdn.net/weixin_41922887/article/details/83755271 redhat6 test1: 172.25.1.11 zabbix-agent redhat7 server: 172.25.1.1 …
昨天网上感觉好冷,睡在席子上都是感觉打哈欠
今天爸妈也是休息一天,中午听说是要到外婆家去,不过家里就不知道会不会有一个团圆聚餐了,还有伴月就是国庆解,那时就要吧这个推掉值班的事情做好下。 转载于:https://www.cnblogs.com/bkchengzheng/p/5874328.html

几行代码实现神奇移动的过渡动画
1.效果如图: 2.实现: 假设需求为如上图,点击ViewController01后,ViewController01上的两张图片,移动到ViewContoller02中,其实两个ViewController的View上分别放置了这两张图,JXMagicMove就是实…
php字符串处理函数相关操作
<?php//获取tech和98426这两个字符串$str "http://info.meadin.com/tech/98426_1.shtml";echo $newstr substr($str,7,strlen($str)); //info.meadin.com/tech/98426_1.shtml$arr explode(/,$newstr);$num $arr[1];//tech$user strstr($arr[2], _, true); /…

介绍Zabbix的两种监控模式(主动模式和被动模式)
Zabbix agent检测分为两种模式:主动模式和被动模式 被动模式,也是默认的Zabbix监控模式,被动模式是相对于proxy来说的。proxy主动发送数据就是主动模式,proxy等待server的请求再发送数据就是被动模式。主动模式有个好处就是可以有…
【Step By Step】将Dotnet Core部署到Docker下
一、使用.Net Core构建WebAPI并访问Docker中的Mysql数据库 这个的过程大概与我之前的文章《尝试.Net Core—使用.Net Core Entity FrameWork Core构建WebAPI(一)》一致。 但是在我们这里,由于docker中无法部署sql server,所以我采…
ipad无法与itunes同步,提示因为这台电脑不再被授权使用在此ipad上购买的项目解决方案...
1、iOS设备用数据线连接到电脑;2、打开电脑上的iTunes 11,按CtrlB键调出菜单栏,按CtrlS键调出边栏;在边栏的 设备 下面看到你的iOS设备;3、点击菜单栏中的商店,点击 对这台电脑授权,输入你的App…
iOS根据字节数截取字符串
最近项目有个需求,文章的作者最多显示7个中文字,英文字符算半个中文字,超过7个中文字,则显示:前7个中文字...,使用NSString的length方法,不管是一个中文还是英文字符,都是返回1。因此…

搭建Zabbix分布式监控
1、实现zabbix监控nginx 实验环境: server1 172.25.1.1 server redhat7 test1 172.25.1.11 agent redhat7 在“手动添加”主机的基础上进行扩展 开启服务: [rootserver ~]# systemctl…
Codeforces Round #372 (Div. 2), problem: (B) Complete the Word
水题,每次截取长度为26的字符串,然后直接进行修改就可以 然而本弱渣昨天wa看很久 include<bits/stdc.h> using namespace std; int n,c; int ans[30]; int main() { string s; cin>>s; int tt0; int ns.size(); if(n<26) { cout<<&…
百练 2973 Skew数 解题报告
思路: 计算出每一个skew数的不同位数表示的权值,然后用该位与权值相乘。用int数组来装权值,用char数组来装skew数。 代码: #include<stdio.h> #include<string.h> int main() {int i, k, sum;int base[32];char skew[…
【Python】在Mac系统中安装Pygame
我们通过Homebrew来安装Pygame,Homebrew是Mac OSX上的软件包管理工具,如果还没安装Homebrew,将以下命令粘贴至终端先安装Homebrew /usr/bin/ruby -e "$(curl -fsSL https://raw.githubusercontent.com/Homebrew/install/master/install…

zabbix部署onealert云警告平台
onealert告警功能 告警 All In One,支持微信、邮箱、短信、APP、电话告警支持接入 Zabbix、Nagios、阿里云、腾讯云、监控宝等等告警信息灵活的分配策略,可灵活的分配告警信息发送给相关人员微信、邮箱、app 等告警方式全部免费实验环境: 首…
StringBuilder、StringBuffer、String区别
相信大家对 String 和 StringBuffer 的区别也已经很了解了,但是估计还是会有很多同志对这两个类的工作原理有些不清楚的地方,今天重新把这个概念给大家复习一下,顺便牵出 J2SE5.0 里面带来的一个新的字符操作的类—— StringBuilder …
Class中isAssignableFrom() 方法
看Spring源码的时候看到这个方法: 1 protected WebApplicationContext createWebApplicationContext(ServletContext sc) { 2 Class<?> contextClass determineContextClass(sc); 3 if (!ConfigurableWebApplicationContext.class.isAs…

【iOS】iOS10.3新增API:应用内评分
1、需求 在iOS10.3以前,APP引导用户评分时需要跳转到AppStore中操作,并且AppStore在国内有时加载会较慢,即便有的用户想给APP好评,但是等了几秒钟评分页面还没加载出来从而放弃。在iOS10.3中,苹果新增了APP内评分的新…
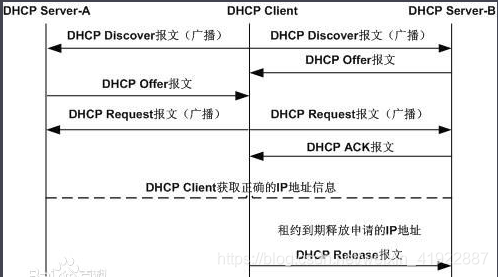
dhcp动态主机配置协议
dhcp简介: 动态主机设置协议(Dynamic Host Configuration Protocol,DHCP)是一个局域网的网络协议,使用UDP协议工作,计算机网络应用层协议。 主要有两个用途:用于内部网或网络服务供应商自动分配…

JSONP--解决ajax跨域问题
取不到数据! 上周客户新买了服务器,原本在旧的服务器上放着客户的Web主页信息和一个后台程序(asp.net),在客户的主页中有一个动态显示最新消息的处理,这个处理就是通过ajax异步从那个后台程序中取得的。由于又购买了新的服务器&am…
OC基本数据存储方式
/** 一,数据存储 常用方式(5种) 1,XML属性列表 -- 保存在Doucuments文件夹 2,偏好设置(NSUserDefault)-- Library/Preference 需要配合writetoFile来配合使用,保存到沙盒 3,归档(NSKeyedArchiver) -- 实现coding协议 4,sqlite --使用sqlite语法操作数据库 5,Core Data -- 由系统…

Xcode可重用代码块code snippets
一. 关于code snippets 通过Xcode的重用代码块(code snippets)可快速输入预设好的常用代码模板,如通过键入 hystrong 系统会直接替代为 property(nonatomic,strong) <#class#> <#name#>;二. 添加方法 如下图进行选择&#…
自动化运维工具Ansible
ansible简介: ansible是新出现的自动化运维工具,基于Python开发,集合了众多运维工具(puppet、cfengine、chef、func、fabric)的优点,实现了批量系统配置、批量程序部署、批量运行命令等功能。 ansible是基…

jquery 的3D Carousel插件参数说明
这个插件大家都很熟悉了,但是在网上找了很久找不到相关的资料,只有自己琢磨研究了一下。有些参数一眼都可以看出意思,在此我只说一下每个图片要想带一些扩展信息怎么处理。 1:首先需要创建一个ul对象,然后里面每一个li…

利用runtime实现KVO
KVO实现原理 一.关于KVO KVO(Key-Value Observing)提供一种机制,当指定对象的属性被修改后,就会通知观察者。简单的说就是每次指定的被观察的对象的属性被修改后,KVO就会自动通知相应的观察者了。 KVO其实也是“观察者”设计模式的一种应用…