phaser.min.js_如何使用Phaser 3,Express和Socket.IO构建多人纸牌游戏
phaser.min.js
I'm a tabletop game developer, and am continually looking for ways to digitize game experiences. In this tutorial, we're going to build a multiplayer card game using Phaser 3, Express, and Socket.IO.
我是桌面游戏开发人员,并且一直在寻找将游戏体验数字化的方法。 在本教程中,我们将使用Phaser 3 , Express和Socket.IO构建多人纸牌游戏。
In terms of prerequisites, you'll want to make sure that you have Node/NPM and Git installed and configured on your machine. Some experience with JavaScript would be helpful, and you may want to run through the basic Phaser tutorial before tackling this one.
在先决条件方面,您需要确保在计算机上安装并配置了Node / NPM和Git 。 使用JavaScript的一些经验会有所帮助,您可能需要先解决基本的Phaser教程,然后再解决这一问题。
Major kudos to Scott Westover for his tutorial on the topic, Kal_Torak and the Phaser community for answering all my questions, and my good friend Mike for helping me conceptualize the architecture of this project.
Scott Westover 的主题教程颇为赞誉,Kal_Torak和Phaser社区回答了我所有的问题,我的好朋友Mike则帮助我概念化了该项目的体系结构。
Note: we'll be using assets and colors from my tabletop card game, Entromancy: Hacker Battles. If you prefer, you can use your own images (or even Phaser rectangles) and colors, and you can access the entire project code on GitHub.
注意:我们将使用桌面纸牌游戏Entromancy:Hacker Battles中的资产和颜色。 如果愿意,可以使用自己的图像(甚至是Phaser矩形 )和颜色,还可以在GitHub上访问整个项目代码。
If you'd prefer a more visual tutorial, you can also follow along with the companion video to this article:
如果您希望使用更直观的教程,则还可以按照本文附带的视频进行操作:
Let's get started!
让我们开始吧!
游戏 (The Game)
Our simple card game will feature a Phaser client that will handle most of the game logic and doing things like dealing cards, providing drag-and-drop functionality, and so on.
我们的简单纸牌游戏将具有一个Phaser客户端,该客户端将处理大多数游戏逻辑并处理诸如发牌,提供拖放功能等操作。
On the back end, we'll spin up an Express server that will utilize Socket.IO to communicate between clients and make it so that when one player plays a card, it shows up in another player's client, and vice-versa.
在后端,我们将启动一个Express服务器,该服务器将使用Socket.IO在客户端之间进行通信,并使它在一个玩家玩纸牌时显示在另一个玩家的客户端中,反之亦然。
Our goal for this project is to create a basic framework for a multiplayer card game that you can build upon and adjust to suit your own game's logic.
该项目的目标是为多人纸牌游戏创建一个基本框架,您可以在该框架上进行构建并进行调整以适应您自己游戏的逻辑。
First, let's tackle the client!
首先,让我们来解决客户!
客户端 (The Client)
To scaffold our client, we're going to clone the semi-official Phaser 3 Webpack Project Template on GitHub.
为了支持我们的客户,我们将在GitHub上克隆半官方的Phaser 3 Webpack项目模板。
Open your favorite command line interface and create a new folder:
打开您喜欢的命令行界面并创建一个新文件夹:
mkdir multiplayer-card-project
cd multiplayer-card-project
Clone the git project:
克隆git项目:
git clone https://github.com/photonstorm/phaser3-project-template.gitThis command will download the template in a folder called "phaser3-project-template" within /multiplayer-card-project. If you want to follow along with our tutorial's file structure, go ahead and change that template folder's name to "client."
此命令会将模板下载到/ multiplayer-card-project内名为“ phaser3-project-template”的文件夹中。 如果要遵循本教程的文件结构,请继续并将该模板文件夹的名称更改为“ client”。
Navigate into that new directory and install all dependencies:
导航到该新目录并安装所有依赖项:
cd client
npm install
Your project folder structure should look something like this:
您的项目文件夹结构应如下所示:
Before we muck with the files, let's go back to our CLI and enter the following command in the /client folder:
在处理文件之前,让我们回到CLI并在/ client文件夹中输入以下命令:
npm startOur Phaser template utilizes Webpack to spin up a local server that in turn serves up a simple game app in our browser (usually at http://localhost:8080). Neat!
我们的Phaser模板利用Webpack启动本地服务器,然后在我们的浏览器中提供一个简单的游戏应用程序(通常位于http:// localhost:8080)。 整齐!
Let's open our project in your favorite code editor and make some changes to fit our card game. Delete everything in /client/src/assets and replace them with the card images from GitHub.
让我们在您最喜欢的代码编辑器中打开我们的项目,并进行一些更改以适合我们的纸牌游戏。 删除/ client / src / assets中的所有内容,并将其替换为GitHub中的卡片图像。
In the /client/src directory, add a folder called "scenes" and another called "helpers."
在/ client / src目录中,添加一个名为“ scenes”的文件夹和另一个名为“ helpers”的文件夹。
In /client/src/scenes, add an empty file called "game.js".
在/ client / src / scenes中,添加一个名为“ game.js”的空文件。
In /client/src/helpers, add three empty files: "card.js", "dealer.js", and "zone.js".
在/ client / src / helpers中,添加三个空文件:“ card.js”,“ dealer.js”和“ zone.js”。
Your project structure should now look like this:
您的项目结构现在应如下所示:
Cool! Your client might be throwing you errors because we deleted some things, but not to worry. Open /src/index.js, which is the main entry point to our front end app. Enter the following code:
凉! 您的客户可能会向您抛出错误,因为我们删除了一些内容,但不必担心。 打开/src/index.js,这是我们前端应用程序的主要入口。 输入以下代码:
import Phaser from "phaser";
import Game from "./scenes/game";const config = {type: Phaser.AUTO,parent: "phaser-example",width: 1280,height: 780,scene: [Game]
};const game = new Phaser.Game(config);
All we've done here is restructure the boilerplate to utilize Phaser's "scene" system so that we can separate our game scenes rather than try to cram everything in one file. Scenes can be useful if you're creating multiple game worlds, building things like instruction screens, or generally trying to keep things tidy.
我们在这里所做的只是重组样板,以利用Phaser的“场景”系统,以便我们可以分隔游戏场景,而不是尝试将所有内容都塞入一个文件中。 如果您要创建多个游戏世界,构建指令屏幕之类的东西,或者通常是试图使事物保持整洁,那么场景会很有用。
Let's move to /src/scenes/game.js and write some code:
让我们转到/src/scenes/game.js并编写一些代码:
export default class Game extends Phaser.Scene {constructor() {super({key: 'Game'});}preload() {this.load.image('cyanCardFront', 'src/assets/CyanCardFront.png');this.load.image('cyanCardBack', 'src/assets/CyanCardBack.png');this.load.image('magentaCardFront', 'src/assets/MagentaCardFront.png');this.load.image('magentaCardBack', 'src/assets/MagentaCardBack.png');}create() {this.dealText = this.add.text(75, 350, ['DEAL CARDS']).setFontSize(18).setFontFamily('Trebuchet MS').setColor('#00ffff').setInteractive();}update() {}
}
We're taking advantage of ES6 classes to create a new Game scene, which incorporates preload(), create() and update() functions.
我们利用ES6类来创建一个新的Game场景,其中包含preload(),create()和update()函数。
preload() is used to...well...preload any assets that we'll be using for our game.
preload()用于...很好...预加载我们将用于游戏的任何资产。
create() is run when the game starts up, and where we'll be establishing much of our user interface and game logic.
当游戏启动时将运行create(),我们将在其中建立许多用户界面和游戏逻辑。
update() is called once per frame, and we won't be making use of it in our tutorial (but it may be useful in your own game depending on its requirements).
update()每帧被调用一次,我们不会在本教程中使用它(但是根据您的要求,它可能在您自己的游戏中很有用)。
Within the create() function, we've created a bit of text that says "DEAL CARDS" and set it to be interactive:
在create()函数中,我们创建了一些文字“ DEAL CARDS”,并将其设置为交互式:
Very cool. Let's create a bit of placeholder code to understand how we want this whole thing to work once it's up and running. Add the following to your create() function:
很酷。 让我们创建一些占位符代码,以了解我们希望整个事情在启动和运行后如何工作。 将以下内容添加到您的create()函数中:
let self = this;this.card = this.add.image(300, 300, 'cyanCardFront').setScale(0.3, 0.3).setInteractive();this.input.setDraggable(this.card);this.dealCards = () => {}this.dealText.on('pointerdown', function () {self.dealCards();})this.dealText.on('pointerover', function () {self.dealText.setColor('#ff69b4');})this.dealText.on('pointerout', function () {self.dealText.setColor('#00ffff');})this.input.on('drag', function (pointer, gameObject, dragX, dragY) {gameObject.x = dragX;gameObject.y = dragY;})We've added a lot of structure, but not much has happened. Now, when our mouse hovers over the "DEAL CARDS" text, it's highlighted in cyberpunk hot pink, and there's a random card on our screen:
我们添加了很多结构,但是并没有发生太多。 现在,当我们的鼠标悬停在“交易卡”文本上时,它以赛博朋克的鲜粉红色突出显示,并且屏幕上有一张随机卡:
We've placed the image at the (x, y) coordinates of (300, 300), set its scale to be a bit smaller, and made it interactive and draggable. We've also added a little bit of logic to determine what should happen when dragged: it should follow the (x, y) coordinates of our mouse.
我们将图像放置在(300,300)的(x,y)坐标上,将其比例设置为较小,并使其具有交互性和可拖动性。 我们还添加了一些逻辑来确定拖动时应发生的情况:它应遵循鼠标的(x,y)坐标。
We've also created an empty dealCards() function that will be called when we click on our "DEAL CARDS" text. Additionally, we've saved "this" - meaning the scene in which we're currently working - into a variable called "self" so that we can use it throughout our functions without worrying about scope.
我们还创建了一个空的dealCards()函数,当我们单击“交易卡”文本时将调用该函数。 此外,我们已经将“ this”(即我们当前正在工作的场景)保存到名为“ self”的变量中,以便我们可以在整个函数中使用它而不必担心范围。
Our Game scene is going to get messy fast if we don't start moving things around, so let's delete the code block that begins with "this.card" and move to /src/helpers/card.js to write:
如果我们不开始四处移动,我们的游戏场景将很快变得混乱,因此让我们删除以“ this.card”开头的代码块,然后移至/src/helpers/card.js进行编写:
export default class Card {constructor(scene) {this.render = (x, y, sprite) => {let card = scene.add.image(x, y, sprite).setScale(0.3, 0.3).setInteractive();scene.input.setDraggable(card);return card;}}
}
We've created a new class that accepts a scene as a parameter, and features a render() function that accepts (x, y) coordinates and a sprite. Now, we can call this function from elsewhere and pass it the necessary parameters to create cards.
我们创建了一个新类,该类接受场景作为参数,并具有一个render()函数,该函数接受(x,y)坐标和一个sprite。 现在,我们可以从其他地方调用此函数并将其传递给必要的参数以创建卡。
Let's import the card at the top of our Game scene:
让我们在游戏场景的顶部导入卡:
import Card from '../helpers/card';And enter the following code within our empty dealCards() function:
并在空的DealCards()函数中输入以下代码:
this.dealCards = () => {for (let i = 0; i < 5; i++) {let playerCard = new Card(this);playerCard.render(475 + (i * 100), 650, 'cyanCardFront');}}When we click on the "DEAL CARDS" button, we now iterate through a for loop that creates cards and renders them sequentially on screen:
现在,当我们单击“交易卡”按钮时,我们遍历一个for循环,该循环创建卡并在屏幕上顺序呈现它们:
NICE. We can drag those cards around the screen, but it might be nice to limit where they can be dropped to support our game logic.
不错。 我们可以在屏幕上拖动这些卡,但是最好限制将它们放到哪里以支持我们的游戏逻辑。
Let's move over to /src/helpers/zone.js and add a new class:
让我们转到/src/helpers/zone.js并添加一个新类:
export default class Zone {constructor(scene) {this.renderZone = () => {let dropZone = scene.add.zone(700, 375, 900, 250).setRectangleDropZone(900, 250);dropZone.setData({ cards: 0 });return dropZone;};this.renderOutline = (dropZone) => {let dropZoneOutline = scene.add.graphics();dropZoneOutline.lineStyle(4, 0xff69b4);dropZoneOutline.strokeRect(dropZone.x - dropZone.input.hitArea.width / 2, dropZone.y - dropZone.input.hitArea.height / 2, dropZone.input.hitArea.width, dropZone.input.hitArea.height)}}
}
Phaser has built-in dropzones that allow us to dictate where game objects can be dropped, and we've set up one here and provided it with an outline. We've also added a tiny bit of data called "cards" to the dropzone that we'll use later.
Phaser具有内置的放置区,可让我们指定可以放置游戏对象的位置,并且我们在此处设置了一个放置区并为其提供了轮廓。 我们还向拖放区添加了少量数据,称为“卡片”,稍后将使用。
Let's import our new zone into the Game scene:
让我们将新区域导入“游戏”场景:
import Zone from '../helpers/zone';And call it in within the create() function:
并在create()函数中调用它:
this.zone = new Zone(this);this.dropZone = this.zone.renderZone();this.outline = this.zone.renderOutline(this.dropZone);Not too shabby!
不是太寒酸!
We need to add a bit of logic to determine how cards should be dropped into the zone. Let's do that below the "this.input.on('drag')" function:
我们需要添加一些逻辑来确定如何将卡片放入该区域。 让我们在“ this.input.on('drag')”函数下面进行操作:
this.input.on('dragstart', function (pointer, gameObject) {gameObject.setTint(0xff69b4);self.children.bringToTop(gameObject);})this.input.on('dragend', function (pointer, gameObject, dropped) {gameObject.setTint();if (!dropped) {gameObject.x = gameObject.input.dragStartX;gameObject.y = gameObject.input.dragStartY;}})this.input.on('drop', function (pointer, gameObject, dropZone) {dropZone.data.values.cards++;gameObject.x = (dropZone.x - 350) + (dropZone.data.values.cards * 50);gameObject.y = dropZone.y;gameObject.disableInteractive();})Starting at the bottom of the code, when a card is dropped, we increment the "cards" data value on the dropzone, and assign the (x, y) coordinates of the card to the dropzone based on how many cards are already on it. We also disable interactivity on cards after they're dropped so that they can't be retracted:
从代码底部开始,放下一张卡片后,我们会在放置区上增加“ cards”数据值,并根据放置在其中的卡片数量将卡片的(x,y)坐标分配给放置区。 我们还会在卡片掉落后禁用其互动性,以使它们无法收回:
We've also made it so that our cards have a different tint when dragged, and if they're not dropped over the dropzone, they'll return to their starting positions.
我们还做到了这一点,以使我们的卡在拖动时具有不同的色泽,并且如果未将其放置在放置区上,它们将返回其初始位置。
Although our client isn't quite complete, we've done as much as we can before implementing the back end. We can now deal cards, drag them around the screen, and drop them in a dropzone. But to move forward, we'll need to set up a server than can coordinate our multiplayer functionality.
尽管我们的客户还不够完善,但是在实现后端之前我们已经尽了最大努力。 现在,我们可以处理卡片,将其拖动到屏幕周围,然后将其放置在放置区中。 但是要前进,我们需要设置服务器,以协调我们的多人游戏功能。
服务器 (The Server)
Let's open up a new command line at our root directory (above /client) and type:
让我们在根目录(/ client上方)打开一个新命令行,然后键入:
npm init
npm install --save express socket.io nodemon
We've initialized a new package.json and installed Express, Socket.IO, and Nodemon (which will watch our server and restart it upon changes).
我们已经初始化了一个新的package.json并安装了Express,Socket.IO和Nodemon (它们将监视我们的服务器并在更改后重新启动它)。
In our code editor, let's change the "scripts" section of our package.json to say:
在我们的代码编辑器中,让我们将package.json的“脚本”部分更改为:
"scripts": {"start": "nodemon server.js"},Excellent. We're ready to put our server together! Create an empty file called "server.js" in our root directory and enter the following code:
优秀的。 我们准备将服务器组装在一起! 在我们的根目录中创建一个名为“ server.js”的空文件,然后输入以下代码:
const server = require('express')();
const http = require('http').createServer(server);
const io = require('socket.io')(http);io.on('connection', function (socket) {console.log('A user connected: ' + socket.id);socket.on('disconnect', function () {console.log('A user disconnected: ' + socket.id);});
});http.listen(3000, function () {console.log('Server started!');
});
We're importing Express and Socket.IO, asking for the server to listen on port 3000. When a client connects to or disconnects from that port, we'll log the event to the console with the client's socket id.
我们正在导入Express和Socket.IO,要求服务器在端口3000上进行侦听。当客户端连接到该端口或从该端口断开连接时,我们将使用客户端的套接字ID将事件记录到控制台。
Open a new command line interface and start the server:
打开一个新的命令行界面并启动服务器:
npm run startOur server should now be running on localhost:3000, and Nodemon will watch our back end files for any changes. Not much else will happen except for the console log that the "Server started!"
我们的服务器现在应该在localhost:3000上运行,Nodemon将监视我们的后端文件是否有任何更改。 除了“服务器已启动!”的控制台日志外,不会发生其他任何事情。
In our other open command line interface, let's navigate back to our /client directory and install the client version of Socket.IO:
在另一个开放的命令行界面中,让我们导航回到/ client目录并安装Socket.IO的客户端版本:
cd client
npm install --save socket.io-client
We can now import it in our Game scene:
现在我们可以将其导入我们的游戏场景中:
import io from 'socket.io-client';Great! We've just about wired up our front and back ends. All we need to do is write some code in the create() function:
大! 我们已经将前端和后端进行了布线。 我们需要做的就是在create()函数中编写一些代码:
this.socket = io('http://localhost:3000');this.socket.on('connect', function () {console.log('Connected!');});We're initializing a new "socket" variable that points to our local port 3000 and logs to the browser console upon connection.
我们正在初始化一个新的“套接字”变量,该变量指向我们的本地端口3000,并在连接后登录到浏览器控制台。
Open and close a couple of browsers at http://localhost:8080 (where our Phaser client is being served) and you should see the following in your command line interface:
在http:// localhost:8080(为我们的Phaser客户端提供服务)上打开和关闭几个浏览器,您应该在命令行界面中看到以下内容:
YAY. Let's start adding logic to our server.js file that will serve the needs of our card game. Replace the existing code with the following:
好极了。 让我们开始将逻辑添加到我们的server.js文件中,这将满足我们的纸牌游戏的需求。 用以下代码替换现有代码:
const server = require('express')();
const http = require('http').createServer(server);
const io = require('socket.io')(http);
let players = [];io.on('connection', function (socket) {console.log('A user connected: ' + socket.id);players.push(socket.id);if (players.length === 1) {io.emit('isPlayerA');};socket.on('dealCards', function () {io.emit('dealCards');});socket.on('cardPlayed', function (gameObject, isPlayerA) {io.emit('cardPlayed', gameObject, isPlayerA);});socket.on('disconnect', function () {console.log('A user disconnected: ' + socket.id);players = players.filter(player => player !== socket.id);});
});http.listen(3000, function () {console.log('Server started!');
});
We've initialized an empty array called "players" and add a socket id to it every time a client connects to the server, while also deleting the socket id upon disconnection.
我们已经初始化了一个名为“ players”的空数组,并在每次客户端连接到服务器时向其添加一个套接字ID,同时在断开连接时也会删除该套接字ID。
If a client is the first to connect to the server, we ask Socket.IO to "emit" an event that they're going to be Player A. Subsequently, when the server receives an event called "dealCards" or "cardPlayed", it should emit back to the clients that they should update accordingly.
如果客户端是第一个连接到服务器的客户端,我们要求Socket.IO“ 发出 ”一个将成为玩家A的事件。随后,当服务器收到一个名为“ dealCards”或“ cardPlayed”的事件时,它应该向客户端发出它们应该相应更新的信息。
Believe it or not, that's all the code we need to get our server working! Let's turn our attention back to the Game scene. Right at the top of the create() function, type the following:
信不信由你,这就是我们服务器正常运行所需的全部代码! 让我们把注意力转移到游戏界。 在create()函数顶部,键入以下内容:
this.isPlayerA = false;this.opponentCards = [];Under the code block that starts with "this.socket.on(connect)", write:
在以“ this.socket.on(connect)”开头的代码块下,编写:
this.socket.on('isPlayerA', function () {self.isPlayerA = true;})Now, if our client is the first to connect to the server, the server will emit an event that tells the client that it will be Player A. The client socket receives that event and turns our "isPlayerA" boolean from false to true.
现在,如果我们的客户端是第一个连接到服务器的服务器,则服务器将发出一个事件,告诉客户端它将是PlayerA。客户端套接字接收到该事件并将“ isPlayerA”布尔值从false变为true。
Note: from this point forward, you may need to reload your browser page (set to http://localhost:8080), rather than having Webpack do it automatically for you, for the client to correctly disconnect from and reconnect to the server.
注意:从现在开始,您可能需要重新加载浏览器页面(设置为http:// localhost:8080),而不是让Webpack为您自动执行此操作,以使客户端正确地从服务器断开并重新连接到服务器。
We need to reconfigure our dealCards() logic to support the multiplayer aspect of our game, given that we want the client to deal us a certain set of cards that may be different from our opponent's. Additionally, we want to render the backs of our opponent's cards on our screen, and vice versa.
考虑到我们希望客户向我们提供可能与我们对手不同的某些牌组,我们需要重新配置dealCards()逻辑以支持游戏的多人游戏方面。 此外,我们想在屏幕上渲染对手的牌背面,反之亦然。
We'll move to the empty /src/helpers/dealer.js file, import card.js, and create a new class:
我们将移至空的/src/helpers/dealer.js文件,导入card.js并创建一个新类:
import Card from './card';export default class Dealer {constructor(scene) {this.dealCards = () => {let playerSprite;let opponentSprite;if (scene.isPlayerA) {playerSprite = 'cyanCardFront';opponentSprite = 'magentaCardBack';} else {playerSprite = 'magentaCardFront';opponentSprite = 'cyanCardBack';};for (let i = 0; i < 5; i++) {let playerCard = new Card(scene);playerCard.render(475 + (i * 100), 650, playerSprite);let opponentCard = new Card(scene);scene.opponentCards.push(opponentCard.render(475 + (i * 100), 125, opponentSprite).disableInteractive());}}}
}
With this new class, we're checking whether the client is Player A, and determining what sprites should be used in either case.
通过这个新类,我们正在检查客户端是否是Player A,并确定在两种情况下都应使用哪种精灵。
Then, we deal cards to our client, while rendering the backs of our opponent's cards at the top the screen and adding them to the opponentCards array that we initialized in our Game scene.
然后,我们向客户发放卡牌,同时在屏幕顶部渲染对手卡牌的背面,并将其添加到我们在游戏场景中初始化的对手卡牌数组中。
In /src/scenes/game.js, import the Dealer:
在/src/scenes/game.js中,导入Dealer:
import Dealer from '../helpers/dealer';Then replace our dealCards() function with:
然后将我们的dealCards()函数替换为:
this.dealer = new Dealer(this);Under code block that begins with "this.socket.on('isPlayerA')", add the following:
在以“ this.socket.on('isPlayerA')”开头的代码块下,添加以下内容:
this.socket.on('dealCards', function () {self.dealer.dealCards();self.dealText.disableInteractive();})We also need to update our dealText function to match these changes:
我们还需要更新我们的dealText函数以匹配这些更改:
this.dealText.on('pointerdown', function () {self.socket.emit("dealCards");})Phew! We've created a new Dealer class that will handle dealing cards to us and rendering our opponent's cards to the screen. When the client socket receives the "dealcards" event from the server, it will call the dealCards() function from this new class, and disable the dealText so that we can't just keep generating cards for no reason.
! 我们创建了一个新的Dealer类,该类将处理发给我们的发牌并在屏幕上呈现对手的发牌。 当客户端套接字从服务器接收到“ dealcards”事件时,它将从该新类中调用dealCards()函数,并禁用DealText,以便我们不能无缘无故地继续生成卡片。
Finally, we've changed the dealText functionality so that when it's pressed, the client emits an event to the server that we want to deal cards, which ties everything together.
最后,我们更改了dealText功能,以便在按下该键时,客户端会向服务器发出一个我们要发牌的事件,该事件将所有内容绑定在一起。
Fire up two separate browsers pointed to http://localhost:8080 and hit "DEAL CARDS" on one of them. You should see different sprites on either screen:
启动两个指向http:// localhost:8080的独立浏览器,然后在其中一个上单击“ DEAL CARDS”。 您应该在任一屏幕上看到不同的精灵:
Note again that if you're having issues with this step, you may have to close one of your browsers and reload the first one to ensure that both clients have disconnected from the server, which should be logged to your command line console.
再次注意,如果您在执行此步骤时遇到问题,则可能必须关闭一个浏览器并重新加载第一个浏览器,以确保两个客户端都已与服务器断开连接,应将其记录到命令行控制台中。
We still need to figure out how to render our dropped cards in our opponent's client, and vice-versa. We can do all of that in our game scene! Update the code block that begins with "this.input.on('drop')" with one line at the end:
我们仍然需要弄清楚如何在对手的客户中呈现掉牌,反之亦然。 我们可以在游戏场景中做到所有这些! 更新以“ this.input.on('drop')”开头的代码块,并在末尾添加一行:
this.input.on('drop', function (pointer, gameObject, dropZone) {dropZone.data.values.cards++;gameObject.x = (dropZone.x - 350) + (dropZone.data.values.cards * 50);gameObject.y = dropZone.y;gameObject.disableInteractive();self.socket.emit('cardPlayed', gameObject, self.isPlayerA);})When a card is dropped in our client, the socket will emit an event called "cardPlayed", passing the details of the game object and the client's isPlayerA boolean (which could be true or false, depending on whether the client was the first to connect to the server).
当将卡放入我们的客户端时,套接字将发出一个名为“ cardPlayed”的事件,传递游戏对象的详细信息以及客户端的isPlayerA布尔值(可以为true或false,具体取决于客户端是第一个连接的客户端)到服务器)。
Recall that, in our server code, Socket.IO simply receives the "cardPlayed" event and emits the same event back up to all of the clients, passing the same information about the game object and isPlayerA from the client that initiated the event.
回想一下,在我们的服务器代码中,Socket.IO只是接收“ cardPlayed”事件并向所有客户端发出相同的事件,并从发起该事件的客户端传递有关游戏对象和isPlayerA的相同信息。
Let's write what should happen when a client receives a "cardPlayed" event from the server, below the "this.socket.on('dealCards')" code block:
让我们在“ this.socket.on('dealCards')”代码块下方编写客户端从服务器接收到“ cardPlayed”事件时应该发生的情况:
this.socket.on('cardPlayed', function (gameObject, isPlayerA) {if (isPlayerA !== self.isPlayerA) {let sprite = gameObject.textureKey;self.opponentCards.shift().destroy();self.dropZone.data.values.cards++;let card = new Card(self);card.render(((self.dropZone.x - 350) + (self.dropZone.data.values.cards * 50)), (self.dropZone.y), sprite).disableInteractive();}})The code block first compares the isPlayerA boolean it receives from the server against the client's own isPlayerA, which is a check to determine whether the client that is receiving the event is the same one that generated it.
该代码块首先将它从服务器接收的isPlayerA布尔值与客户端自己的isPlayerA进行比较,这是一项检查以确定接收事件的客户端是否与生成该事件的客户端相同。
Let's think that through a bit further, as it exposes a key component to how our client - server relationship works, using Socket.IO as the connector.
让我们进一步考虑一下,因为它使用Socket.IO作为连接器,向我们的客户-服务器关系的工作原理公开了一个关键组件。
Suppose that Client A connects to the server first, and is told through the "isPlayerA" event that it should change its isPlayerA boolean to true. That's going to determine what kind of cards it generates when a user clicks "DEAL CARDS" through that client.
假设客户端A首先连接到服务器,并通过“ isPlayerA”事件告知其应将其isPlayerA布尔值更改为true 。 这将确定用户通过该客户端单击“交易卡”时生成的卡类型。
If Client B connects to the server second, it's never told to alter its isPlayerA boolean, which stays false. That will also determine what kind of cards it generates.
如果客户端B第二次连接到服务器,则永远不会告诉它更改其isPlayerA布尔值,该布尔值保持false 。 那也将决定它产生什么样的卡。
When Client A drops a card, it emits a "cardPlayed" event to the server, passing information about the card that was dropped, and its isPlayerA boolean, which is true. The server then relays all that information back up to all clients with its own "cardPlayed" event.
客户端A放下卡时,它将向服务器发出“ cardPlayed”事件,将有关已放下的卡及其isPlayerA布尔值的信息传递给true 。 然后,服务器通过其自己的“ cardPlayed”事件将所有这些信息中继回所有客户端。
Client A receives that event from the server, and notes that the isPlayerA boolean from the server is true, which means that the event was generated by Client A itself. Nothing special happens.
客户端A从服务器接收到该事件,并注意到来自服务器的isPlayerA布尔值为true ,这意味着该事件是由客户端A本身生成的。 没什么特别的。
Client B receives the same event from the server, and notes that the isPlayerA boolean from the server is true, although Client B's own isPlayerA is false. Because of this difference, it executes the rest of the code block.
客户端B从服务器接收到相同的事件,并且注意到客户端B的isPlayerA布尔值为true ,尽管客户端B自己的isPlayerA为false 。 由于存在这种差异,它将执行其余的代码块。
The ensuing code stores the "texturekey" - basically, the image - of the game object that it receives from the server into a variable called "sprite". It destroys one of the opponent card backs that are rendered at the top of the screen, and increments the "cards" data value in the dropzone so that we can keep placing cards from left to right.
随后的代码将从服务器接收的游戏对象的“纹理键”(基本上是图像)存储到称为“ sprite”的变量中。 它破坏了显示在屏幕顶部的对手纸牌之一,并增加了放置区中的“纸牌”数据值,因此我们可以继续从左到右放置纸牌。
The code then generates a new card in the dropzone that uses the sprite variable to create the same card that was dropped in the other client (if you had data attached to that game object, you could use a similar approach to attach it here as well).
然后,代码在dropzone中生成一个新卡,该卡使用sprite变量创建与其他客户端中放置的卡相同的卡(如果您已将数据附加到该游戏对象,则也可以使用类似的方法在此处附加卡)。
Your final /src/scenes/game.js code should look like this:
您的最终/src/scenes/game.js代码应如下所示:
import io from 'socket.io-client';
import Card from '../helpers/card';
import Dealer from "../helpers/dealer";
import Zone from '../helpers/zone';export default class Game extends Phaser.Scene {constructor() {super({key: 'Game'});}preload() {this.load.image('cyanCardFront', 'src/assets/CyanCardFront.png');this.load.image('cyanCardBack', 'src/assets/CyanCardBack.png');this.load.image('magentaCardFront', 'src/assets/magentaCardFront.png');this.load.image('magentaCardBack', 'src/assets/magentaCardBack.png');}create() {this.isPlayerA = false;this.opponentCards = [];this.zone = new Zone(this);this.dropZone = this.zone.renderZone();this.outline = this.zone.renderOutline(this.dropZone);this.dealer = new Dealer(this);let self = this;this.socket = io('http://localhost:3000');this.socket.on('connect', function () {console.log('Connected!');});this.socket.on('isPlayerA', function () {self.isPlayerA = true;})this.socket.on('dealCards', function () {self.dealer.dealCards();self.dealText.disableInteractive();})this.socket.on('cardPlayed', function (gameObject, isPlayerA) {if (isPlayerA !== self.isPlayerA) {let sprite = gameObject.textureKey;self.opponentCards.shift().destroy();self.dropZone.data.values.cards++;let card = new Card(self);card.render(((self.dropZone.x - 350) + (self.dropZone.data.values.cards * 50)), (self.dropZone.y), sprite).disableInteractive();}})this.dealText = this.add.text(75, 350, ['DEAL CARDS']).setFontSize(18).setFontFamily('Trebuchet MS').setColor('#00ffff').setInteractive();this.dealText.on('pointerdown', function () {self.socket.emit("dealCards");})this.dealText.on('pointerover', function () {self.dealText.setColor('#ff69b4');})this.dealText.on('pointerout', function () {self.dealText.setColor('#00ffff');})this.input.on('drag', function (pointer, gameObject, dragX, dragY) {gameObject.x = dragX;gameObject.y = dragY;})this.input.on('dragstart', function (pointer, gameObject) {gameObject.setTint(0xff69b4);self.children.bringToTop(gameObject);})this.input.on('dragend', function (pointer, gameObject, dropped) {gameObject.setTint();if (!dropped) {gameObject.x = gameObject.input.dragStartX;gameObject.y = gameObject.input.dragStartY;}})this.input.on('drop', function (pointer, gameObject, dropZone) {dropZone.data.values.cards++;gameObject.x = (dropZone.x - 350) + (dropZone.data.values.cards * 50);gameObject.y = dropZone.y;gameObject.disableInteractive();self.socket.emit('cardPlayed', gameObject, self.isPlayerA);})}update() {}
}
Save everything, open two browsers, and hit "DEAL CARDS". When you drag and drop a card in one client, it should appear in the dropzone of the other, while also deleting a card back, signifying that a card has been played:
保存所有内容,打开两个浏览器,然后单击“交易卡”。 当您将卡拖放到一个客户端中时,该卡应显示在另一个客户端的放置区中,同时还应将其删除,这表示已播放了卡:
That's it! You should now have a functional template for your multiplayer card game, which you can use to add your own cards, art, and game logic.
而已! 现在,您应该具有用于多人纸牌游戏的功能模板,可用于添加自己的纸牌,艺术品和游戏逻辑。
One first step could be to add to your Dealer class by making it shuffle an array of cards and return a random one (hint: check out Phaser.Math.RND.shuffle([array])).
第一步可能是通过将其洗牌成数组并返回随机的一类来添加到Dealer类中(提示:签出Phaser.Math.RND.shuffle([array]) )。
Happy coding!
编码愉快!
If you enjoyed this article, please consider checking out my games and books, subscribing to my YouTube channel, or joining the Entromancy Discord.
如果您喜欢这篇文章,请考虑查看我的游戏和书籍 , 订阅我的YouTube频道或加入Entromancy Discord 。
M. S. Farzan, Ph.D. has written and worked for high-profile video game companies and editorial websites such as Electronic Arts, Perfect World Entertainment, Modus Games, and MMORPG.com, and has served as the Community Manager for games like Dungeons & Dragons Neverwinter and Mass Effect: Andromeda. He is the Creative Director and Lead Game Designer of Entromancy: A Cyberpunk Fantasy RPG and author of The Nightpath Trilogy. Find M. S. Farzan on Twitter @sominator.
法赞(MS Farzan)博士 他曾为知名的视频游戏公司和编辑网站(例如,Electronic Arts,Perfect World Entertainment,Modus Games和MMORPG.com)撰写和工作,并曾担任《龙与地下城:龙骨无双》和《 质量效应:仙女座》等游戏的社区经理。 。 他是《 Entronancy:Cyberpunk Fantasy RPG》的创意总监和首席游戏设计师,并且是《 The Nightpath Trilogy》的作者。 在Twitter @sominator上找到MS Farzan 。
翻译自: https://www.freecodecamp.org/news/how-to-build-a-multiplayer-card-game-with-phaser-3-express-and-socket-io/
phaser.min.js
相关文章:

VirtualBox - RTR3InitEx failed with rc=-1912 (rc=-1912)
有一天重启电脑后虚拟机virtual box突然打不开了,提示类似 https://askubuntu.com/questions/900794/virtualbox-rtr3initex-failed-with-rc-1912-rc-1912 参考帖子中查看了一下包的情况dpkg --list virtualbox-* | grep ii 结果:ii virtualbox-dkms …
边工作边刷题:70天一遍leetcode: day 27
Permutation Sequence 原理:一个permutation是n位,在第i位的值取决于有多少个i-1位的组合。这i-1位的组合是在高位pick完之后剩下的数中 细节: 不同于decimal,位数是固定的,所以不能用k>0作为循环条件(这…
基本数据结构(图: 基本结构,DFS,prim算法, kruskal算法)
#include <iostream> using namespace std; //约定: //1. 图是由很多节点(VERTEX)构成的, 因此图结构是由一个VERTEX的链表构成的, 每个VERTEX则需要有一个id,也就是start, 取start是为了跟LINE更直观地结合。 //2. 每个节点关联着很多(LINE)构成,因此每个VER…

gatsby_如何使用Gatsby和Leaflet创建夏季公路旅行地图绘制应用程序
gatsbyGet ready for the summer by building your own road trip mapping app with this step-by-step guide!通过此逐步指南,构建自己的公路旅行地图应用,为夏天做好准备! What are we going to build? 我们要建造什么? What …
NEFU 1146 又见A+B
又见ab Problem:1146 Time Limit:1000ms Memory Limit:65535K Description 给定两个非负整数A,B,求他们的和。 Input 多组输入,每组输入两个非负整数A和B(0<A,B<10^3000),可能会有前缀0,但保证总长度不超过3000…
图的最短路径dijkstra算法
想法是这样的: 1. 最开始要建立4个list,分别存储 a. 所有的Vertex: allVertex[] b. 一个空的Vertex list: emptyVertex[] c. 一个前缀表 previous list(用来回溯路径用): previous[] d. 一个表示最短距离的表(就是表示某个点与0点的最短距离)࿱…
JDBC数据源连接池(1)---DBCP
何为数据源呢?也就是数据的来源。我在前面的一篇文章《JDBC原生数据库连接》中,采用了mysql数据库,数据来源于mysql,那么mysql就是一种数据源。在实际工作中,除了mysql,往往还会有Oracle,sql se…
如果成为一名高级安卓开发_什么是高级开发人员,我如何成为一名开发人员?
如果成为一名高级安卓开发Becoming a Senior Developer is something many of us strive for as we continue our code journey and build our career. But what does it actually mean to be a "Senior" Developer?成为一名高级开发人员是我们许多人在继续我们的代…
拍牌神器是怎样炼成的(三)---注册全局热键
要想在上海拍牌的超低中标率中把握机会、占得先机,您不仅需要事先准备好最优的竞拍策略,还要制定若干套应急预案,应对不时之需。既定策略交给计算机自动执行,没有问题。可是谁来召唤应急预案呢?使用全局热键应该是个不…
eclipse 变成中文
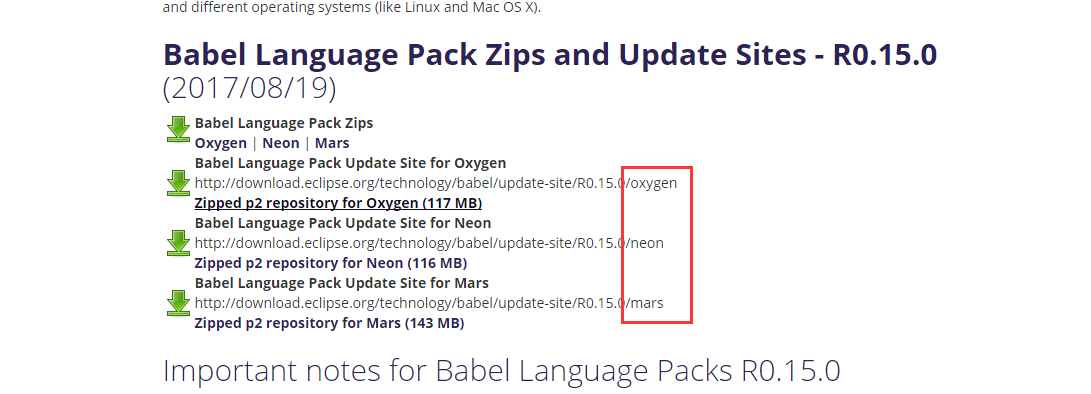
官方下载 http://www.eclipse.org/babel/downloads.php 按照自己的eclipse版本下载对应的 复制链接 到eclipse ->help->Install New Software 勾选自己的语言包 如: 等待 安装完成 ,无过不好用 更改 右键 属性 更改位置 加后缀 D:\xinle_eclips…
框架模式与设计模式之区别
http://my.oschina.net/u/991183/blog/109854 有很多程序员往往把框架模式和设计模式混淆,认为MVC是一种设计模式。实际上它们完全是不同的概念。框架、设计模式这两个概念总容易被混淆,其实它们之间还是有区别的。框架通常是代码重用,而设计…
村上春树 开始写作_如何克服对写作的恐惧并找到开始的动力
村上春树 开始写作Writing about our work is one of those things that most of us have on our to-do list. But whether its due to procrastination or fear, we never actually get to it. Heres some more motivation and reasons why you should give it a shot!撰写我们…

一个基于组件的动态对象系统
http://hulefei29.iteye.com/blog/1490889 一、静态的痛苦 作为一个项目经验丰富的程序员,你经常会遇到游戏开发过程中的“反复”(iterations):今天美术将一个静态的模型改为骨骼模型并添加了动画;明天企划会议上决定把所有未拾取武器由…
Lua生成Guid(uuid)
全局唯一标识符(GUID,Globally Unique Identifier)也称作 UUID(Universally Unique IDentifier) 。GUID是一种由算法生成的二进制长度为128位的数字标识符。GUID主要用于在拥有多个节点、多台计算机的网络或系统中。在理想情况下,…
c:if标签的使用
1、标签的基本介绍 <c:if> 标签必须要有test属性,当test中的表达式结果为true时,则会执行本体内容;如果为false,则不会执行。例如:${requestScope.username admin},如果requestScope.username等adm…
ecs和eks 比较_如何使用Kubernetes,EKS和NGINX为网站设置DNS
ecs和eks 比较As the creator of Foo, a platform for website quality monitoring, I recently endeavored in a migration to Kubernetes and EKS (an AWS service).作为网站质量监控平台Foo的创建者,我最近努力迁移到Kubernetes和EKS(一种AWS服务)。 Kubernetes…
仅需6步,教你轻易撕掉app开发框架的神秘面纱(1):确定框架方案
遇到的问题 做游戏的时候用的是cocos2dxlua,游戏开发自有它的一套框架机制。而现在公司主要项目要做android和iOS应用。本文主要介绍如何搭建简单易用的App框架。 如何解决 对于新手来说,接触一门新的知识,往往会思考该怎么入手,…
js全局变量污染
一.定义全局变量命名空间 只创建一个全局变量,并定义该变量为当前应用容器,把其他全局变量追加在该命名空间下 var my{}; my.name{big_name:"zhangsan",small_name:"lisi" }; my.work{school_work:"study",family_work:&q…
cached-query 将缓存和查询数据库高速连接起来的轻类库
介绍 我们经常有这种需求:当我们把memcached增加到项目后我还还要写一个 cacheUtils 或者 cacheManager 之类的类来操作memcached。而且一般的操作不外乎是这种操作: 拿到一段sql,先去memcahed里面看下是否有缓存,假设有就直接返回…
全栈Python Flask教程-建立社交网络
Learn how to build a basic social platform with the Python Flask web framework. 了解如何使用Python Flask网络框架构建基本的社交平台。 In this video, we show you how to:在此视频中,我们向您展示如何: how to create a database, 如何创建数…
py执行系统命令
py执行系统命令 1. os.system In [32]: run os.system("date") Thu Jan 28 09:41:25 CST 2016 In [33]: run Out[33]: 0 只能得到返回值,无法得到输出。 2. os.popen In [35]: run os.popen("date") In [36]: run.read Out[36]: <function…
仅需6步,教你轻易撕掉app开发框架的神秘面纱(2):MVP比MVC更好吗
对于程序框架的选择,由于android天然的MVC,本来不需要另外设计直接使用即可。但是我更加钟情于MVP模式,对于其将ui完全与业务逻辑分离的思路很赞同。 那么什么是业务逻辑?个人认为,对数据(即MVC中的M&…
一、nginx 安装
添加官方 yum 源 1 vim /etc/yum.repos.d/nginx.rep 输入以下内容(OS为你的系统,OSRELEASE 系统版本) 1 [nginx] 2 namenginx repo 3 baseurlhttp://nginx.org/packages/mainline/OS/OSRELEASE/$basearch/ 4 gpgcheck0 5 enabled1 列出可安装…
华为技术面试编码题_最佳技术编码面试准备书
华为技术面试编码题Technical coding interviews are notoriously difficult — almost borderline quiz-like for those unprepared. It can sometimes be a daunting task to navigate all the technical coding preparation resources available online, and one might as…
仅需6步,教你轻易撕掉app开发框架的神秘面纱(3):构造具有个人特色的MVP模式
1. MVP的问题 之前我们说过MVP模式最大的问题在于:每写一个Activity/Fragment需要写4个对应的文件,对于一个简易的app框架来说太麻烦了。所以我们需要对MVP进行一定的简化。 关于MVP模式是什么及其简单实现,可以参照:浅谈 MVP i…
Java进阶之自动拆箱与自动装箱
序. java基本类型介绍 java中,基本数据类型一共有8种,详细信息如下表: 类型大小范围默认值byte8-128 - 1270short16-32768 - 327680int32-2147483648-21474836480long64-9233372036854477808-92333720368544778080float32-3.40292347E38-3.40…
Ceilometer Polling Performance Improvement
Ceilometer的数据采集agent会定期对nova/keystone/neutron/cinder等服务调用其API的获取信息,默认是20秒一次, # Polling interval for pipeline file configuration in seconds.# (integer value)#pipeline_polling_interval 20 这在大规模部署中会对O…
vue使用pwa_如何使用HTML,CSS和JavaScript从头开始构建PWA
vue使用pwaProgressive web apps are a way to bring that native app feeling to a traditional web app. With PWAs we can enhance our website with mobile app features which increase usability and offer a great user experience.渐进式Web应用程序是一种将本地应用程…
仅需6步,教你轻易撕掉app开发框架的神秘面纱(4):网络模块的封装
程序框架确定了,还需要封装网络模块。 一个丰富多彩的APP少不了网络资源的支持,毕竟用户数据要存储,用户之间也要交互,用户行为要统计等等。 使用开源框架 俗话说得好,轮子多了路好走,我们不需要自己造轮…
结构体成员数组不定长如何实现
【目的】 定义一个结构体类,其中的成员变量数组长度不定,根据实例化的对象指定长度,所以想到用指针实现 【现状】 指针可以指向任意长度数组,但结构体类只分配指针本身4字节长度,所以无法扩展 1 /**2 ****************…